 Loading...
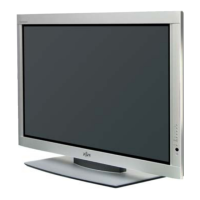
Do you have a question about the Fujitsu Plasmavision P37FT05AUB and is the answer not in the manual?
Specifies required clearances for ventilation and heat dissipation.
Measures to secure the display and prevent injury from tipping.
Instructions for attaching ferrite cores to cables to reduce noise.
Identifies and explains the controls and indicators on the front of the display.
Details the various input and output terminals on the rear panel.
Explains the functions of each button on the remote control for operation.
Step-by-step guide on how to insert batteries into the remote control.
Important warnings and advice for using the remote control safely and effectively.
Guides on connecting antenna, cable TV, speakers, and external equipment.
Detailed steps for setting up cable TV reception using a CableCARD.
Instructions for cable TV reception without a CableCARD.
Steps for setting up terrestrial TV reception using an antenna.
Instructions for turning the display on and selecting input modes.
How to put the display into standby mode.
How to adjust the audio volume using the remote or display buttons.
How to temporarily mute the audio output.
How to select TV mode for terrestrial or cable broadcasts.
How to switch between different video input sources (Video, S-Video, Component, HDMI).
How to select the RGB input for PC or similar sources.
Controlling connected IEEE1394 devices.
How to set and recall favorite TV channels.
Accessing and using the TV program guide.
Switching and setting closed caption display options.
Selecting different audio modes like MTS or stereo.
Displaying current channel and program information.
Adjusting audio for nighttime viewing.
Showing current program number, input mode, and screen size.
Setting the display to automatically turn off after a specified time.
Selecting different picture presets for various viewing conditions.
Storing and recalling custom picture settings.
Standard 4:3 aspect ratio display.
Displays natural-looking standard size pictures on a wide screen.
Ideal for vertically extended pictures or HD signals.
Displays normal size picture as a wide screen.
Displays pure picture without expansion for 1080i/1080P signals.
Adjusts the contrast level for optimal picture clarity.
Adjusts luminance level and contrast.
Controls the overall brightness of the picture.
Adjusts the color saturation for richer or muted tones.
Adjusts the color balance towards green or magenta.
Enhances or softens the detail in the picture.
Automatically optimizes picture based on ambient light.
Selects preset picture modes like Natural, Fine, Effective.
Advanced picture quality adjustments.
Strengthens or weakens black reproduction for deep blacks.
Corrects light and dark areas of the picture.
Reduces noise and screen flicker for better viewing.
Reduces mosquito or block noise in digital signals.
Detailed image quality settings.
Sets the color temperature (reddish or bluish).
Allows custom adjustment of color temperature.
Corrects specific color hues like skin tones or skies.
Sets conversion processing for interlace signals.
Reduces jagged diagonal lines for smoother pictures.
Adjusts picture processing sensitivity for motion.
Fine-tunes brightness for preferred image.
Adjusts screen luminance matched to ambient brightness.
Stores and recalls up to eight groups of picture settings.
Adjusts the high-frequency sound response.
Adjusts the low-frequency sound response.
Shifts volume balance between left and right speakers.
Balances bass and treble for easy listening at low volumes.
Sets the sound field (Flat, Standard, Voice, Surround).
Adjusts the horizontal and vertical placement of the picture.
Adjusts the width and height of the picture display.
Minimizes vertical stripes in PC pictures.
Minimizes blur or flicker caused by PC clock phase differences.
Adjusts picture brightness for RGB and Component Video.
Optimizes picture dynamic range for white screen signals.
Controls on-screen display brightness (bright or dark).
Selects the display language for menus and on-screen information.
Customizes display names for video and RGB inputs.
Selects the signal system for the D-SUB input terminal.
Chooses signal system (RGB-PC or Decoder) for D-SUB input.
Sets the display's date and time, can auto-sync with TV Guide.
Configures closed caption service settings.
Turns closed caption service ON or OFF.
Sets digital closed caption service options like size, style, text.
Adjusts character edge style and color for closed captions.
Sets character color for closed captions.
Sets character transparency for closed captions.
Sets background color and transparency for closed captions.
Restricts program viewing based on age, channel, or category.
Sets MPAA and TV RATING system restrictions.
Enables/disables viewing control for specific channels.
Allows changing the parental control password.
Automatically enters standby mode after extended no-signal periods.
Sets the duration before auto standby activation.
Selects background color for no-signal state.
Selects audio terminals for external equipment.
Selects audio format (PCM or Dolby Digital) for digital output.
Minimizes screen burn-in by moving the picture.
Sets Screen Orbiter mode (Off, Time, Mode).
Adjusts the range of movement for the Screen Orbiter.
Switches RGB input signal settings.
Normally used in Auto mode for settings.
Displays white to minimize phosphor burn-in.
Sets brightness for areas not displaying images to reduce burn-in.
Manages channels, including auto scan and editing.
Scans for and lists available TV channels automatically.
Sets channels displayed when the FAVORITE button is pressed.
Resets the current channel list to factory defaults.
Displays information for contacting the cable-TV provider.
Sets display switching for emergency alert broadcasts.
Configures IEEE1394 device linking when the display is in standby.
Demonstrates connecting and controlling IEEE1394 devices like STB or AVHDD.
Important warnings and guidelines for connecting IEEE1394 devices.
Verifies the entered TV Guide On Screen settings.
Displays helpful information after successful guide setup.
Shows the progress of obtaining TV Guide data.
Overview of the TV Guide On Screen system and its services.
Essential precautions before using the TV Guide On Screen system.
How to navigate and use the LISTINGS screen and Info Box.
Explains common icons used in the TV Guide On Screen system.
Navigates and selects program titles from the TV Guide listing.
Customizes how channel information and video display in the Listings screen.
Searches for shows by category or title.
Finds shows by browsing titles alphabetically.
Searches for shows using specific keywords.
Allows editing or deleting saved search keywords.
Reviews, edits, or deletes scheduled recordings and reminders.
Displays a list of recorded or previously viewed shows.
Manages recorded shows, including viewing options.
Modifies system settings, channel display, and default options.