1. MOUNTING
1-3
1.3 How to Install the Switch Box
The switch box (PSD-003) is designed to be flush mounted on a flat surface, such as
a bulkhead or console.
1. Referring to the supplied outline drawing, make a cutout at the mounting location.
2. Unfasten the two screws that connect the flushmount bracket to the PSD-003,
then remove the bracket. The bracket and screws are reused.
3. Fit the flushmount sponge (included as installation materials) to the rear of the
switch box.
4. Insert the switch box to the cutout.
Note: Take care that the cables are not pinched or squashed.
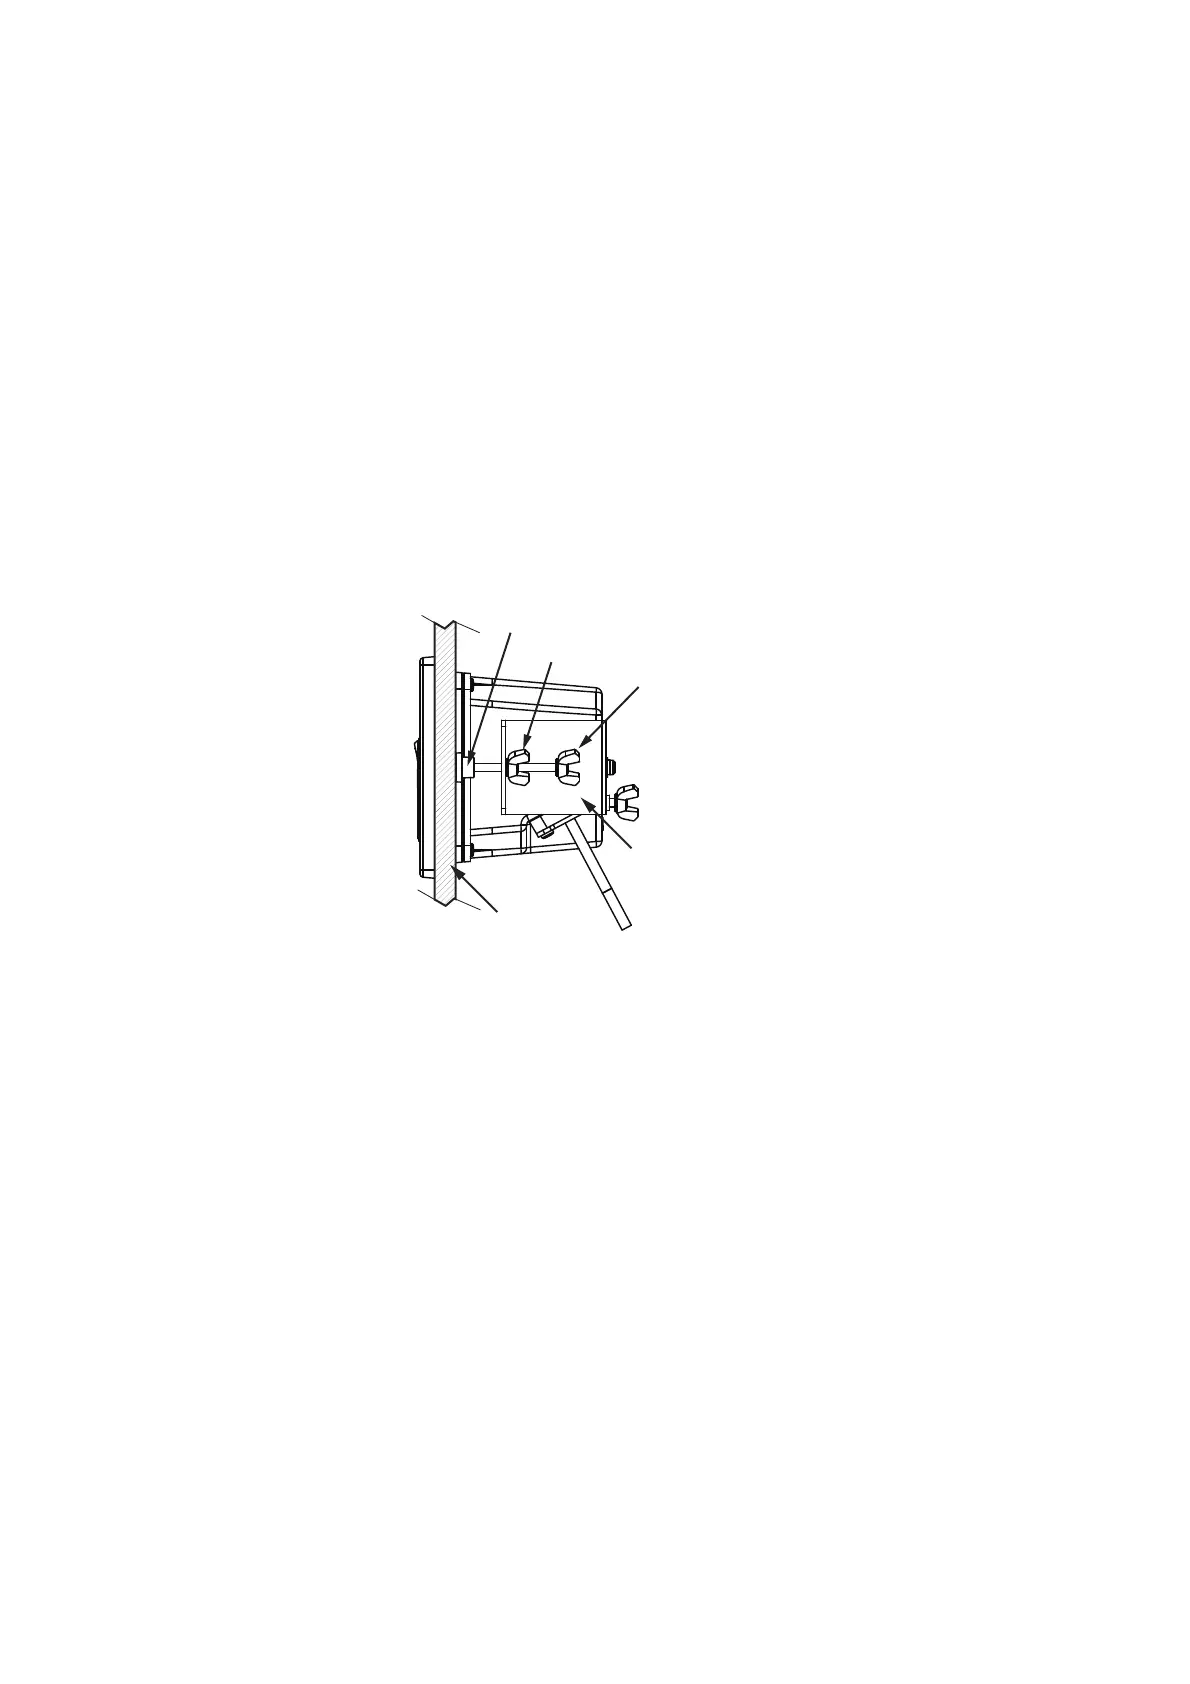
5. Fit the flushmount bracket (removed at step 2) to the rear of the unit, then secure
the bracket with two screws.
6. Tighten the wing bolts to fasten the switch box.
7. Tighten the wing nuts to fasten the flushmount bracket, securing the switch box.
Wing bolt
Wing nut
Protector for screw
Mounting panel
Flush mount fixture
 Loading...