– 64 –
(Continued next page)
Retainer
Disconnect
Fill Tube
Funnel
Disconnect
Disconnect
Shield
Wire
Wire Retainers
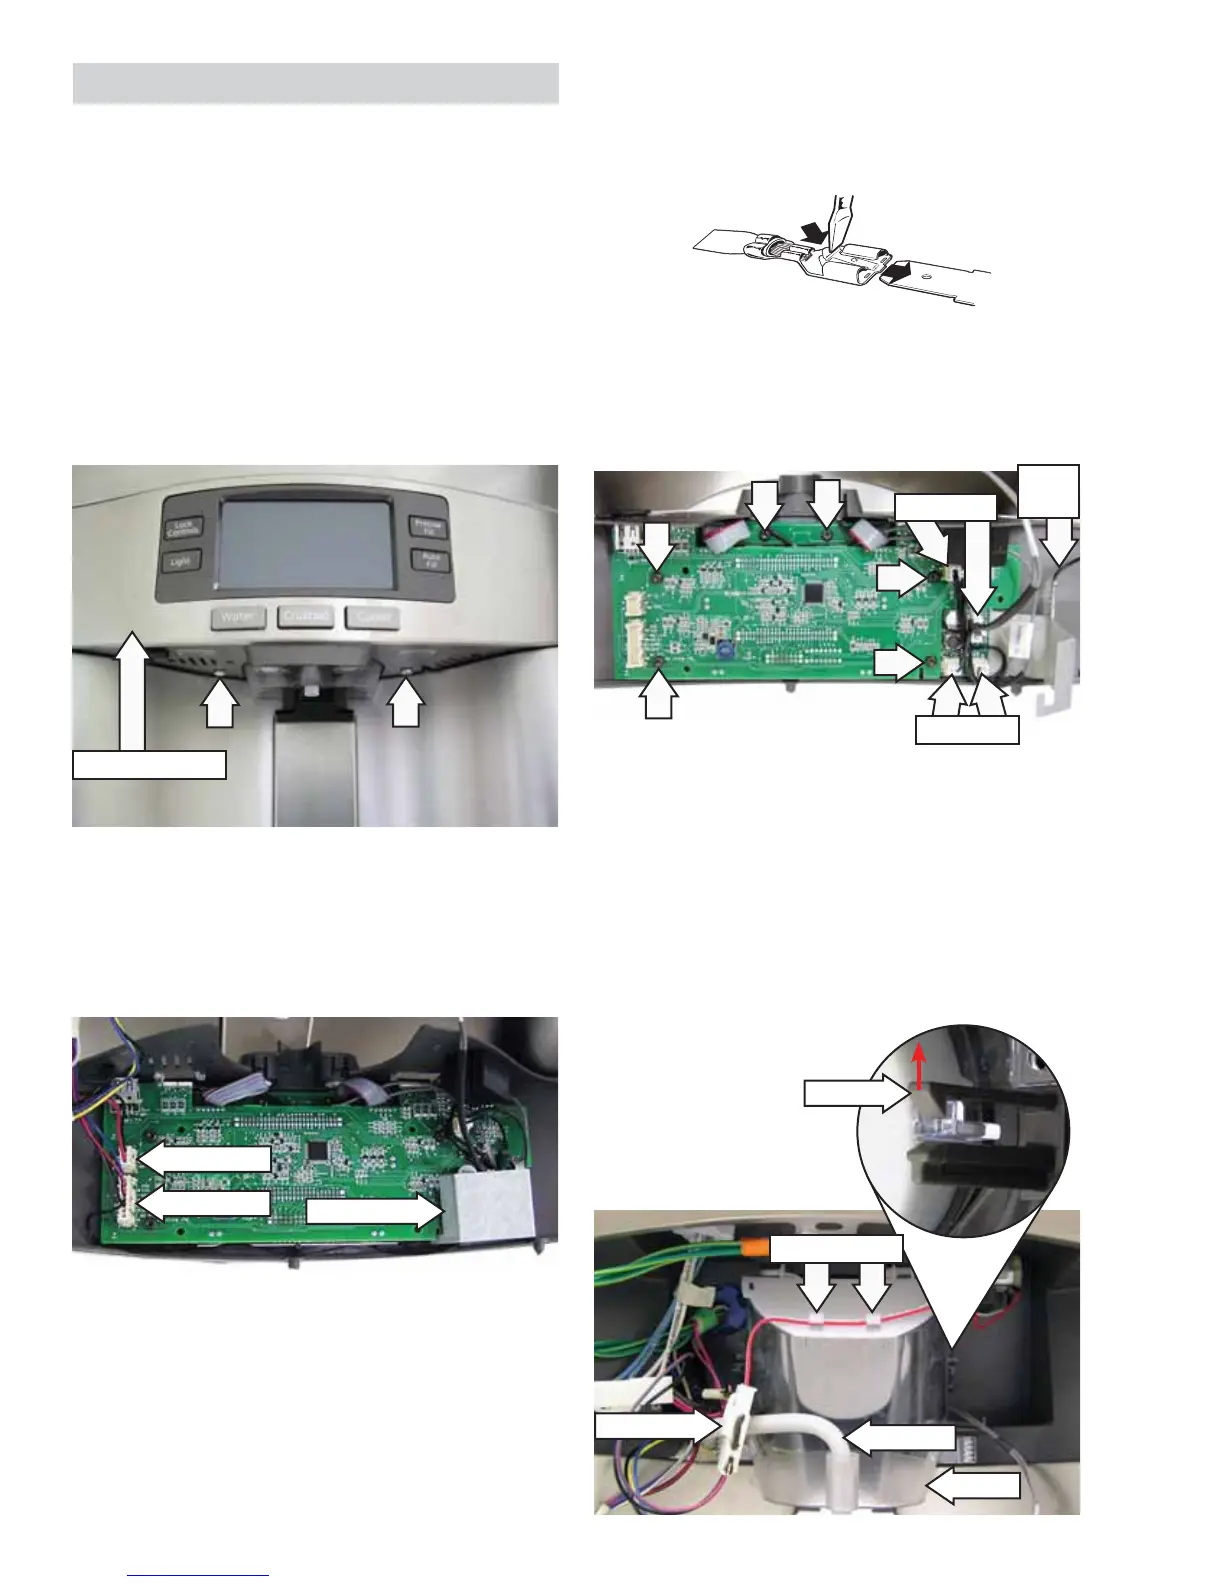
4. Disconnect the speaker wire, 2 upper ultrasonic
sensors, and the lower ultrasonic harnesses.
Note: In the following step, the shield wire uses a
releasing lock tab.
ELECTRICAL TERMINAL
RELEASE/LOCKING TAB
5. Disconnect the shield wire from the metal shield.
6. Remove the six T-15 Torx screws that attach the
display board to the display cover bracket.
7. Pull the fi ll tube out from the funnel.
8. Disconnect duct door motor wire harness and
remove motor wiring from wire retainers.
9. Push up on both the right and left retainers and
pull the funnel out from the dispenser recess.
Note: Funnel on GE/Adora models is attached to the
dispenser recess with two 1/4-in. hex-head screws.
2. Pull the bottom of display assembly out, then
lower display assembly from dispenser recess.
3. Disconnect the left side wire harnesses and lift
and pivot open the metal shield.
Disconnect
Disconnect
Metal Shield
Dispenser Assembly
The dispenser assembly incorporates the user
interface (UI) used for temperature control and
features and houses the dispenser LED lights and
ultrasonic sensors.
To remove dispenser assembly components:
Note: On early production models, the display
assembly has 2 screws that hold it to the dispenser
recess.
1. If present, remove the 2 Phillips-head screws
from the bottom of the display assembly.
Display Assembly
 Loading...