651
24/44
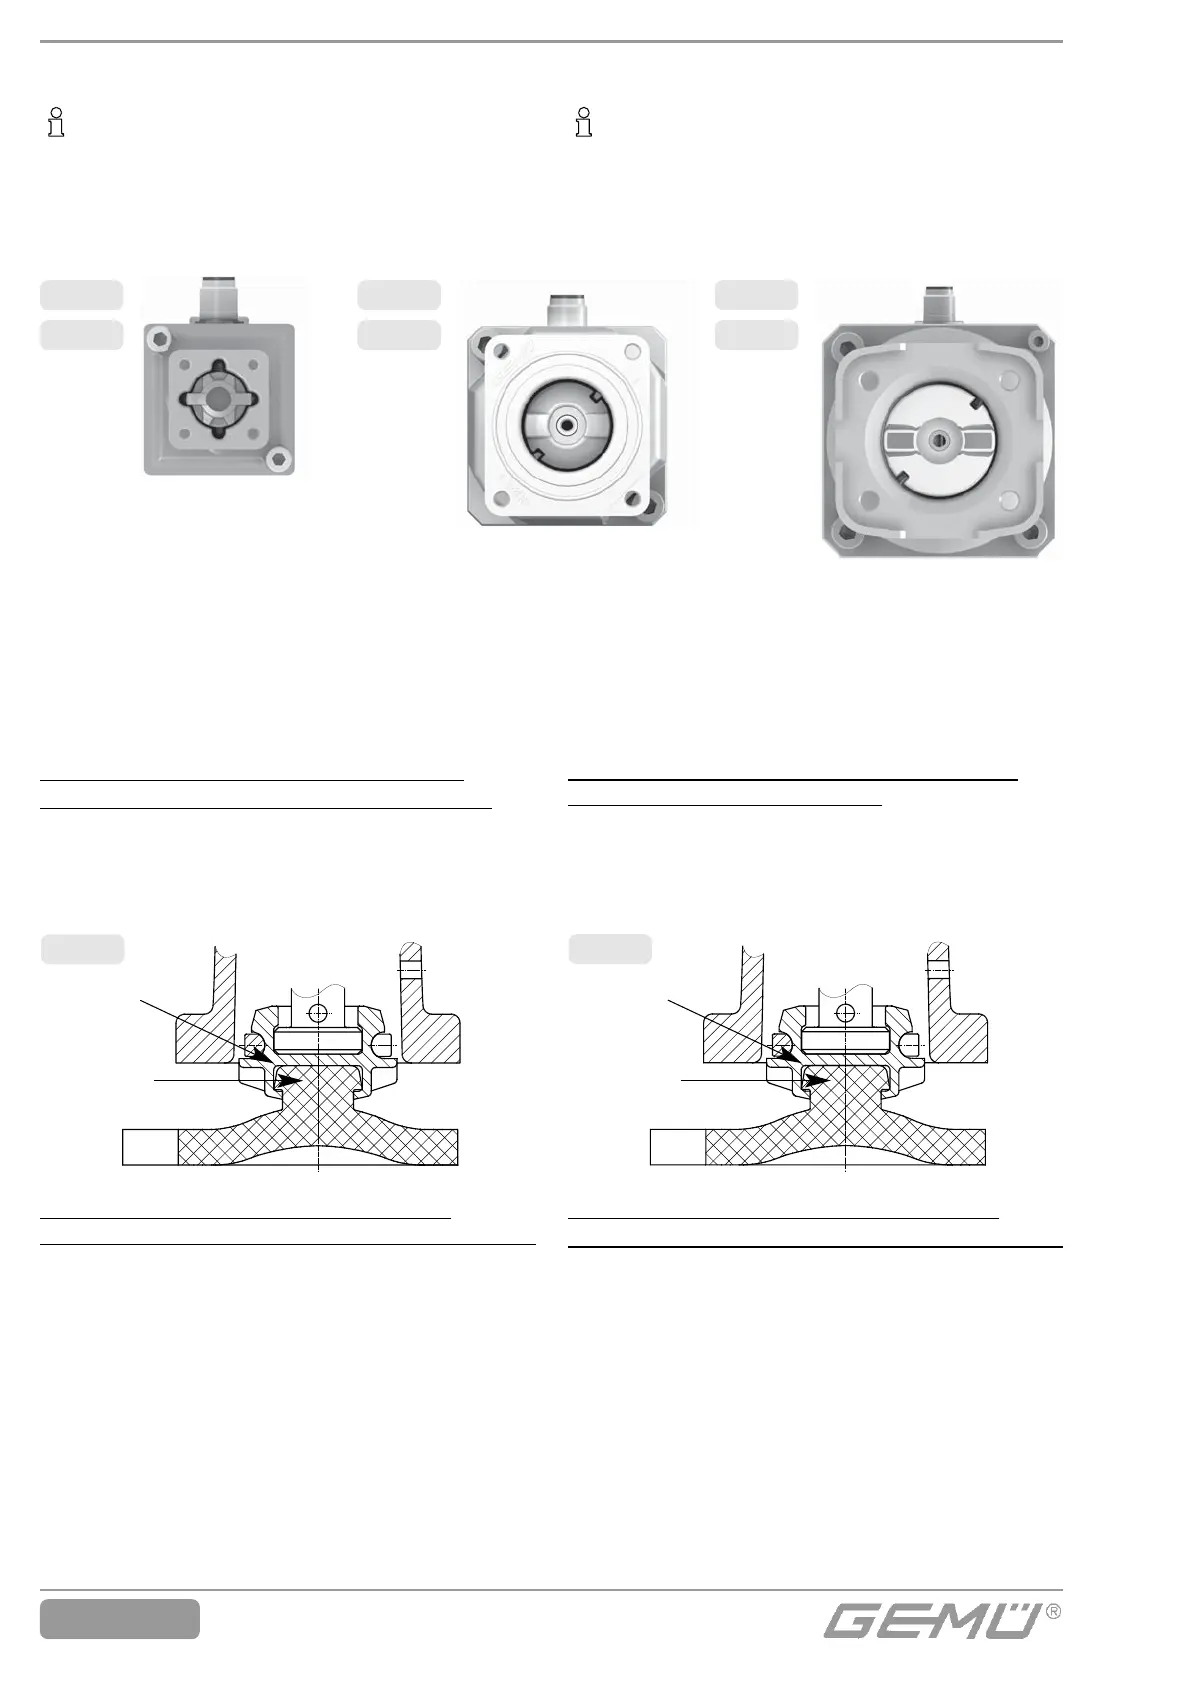
12.4 Diaphragm assembly
* Diaphragm size
The compressor can not be removed for the
DN 4-15 (diaphragm size 8).
The compressor for DN 10-25 (diaphragm
sizes 10-25) is loose. Place the compressor
loosely on the actuator spindle as shown in
fig. 1, fit the wings into the distance piece guides.
Mounting a push-fit concave diaphragm
(DN 4-15, diaphragm size 8)
1. Place the diaphragm with the fastening
spigot in an inclined position at the
recess of the compressor (fig. 4).
2. Screw / push ist in manually.
IMPORTANT
Mount the correct diaphragm that suits
the valve (diaphragm must be suitable
for medium or medium concentration,
temperature and pressure).
MG* 25MG* 10MG* 8
Bild 1
Fig. 1
Bild 2
Fig. 2
Bild 3
Fig. 3
Bild 4
Druckstück-
aussparung
Befestigungs-
zapfen
Fig. 4
Recess of
compressor
Fastening
spigot
Mounting a concave diaphragm with a
threaded pin (DN 10-25, diaphragm size 10-25)
1. Disassemble the actuator as described
under chapter 10.1.
2. Screw diaphragm clockwise tightly into
the compressor manually (fig. 5).
3. Check if the diaphragm boss fits closely
in the recess of the compressor.
4. If it is difficult to screw it in, check the
thread, exchange damaged parts
(only use genuine parts from GEMÜ).
5. When clear resistance is felt turn back the
diaphragm anticlockwise until its bolt holes
are in correct alignment with the bolt holes
of the actuator.
12.4 Montage Membrane
* Membrangröße
Bei DN 4-15 (Membrangröße 8) kann das
Druckstück nicht entfernt werden.
Druckstück ist bei DN 10-25 (Membrangrö-
ßen 10-25) lose. Druckstück wie in Bild 1
gezeigt lose auf Ventilspindel aufsetzen,
Nase in Führung einpassen.
Montage der Konkav-Membrane zum
Einknüpfen (DN 4-15, Membrangröße 8)
1. Membrane mit angeformtem Befesti-
gungszapfen schräg an Druckstückaus-
sparung ansetzen (Bild 4).
2. Von Hand hineindrehen / hineindrücken.
WICHTIG
Für Ventil passende Membrane einbauen
(Membrane muss für Medium, Medium-
konzentration, Temperatur und Druck
geeignet sein).
Montage der Konkav-Membrane mit
Schraubpin (DN 10-25, Membrangröße 10-25)
1. Antrieb demontieren wie unter Kapitel 10.1
beschrieben.
2. Membrane von Hand im Uhrzeigersinn
fest in Druckstück einschrauben (Bild 5).
3. Kontrollieren ob Membrandom in Druck-
stückaussparung liegt.
4. Bei Schwergängigkeit Gewinde prüfen,
beschädigte Teile austauschen
(nur Originalteile von GEMÜ verwenden).
5. Beim Verspüren eines deutlichen Wider-
stands Membrane soweit zurückschrau-
ben, bis Membran-Lochbild mit Antriebs-
Lochbild übereinstimmt
 Loading...