1. Open the door and insert the door switch
safety key. Ensure the waste tray is fitted
correctly and empty. Using the service
keypad located in the rear of the door,
press the Machine Cool Down (
button
10
). The LCD will display the message
shown opposite while approximately 13.5 fl. oz. (400ml) of cold water is
flushed through the system and out to the waste tray.
Important! Pressing button 10 also informs the machine software that
the B2C system has been drained ensuring that the B2C system will
automatically fill before heating on power up. This is very important and
must not be overlooked.
2. Once the B2C system has been cooled the LCD will display the message
‘Machine cooled’ and water will stop pumping through the system. Remove
the waste tray and empty the contents before re-fitting to the machine.
3. Remove the safety key from the door switch to turn off the power to the
machine.
4. Close the fresh beans outlet slide and remove the fresh beans container.
Rotate ingredient canister outlets to upright position and remove the
canisters. DO NOT place them on the floor.
5. Loosen the 4 screws securing the top cover
and remove. Remove the brewer waste bucket
from the machine. Loosen the 4 screws
securing the lower cover.
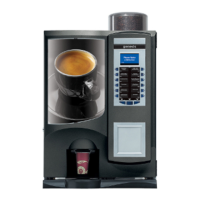
6. Remove the lower cover from the machine to
expose the boiler blanking plug (1). Hold the
collar and remove the plug. Attach a length of
silicone tube to the outlet to act as a drain.
Place the trailing end into an empty bucket.
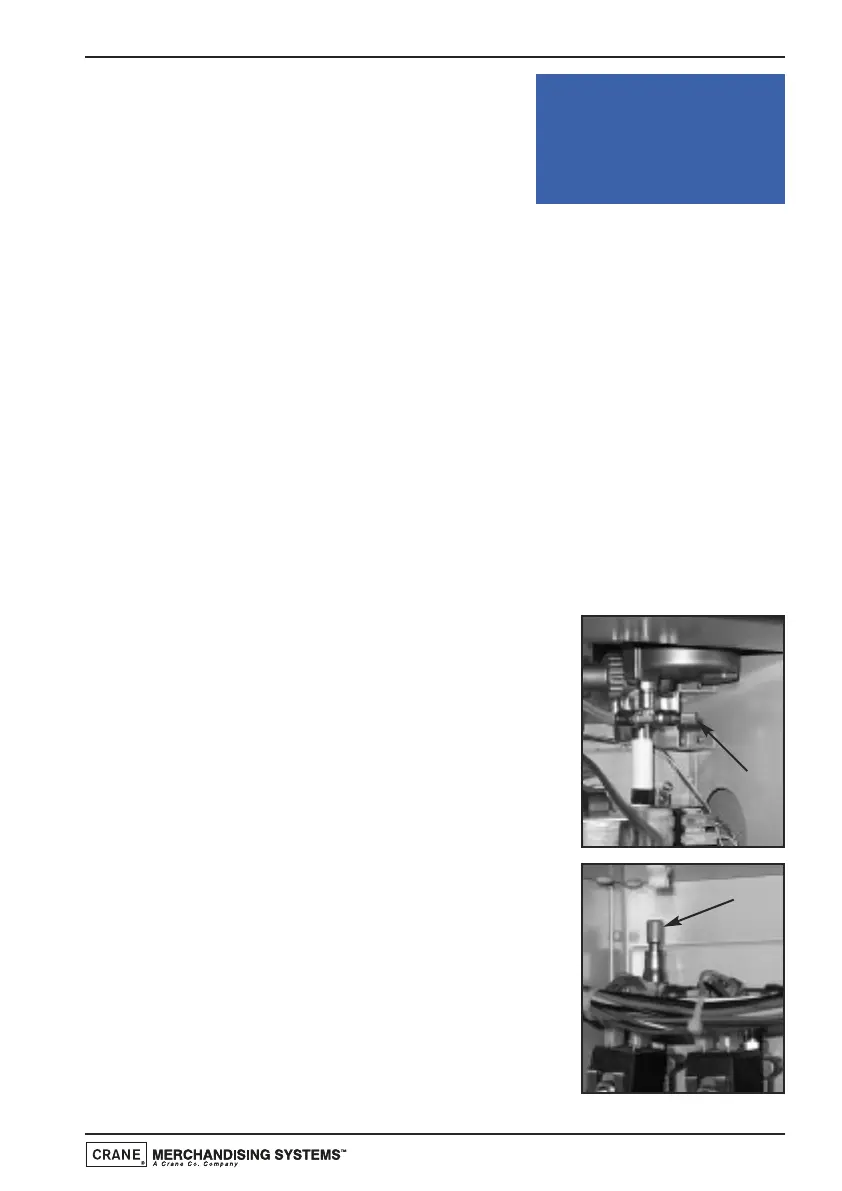
7. Remove the air intake blanking plug (2) located
in the top LH corner of the machine. All water
will be ejected from the system via the boiler
drain into the bucket allowing the engineer to
safely work on system components.
1
2
Technical Manual
127
 Loading...