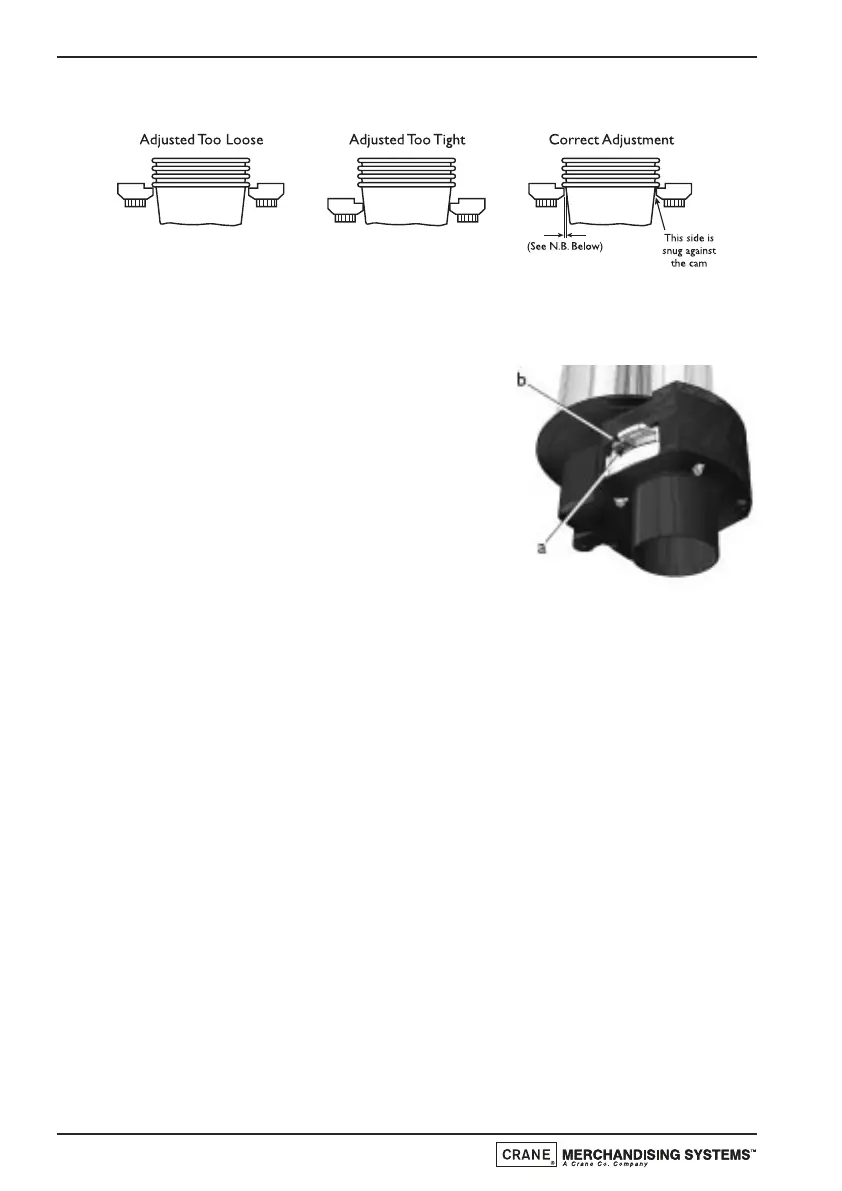
2. Place a minimum of 4 new cups into the cup splitter. Observe the
clearance as shown in the illustration below.
N.B. Clearance indicated in Correct Adjustment diagram should be no
more than half the diameter of the cup lip (maximum) but just enough to
allow for smooth cup ejection.
3. If necessary adjust the cup ring to obtain
the clearance as shown. Loosen the
adjustment arm screw (a) and move the
adjustment arm (b) until the correct
clearance is achieved. Hold adjustment arm
in place and retighten the adjustment
screw.
N.B. Move the arm clockwise if adjusting
for larger diameter cups and anti-clockwise
for smaller cups.
4. Switch on the power to the machine using the door switch safety key.
Using the service keypad located in the rear of the door, press the Cup
Test (
button 7) and check that a cup is ejected correctly. Repeat this test
several times to confirm that the mechanism is functioning correctly.
5. Refit the transparent cup sleeves to the cup drop mechanism ensuring that
the flat on the turret motor lines up with the flat in the turret spigot
moulding. Fill the cup sleeves with cups. DO NOT touch cups with your
hands. Allow the cups to drop into the cup sleeves directly from the
packaging.
6. Rotate the cup turret assembly back into its operating position, ensuring
that the unit ‘locks’ into place. Remove the safety key and close the door.
12.5 B2C System Drain Down (B2C Machines)
Should it become necessary for the engineer to work on the B2C water system or
the machine requires draining prior pressure boiler maintenance etc., it is very
important that the following sequence is followed to ensure safe working as well as
correct system fill and heating when the machine is powered up.
Technical Manual
126
 Loading...