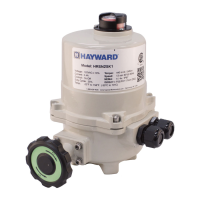
USE ONLY HAYWARD GENUINE REPLACEMENT PARTS
HRSLCSSPLMNTIOM Rev A
Page 20 of 42
Hayward Flow Control
1-888-HAY-INDL (1-888-429-4635)
www.haywardowcontrol.com
Notice: The end stop travel (cams) of this actuator have been factory set and tested to respond between 0° and
90° degrees rotation. If NO changes to end stops are required, this unit is ready to be put into service immediately
using this procedure. IF changes to the cam positions are required, refer to the product IOM before proceeding.
Conceptually this procedure rst establishes correct direction and control; these MUST be veried in order to
proceed. Regardless of the Level of the actuator, the actuator must drive CW when commanded to do so, and
STOP when the actuator reaches the full CW travel position. The same applies for the CCW operation.
Calibration Procedure - CP Series Proportional Control
1. Set the control signal selection jumpers, refer to the Actuator IOM Proportional PCB detail page.
2. Before applying power, verify that the voltage feeding the actuator is the same as the rating of the actuator.
Proceed after conrmation is made.
3. Apply power, then measure the voltage between terminals #2 (COM/NEG/NEU) & #7 (HOT/POS/L1).
4. Be sure there are NO REMOTE movement commands active, then depress the LCS Mode switch so it turns blue.
It will then be in REMOTE mode.
A. Note that the MODE switch is NOT a power disconnect.
B. The actuator should NOT move.
I. If it does, IMMEDIATELY remove power from the actuator to STOP movement.
5. Generate a remote CW move command (4mA) and verify the DIRECTION of rotation of the position indicator is CW.
A. If it is, proceed to step 5.D.
B. If it is NOT, IMMEDIATELY remove power from the actuator to STOP movement.
C. Verify that the remote move command is transmitting a 4mA control signal to the actuator. Insert a 4-20 signal
monitor in series with terminal #3 (+ IN). Correct and return to step 5.
D. The CLOSED LED indicator on the face of the LCS will be ashing RED.
E. On HRCK3A~4F units with torque switches, during CW travel movement, depress the lever on the UPPER
torque switch to interrupt actuator movement as a check of the system.
F. On HRCK5A~6A units with torque switches, during CW travel movement, depress the lever on the LOWER
torque switch to interrupt actuator movement as a check of the system.
G. When the actuator reaches its full CW end of travel position, the RED indicator on the face of the LCS will be
on steady.
6. Generate a remote CCW move command (20mA) and verify the DIRECTION of rotation of the position indicator
is CCW.
A. If it is, proceed to step 6.D.
B. If it is NOT, IMMEDIATELY remove power from the actuator to STOP movement.
C. Verify that the remote move command is transmitting a 20mA control signal to the actuator. Insert a 4-20 signal
monitor in series with terminal 3 (+ IN). Correct and return to step 6.
D. The OPEN LED indicator on the face of the LCS will be ashing GRN.
WARNING – Follow these directions carefully and in order. Actuator damage due to improper testing and
commissioning will NOT be covered under warranty.
CAUTION – This procedure has many sections with the text “IMMEDIATELY remove power from the actuator to
STOP movement”. Quick action is necessary in case of any unexpected or uncontrolled movement to keep the actuator
from possibly driving into the mechanical stops, past the limits of the valve or damper attached, and to simply keep the
actuator in a known position for a quick, efcient installation.
LCS CALIBRATION AND COMMISSIONING
HRCP PROPORTIONAL CONTROL
Back to TOC

 Loading...