Before You Start
●
Connect the device to the Internet.
●
Set the IP address, subnet mask, gateway, and DNS server of the LAN.
Steps
1.
Go to
Conguraon → Network → Data Connecon → Guarding Vision Plaorm .
2.
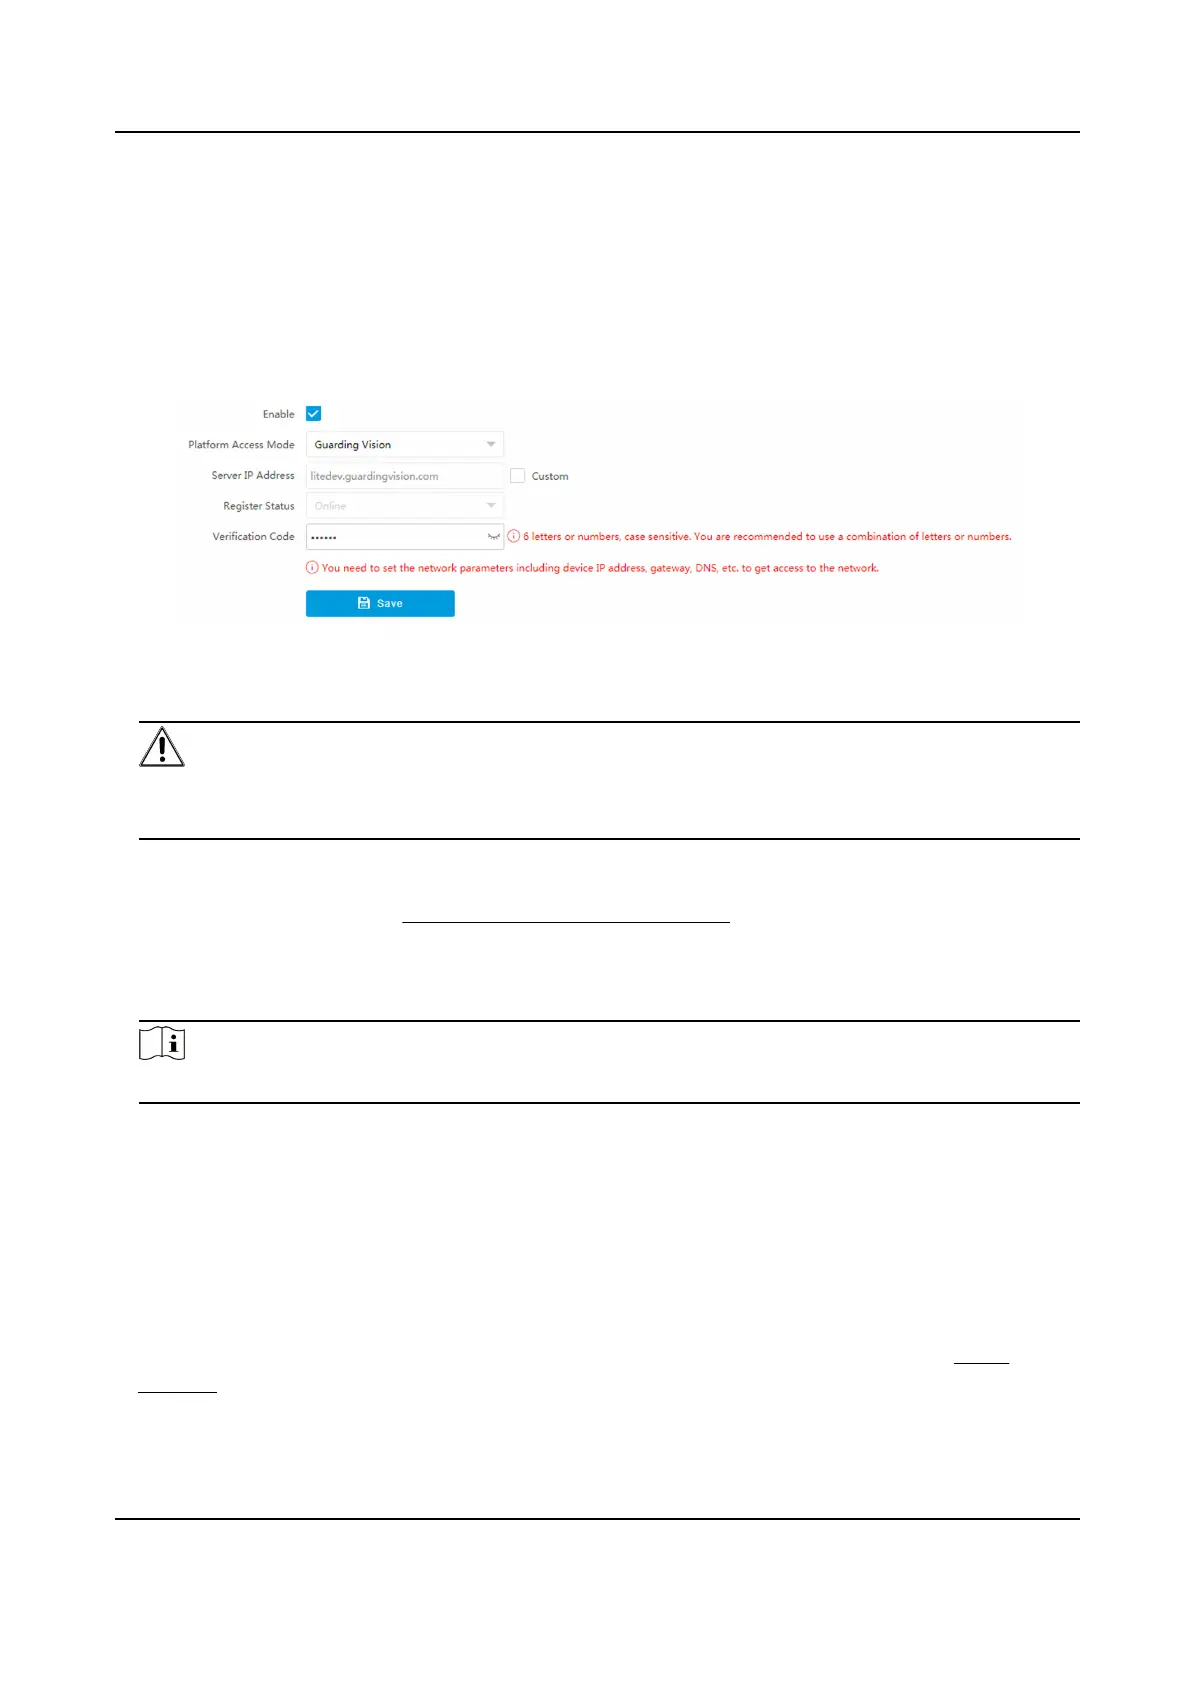
Check Enable.
Figure 6-3 Connect to Guarding Vision
3.
Enter a custom Vericaon Code used to add the device via Guarding Vision.
Cauon
The vericaon code should be 6 leers or numbers, case sensive. You are recommended to
use a combinaon of leers or numbers.
4.
Click Save.
5.
Get access to Guarding Vision in the following ways.
-
For computer user: Visit hps://www.guardingvison.com .
-
For mobile phone user: Download Guarding Vision in App Store (iOS system) or Google Play
TM
(Android system).
6.
Register an account and add the device to Guarding Vision.
Note
Refer to the user manual of Guarding Vision for details.
6.3 Set DDNS
You can use the Dynamic DNS (DDNS) for network access. The dynamic IP address of the device can
be mapped to a domain name resoluon server to realize the network access via domain name.
Before You Start
●
Register the domain name on the DDNS server.
●
Set the LAN IP address, subnet mask, gateway, and DNS server parameters. Refer to
Set IP
Address for details.
●
Complete port mapping. The default ports are 80, 8000, and 554.
Network Trac Camera Operaon Manual
35

 Loading...