Steps
1.
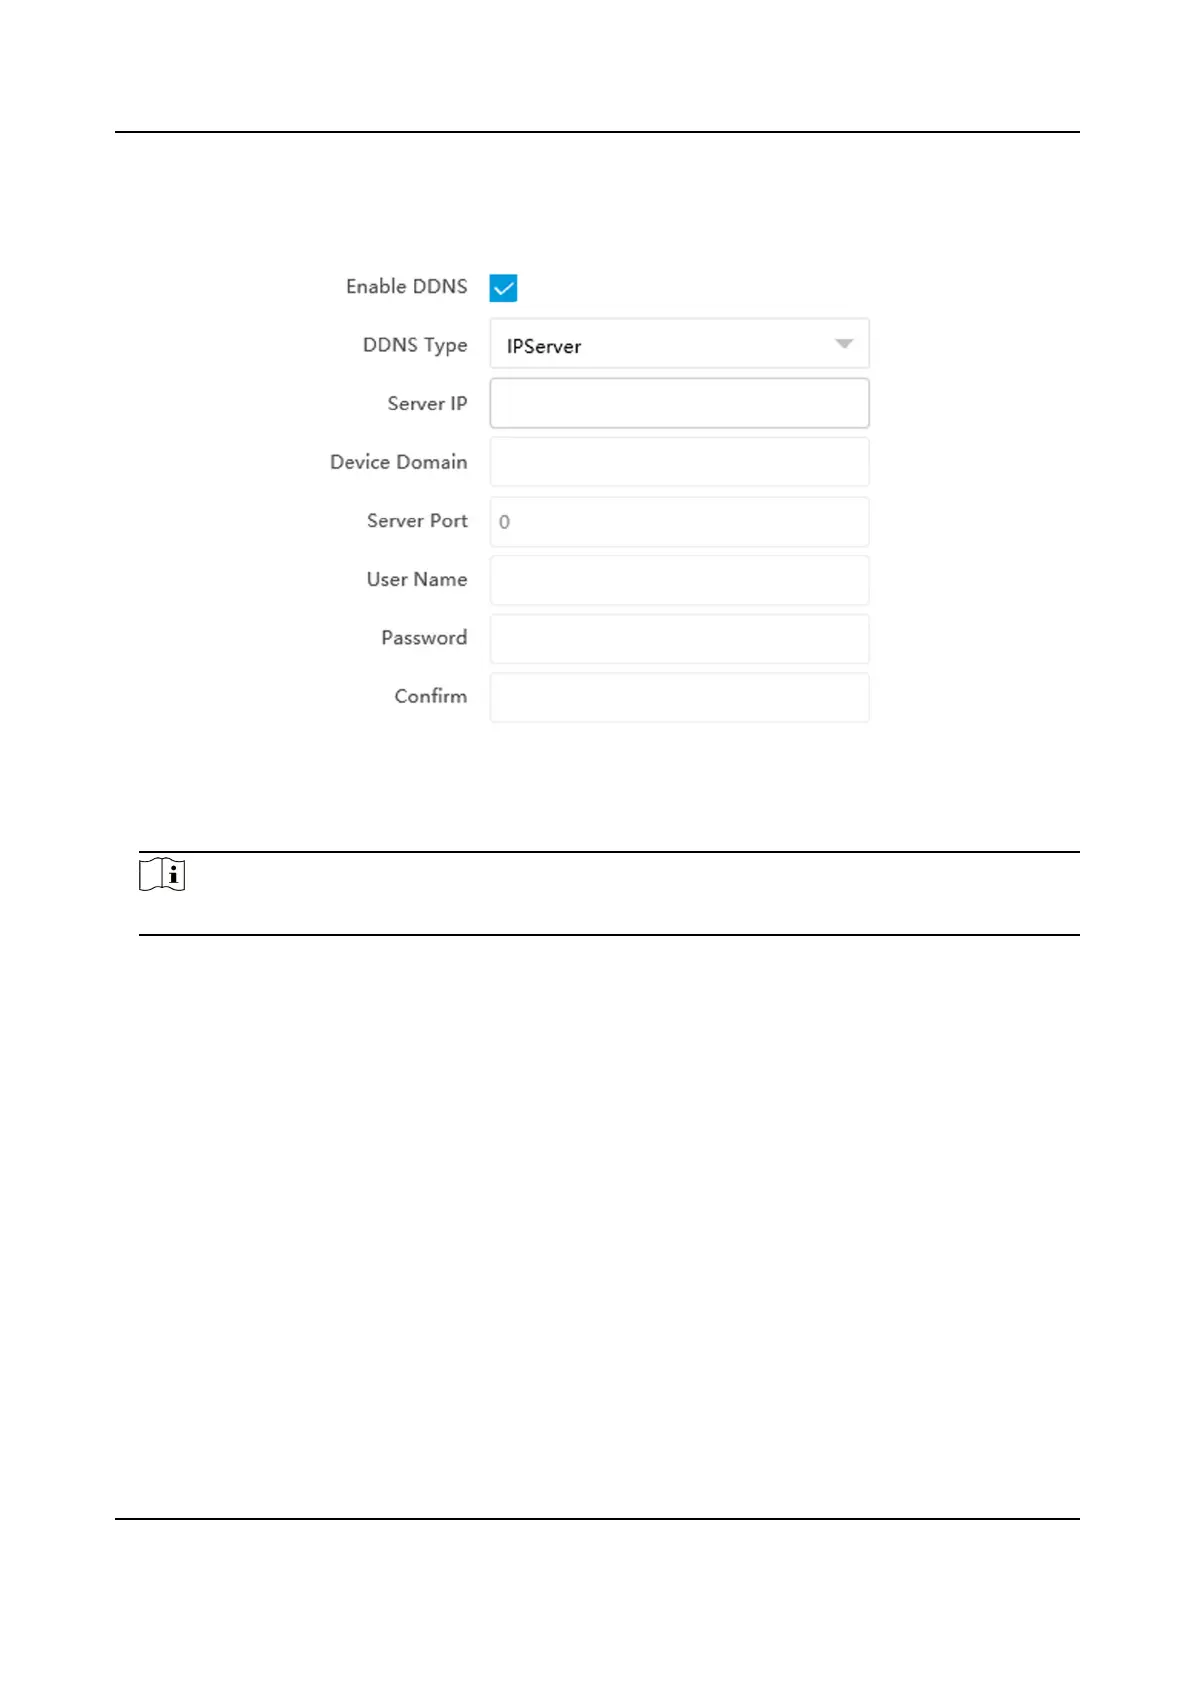
Go to Conguraon → Network → Network Parameters → DDNS .
Figure 6-4 Set DDNS
2.
Check Enable DDNS.
3.
Enter the server address and other informaon.
Note
You can select IPServer, DynDNS, and NO-IP for the DDNS type.
4.
Click Save.
5.
Access the device.
By Browsers
Enter the domain name in the browser address bar to access the device.
By Client Soware Add domain name to the client soware. Refer to the client soware
manual for specic adding methods.
6.4 Set SNMP
You can set the SNMP network management protocol to get the alarm event and excepon
messages in network transmission.
Before You Start
Download the SNMP soware and manage to receive the device informaon via SNMP port.
Steps
1.
Go to Conguraon → Network → Network Parameters → SNMP .
2.
Check Enable SNMPv1/Enable SNMP v2c/Enable SNMPv3.
Network Trac Camera Operaon Manual
36

 Loading...