HYJE-D02H
E. Prohibiting Operation by Remote Control Switch
<Function>
To prohibit the operation by the remote control switch.
When this function is available, the "CENTRAL" indication appears on the LCD on the remote control switch and
the operation by the remote control switch is not available.
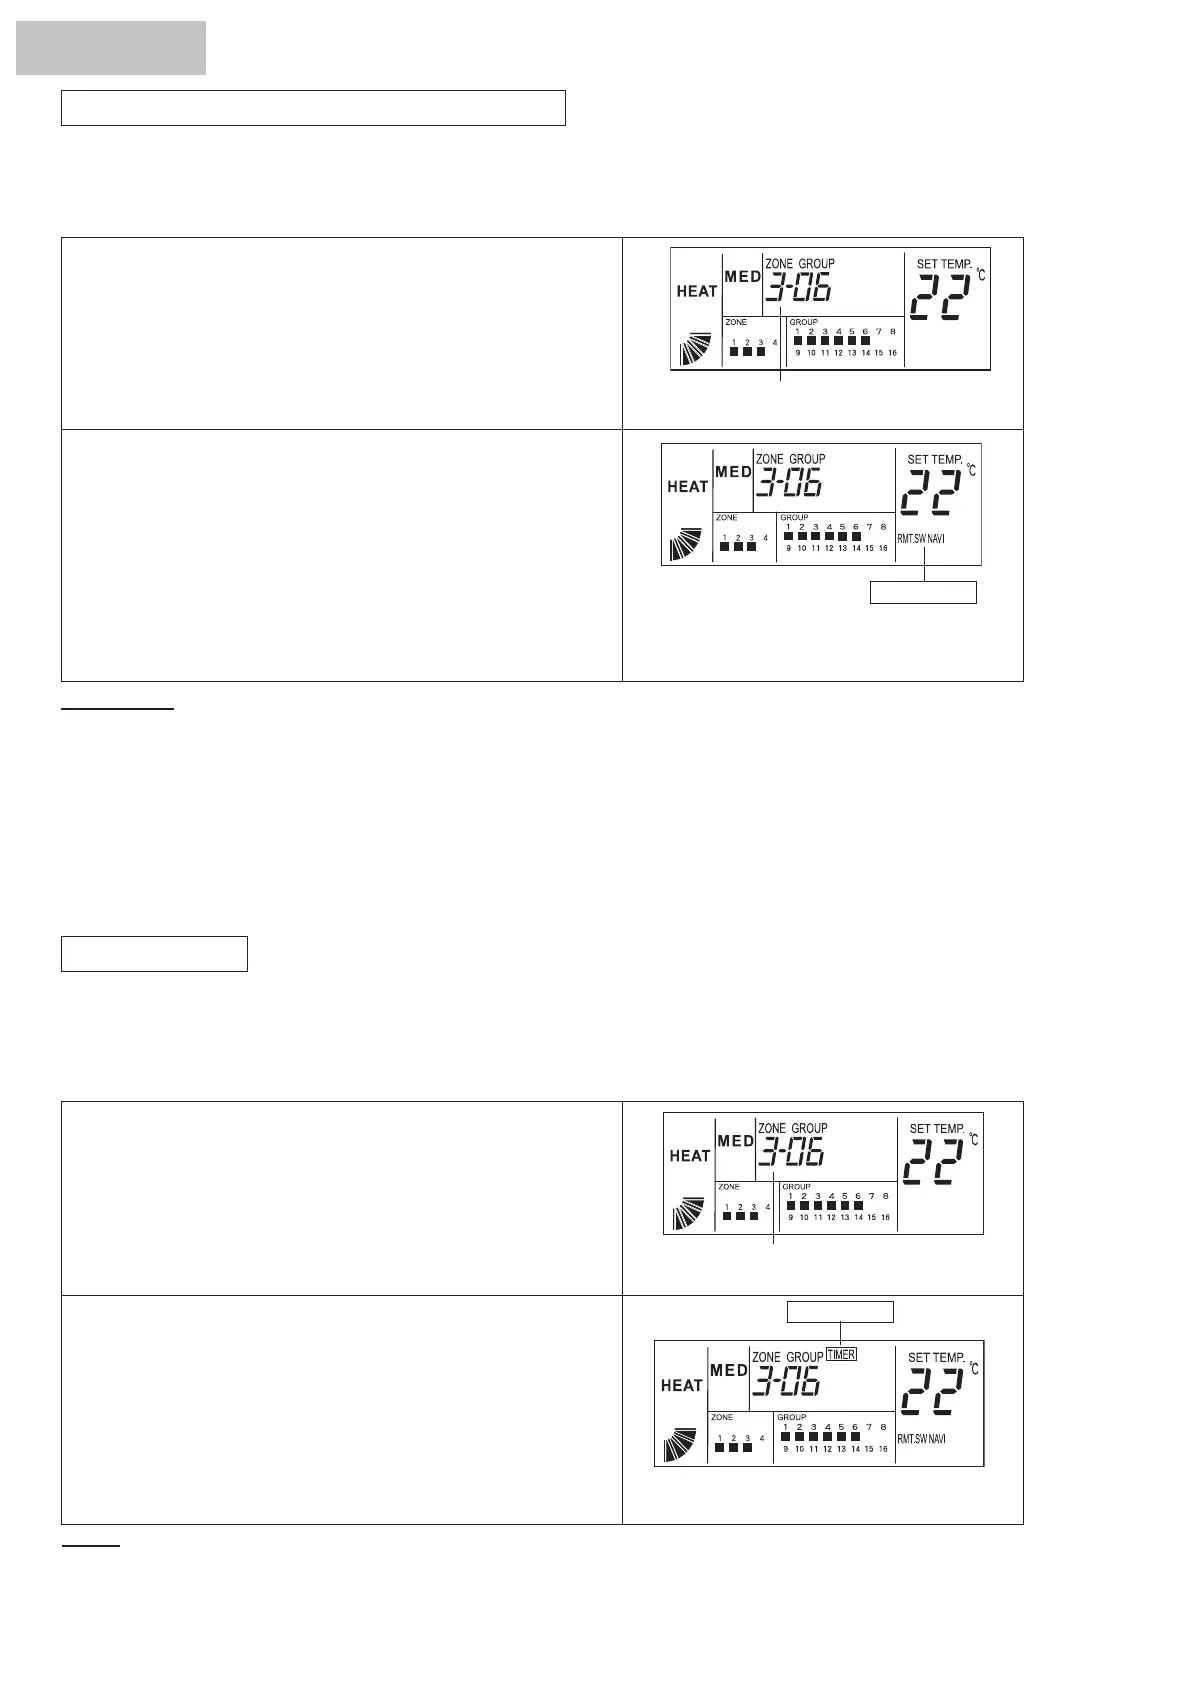
1.
Depress the "ZONE" switch and the "GROUP" switch and select
the setting target.
(Refer to item 2 of "A. Setting Target Selection and Monitoring
Unit Operation Status" .)
The above fi
gure shows the case of selecting
"ZONE 3, GROUP 6".
2. Depress the "RMT. SW NAVAL" switch. Every time the "RMT.
SW NAVAL" switch is depressed, the "RMT. SW NAVAL"
indication is turned ON and OFF alternately.
ATTENTION:
A. The above indications show the case of setting operation mode for "ZONE 3, GROUP 6".
The same setting procedure shall be performed for other groups.
B. Although the "RMT. SW NAVAL" function is set, in case of operation by the central station, the unit can be
stopped by the remote control switch, and in this case, the unit can be started again by the remote control switch.
C. For the unit without remote control switch, the "RMT. SW NAVAL" function shall be set.
D. In case of using together with other controllers, do not set the "RMT. SW NAVAL" function. Additionally, do not
set the "RMT. SW NAVAL" function by other controller or the malfunction may occur.
E. In case of no setting of temperature ("- -"), the temperature can be set by the remote control switch during the “RMT.
SW NAVAL" function is available.
F. Timer Operation
<Function>
To set the schedule operation "available" or "not available" by the signal from the control timer in case of connection
with the control timer (HYDE-E01H; Option).
The
schedule operation can be set "available" or "not available" for each group, each zone or simultaneously
however, the operation schedule is all the same.
1. Depress the "ZONE" switch and the "GROUP" switch and select
the setting target.
(Refer to item 2 of "A. Setting Target Selection and Monitoring
Unit Operation Status" in page 18.)
The above fi gure shows the case of selecting
"ZONE 3, GROUP 6".
2. Depress the "TIMER" switch. Every time the "TIMER" switch
is depressed, the "TIMER" indication is turned ON and OFF
alternately. The group with timer setting is operated according
to setting schedule by the signal from the control timer.
The above fi gure shows the case of "ZONE 3,
GROUP 6" setting timer operation.
NOTE:
The above indications show the case of setting operation mode for "ZONE 3, GROUP 6"
Turned ON
The above fi gure shows the case of "ZONE 3,
GROUP 6" prohibited from operating by the
remote control switch.
Turned ON
The same setting procedure shall be performed for other groups.
142
 Loading...