(1)
(4)
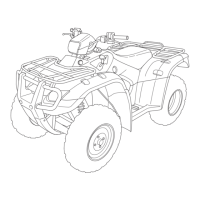
(1) left air guide
(2) screw
LEFT FRONT
(3) lock nut
(4) clutch adjuster
(3)
(2)
136
Clutch Adjustment
Clutch System
Servicing Your Honda
Saf ety Precautions
Your ATV’s shift-activated, wet, multiplate clutch is part of the primary
drive system. Proper adjustment allows a smooth, gradual engagement
when shifting gears.
Refer to on page .
If you cannot get proper adjustment, or the clutch does not work
properly, the clutch friction discs may be worn. See your Honda dealer
or refer to official Honda Service Manual (page ).
Turn the clutch adjuster ( ) counterclockwise until you feel slight
resistance.
Turn the adjuster 1/4 turn clockwise, then tighten the lock nut to hold
the adjuster in this position.
After adjustment, start the engine and test ride your ATV to be sure
the clutch is operating properly.
Install the removed parts in reverse order of removal.
Make sure the ignition switch is OFF ( ).
Remove the left engine sub cover (page ).
Remove the left air guide ( ) by removing the screw ( ).
Loosen the lock nut ( ).
Make sure the engine is cool.1.
2.
3.
4.
5.
6.
7.
8.
1
99
117
224
9.
3
4
2
10/02/12 15:09:31 31HP0970 0145
 Loading...
