E
3
Point Gas Monitor Technical Manual
Installation
7
Mounting for Remote monitor
The E3Point Remote Monitor is designed to be mounted in an extra wide (2 3/8”)
electrical box (not supplied) in the same way as a faceplate. Suggested electrical
boxes include T&B BC1110, Hubbell 1110, OZ-Gedney 18112, Appleton 18112,
Bowers 10612-BW, or Steel City 68371-12.
It does not fit on 4x4” steel boxes with a single gang mud ring, such as T&B 52CO
or 52C13.
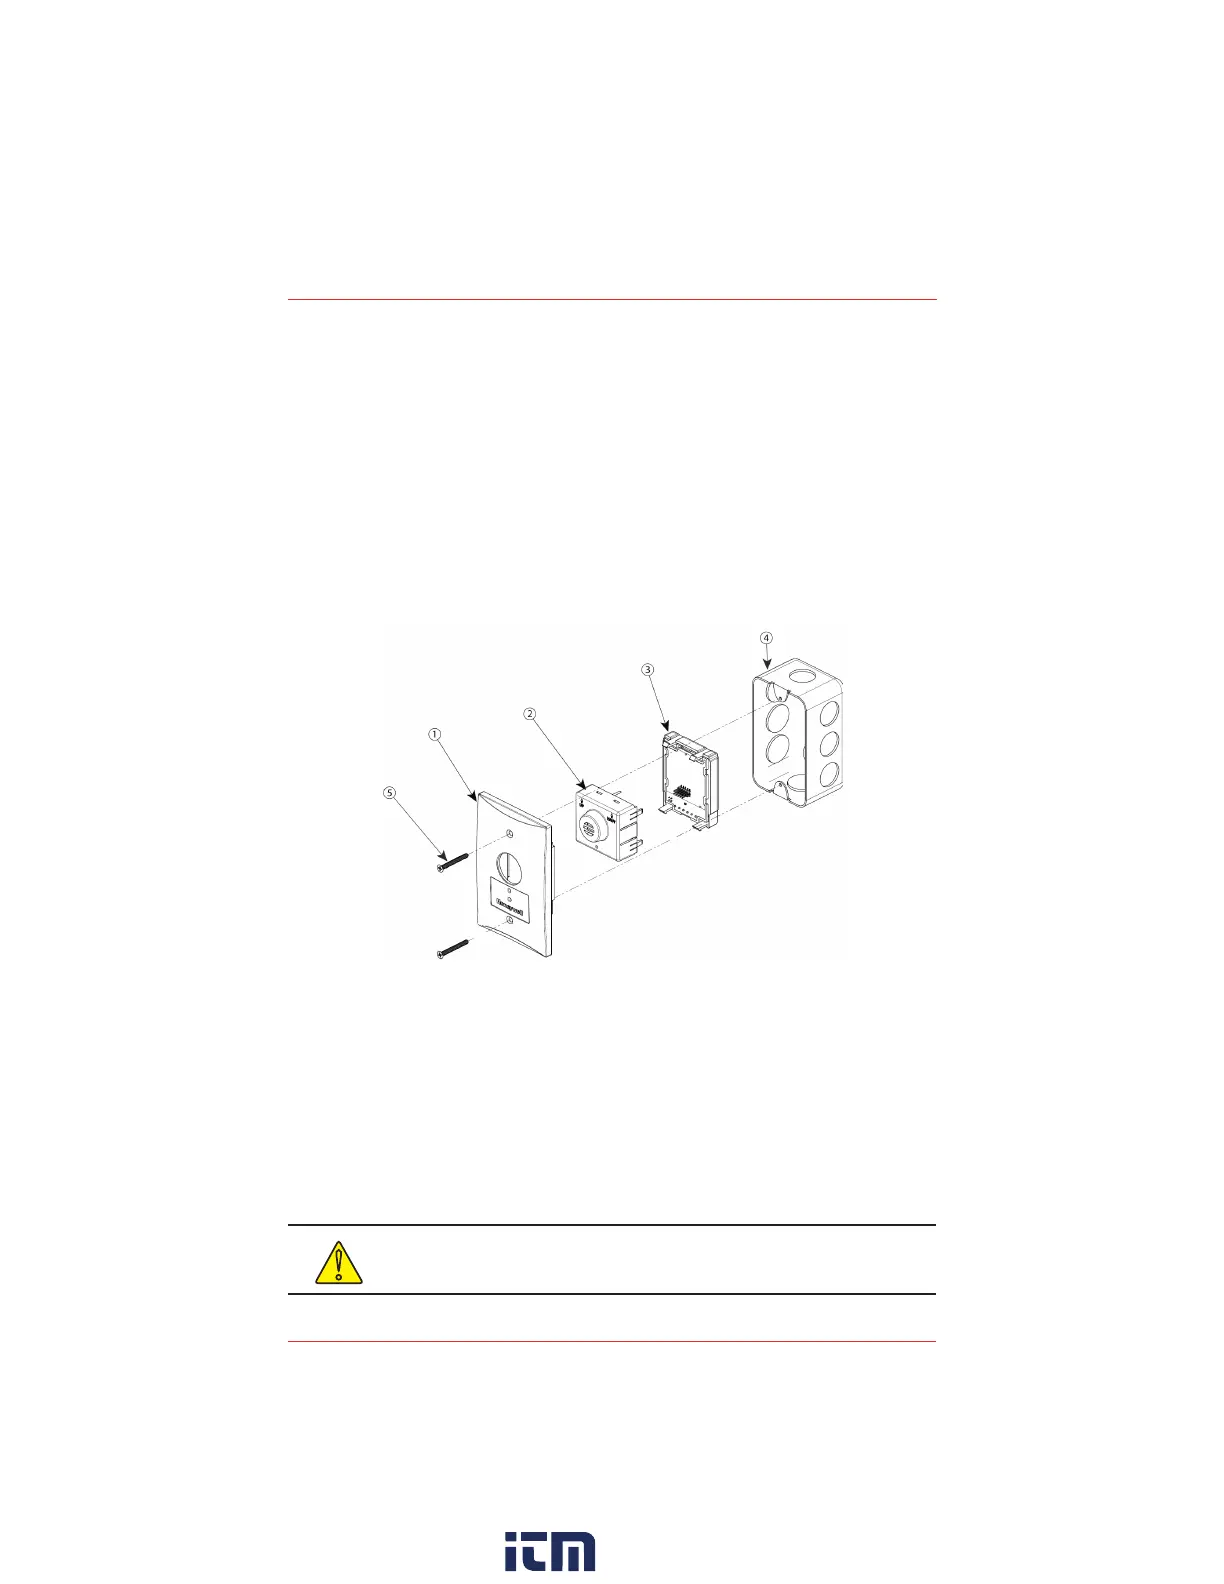
● Run the wires through the electrical box and connect to the remote monitor.
● Press the monitor (2) into the faceplate (1) and close and press the back cover (3) into
the faceplate. You should hear a click.
Securely mount the monitor to the extra wide electrical box (4) using the
appropriate screws (5)(not supplied).
General Mounting Considerations:
• Must be easily accessible for calibration and maintenance.
• Mount the sensor close to the potential leak source for fastest possible
leak detection.
• If personnel protection is the primary application, mount in the “breathing
zone” (3.3–5 ft/1–1.5 m from the ground, within the range of a person’s
respiration area).
• Take air movement and ventilation patterns into account.
• See Warnings and Cautions on page 2 for additional considerations.
!
CAUTION: Use caution when opening the E3Point enclosure
to avoid damage.
w ww . . co m
information@itm.com1.800.561.8187
 Loading...