PX4ie and PX6ie High Performance Printer User Guide 87
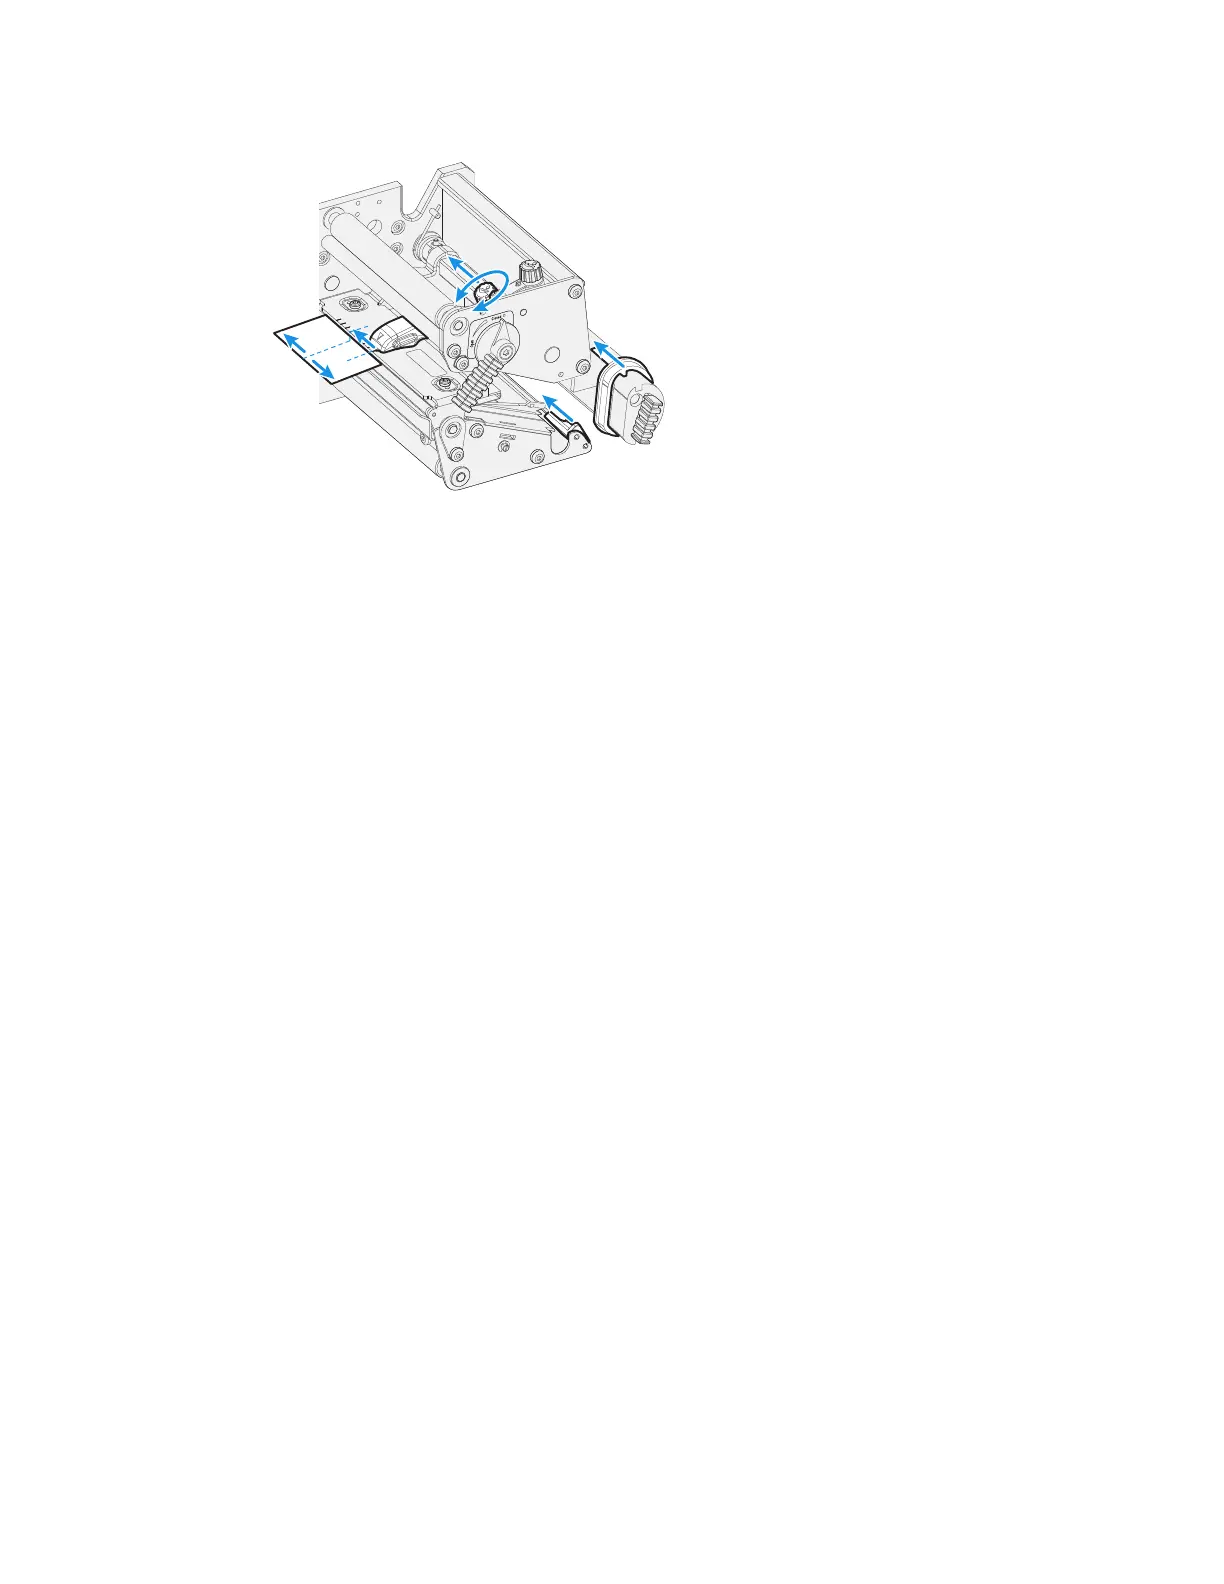
4. Loosen the knob that secures the pressure arm.
5. Move the pressure arm inward or outward until the arrow on the tip of the arm
is centered with the media.
Note: Move the pressure arm at the part closest to the knob, not at the tip. If the arm is
difficult to move, lift the printhead and pull the printhead bracket free from the
magnet in the arm.
6. When the pressure arm is centered, tighten the knob to secure the arm.
7. Adjust the edge guides.
8. If necessary, load ribbon.
9. Close the front door and media cover.
Adjusting the Label Stop Sensor
The label stop/black mark sensor (LSS) is a photoelectric sensor that controls the
printer’s media feed by detecting gaps between labels or slots or black marks in
continuous stock, depending on the printer’s media type setup. The LSS must be
aligned with the gaps, slots, or black marks. If you are using irregularly shaped
labels, align the LSS with the front tips of the labels.
The LSS can be moved laterally from the inner edge of the media path to 50mm
(1.96in) outward, which corresponds to the center line of full width media. One part
of the sensor is on the upper media guide and the other part of the sensor in under
the lower guide.
To adjust the LSS
1. Use a slotted screwdriver to turn the adjustment screw.
• Rotate the screw clockwise to move the sensor toward the center section.