Upgrading Your System
Removing and Replacing the System Board
Removing and Replacing the System Board
WARNING To avoid system damage, make sure your static-grounding strap is securely attached
to your wrist and to the bare metal on the workstation.
Removing the old System Board
1. Ensure all workstation cables are out of the way to avoid interference or damage when you remove the
system board tray.
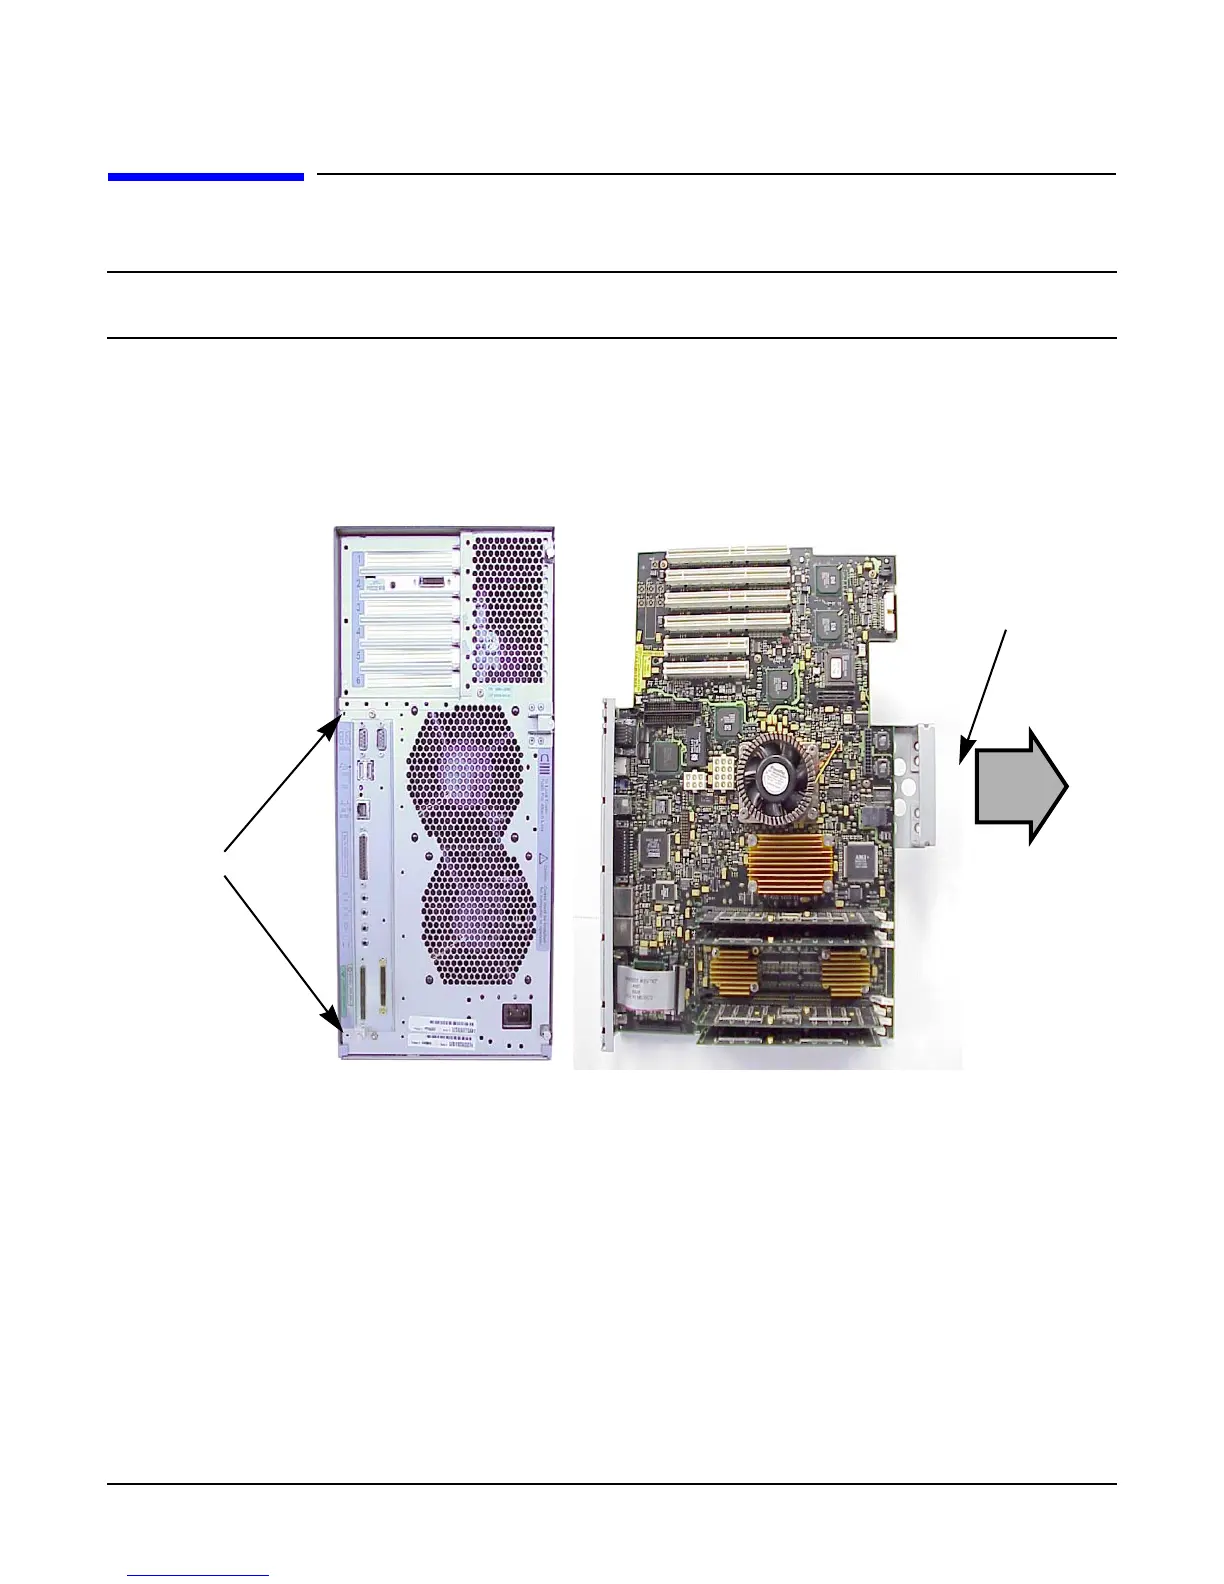
Figure 2-16 Removing the System Board
System boar
tray handle
T-15 Torx Screws
2. Remove the two T-15 Torx screws that secure the system board tray to the rear wall of the workstation.
3. Grasp the system-board tray handle and slide the system board tray toward the front of the workstation to
unseat the keyhole standoffs on the floor of the chassis, underneath the board. Using the handle, lift the
system board tray out of the workstation and place it on the conductive sheeting.
Chapter 2
21
 Loading...