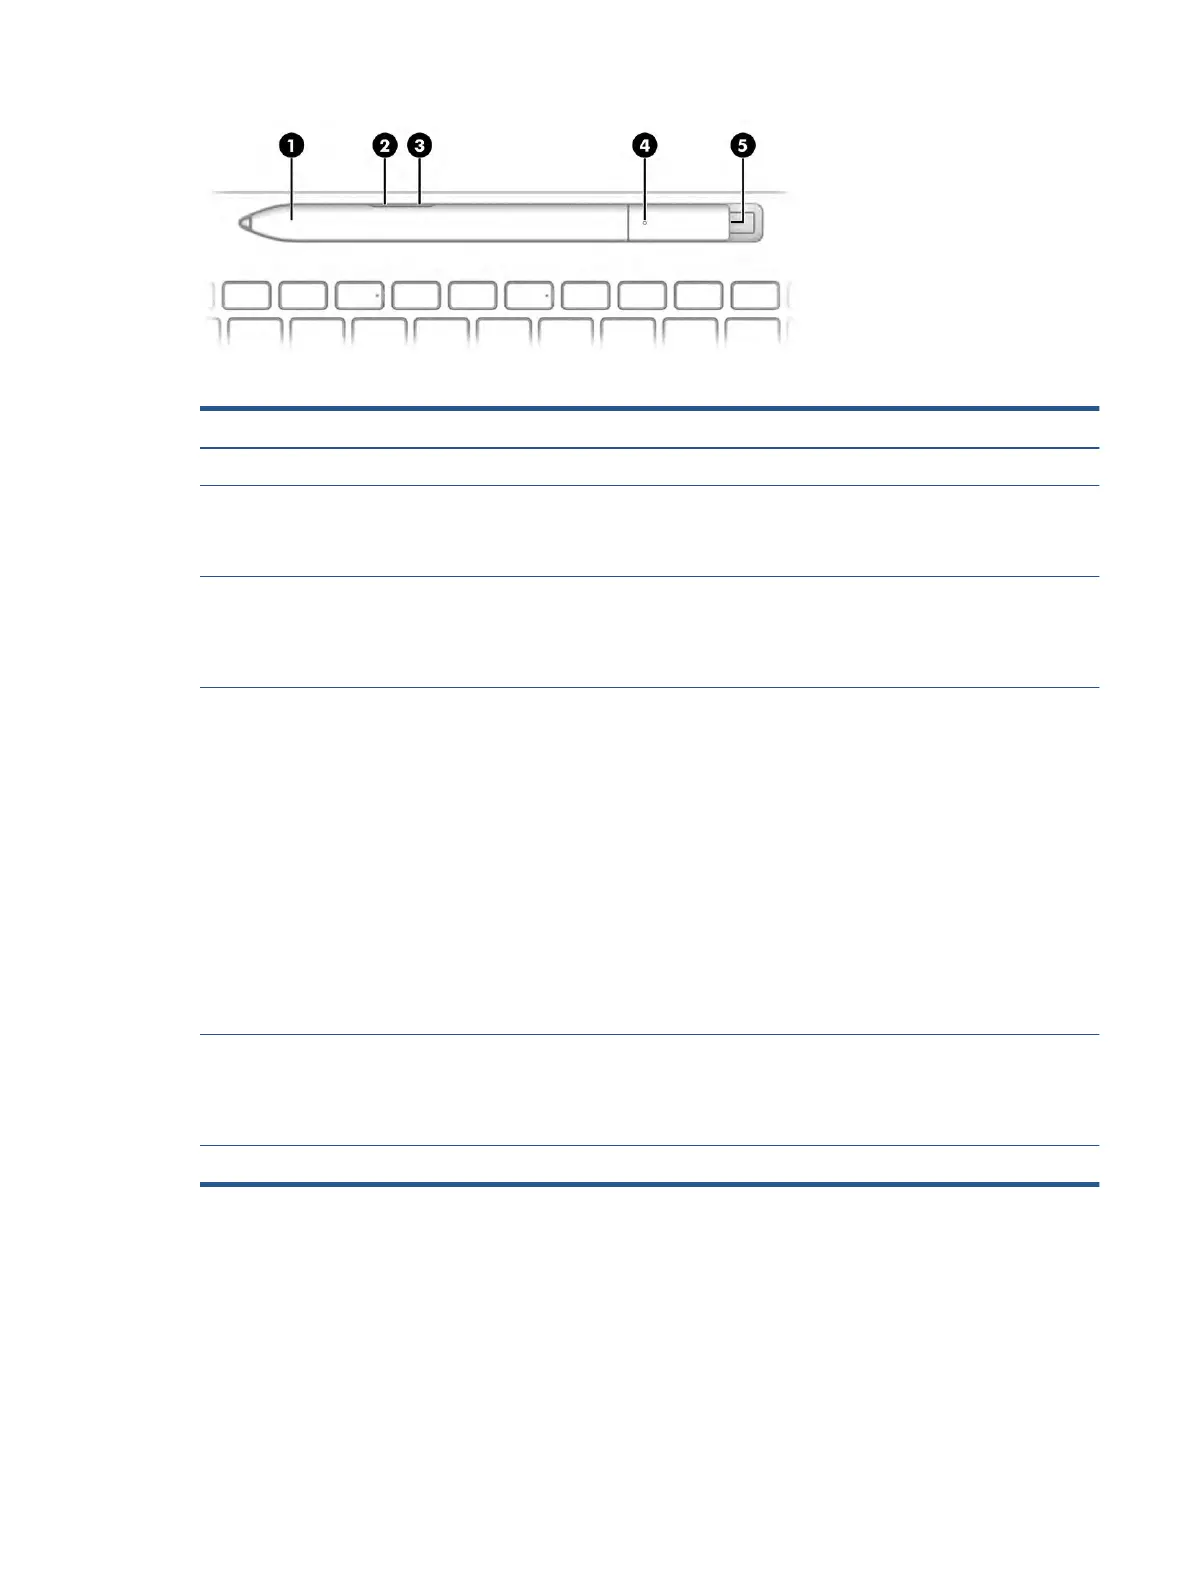
Table 2-7 Digital pen features and their descriptions
Component Description
(1) Digital pen pocket A recessed area for storing and charging the digital pen.
(2) Bottom button Erases content on the screen.
NOTE: You can congure the action of this button in the pen software
that is installed on your computer.
(3) Top button Press and hold the button and tap the screen to imitate the action of a
right-click of your mouse.
NOTE: You can congure the action of this button in the pen software
that is installed on your computer.
(4) Digital pen light ● Blinking blue (slowly): The pen is in pairing mode.
● Blinking blue (fast): The pen has paired successfully.
● Solid blue: The pen is successfully paired.
● Solid red: The pen is in over-the-air (OTA) mode.
● Blinking red (fast): OTA is transferring information.
● Blinking blue (very fast): OTA transfer has completed successfully.
● O
(1 s): OTA failed.
● Blinking red (slowly): The battery charge level is low.
● Blinking white: The pen is charging.
● Solid white: The pen is fully charged.
(5) Pairing button To connect your digital pen to your computer, press and hold the
p
airing button for 5 seconds.
NOTE: You can
congure the action of this button in the pen software
that is installed on your computer.
*The Regulatory Model Number (RMN) for this equipment is STA-WP01.
Turn on your digital pen by tapping the tip on any surface.
Special keys
Use the illustration and table to identify the special keys.
Keyboard area 11
 Loading...