Before removing the solid-state drive, follow these steps:
1. Prepare the computer for disassembly (see Preparation for disassembly on page 28).
2. Remove the pen (see Pen on page 28).
3. Remove the bottom cover (see Bottom cover on page 30).
4. Disconnect the battery cable from the system board (see Battery on page 31).
5. Remove the heat sink (see Heat sink on page 36).
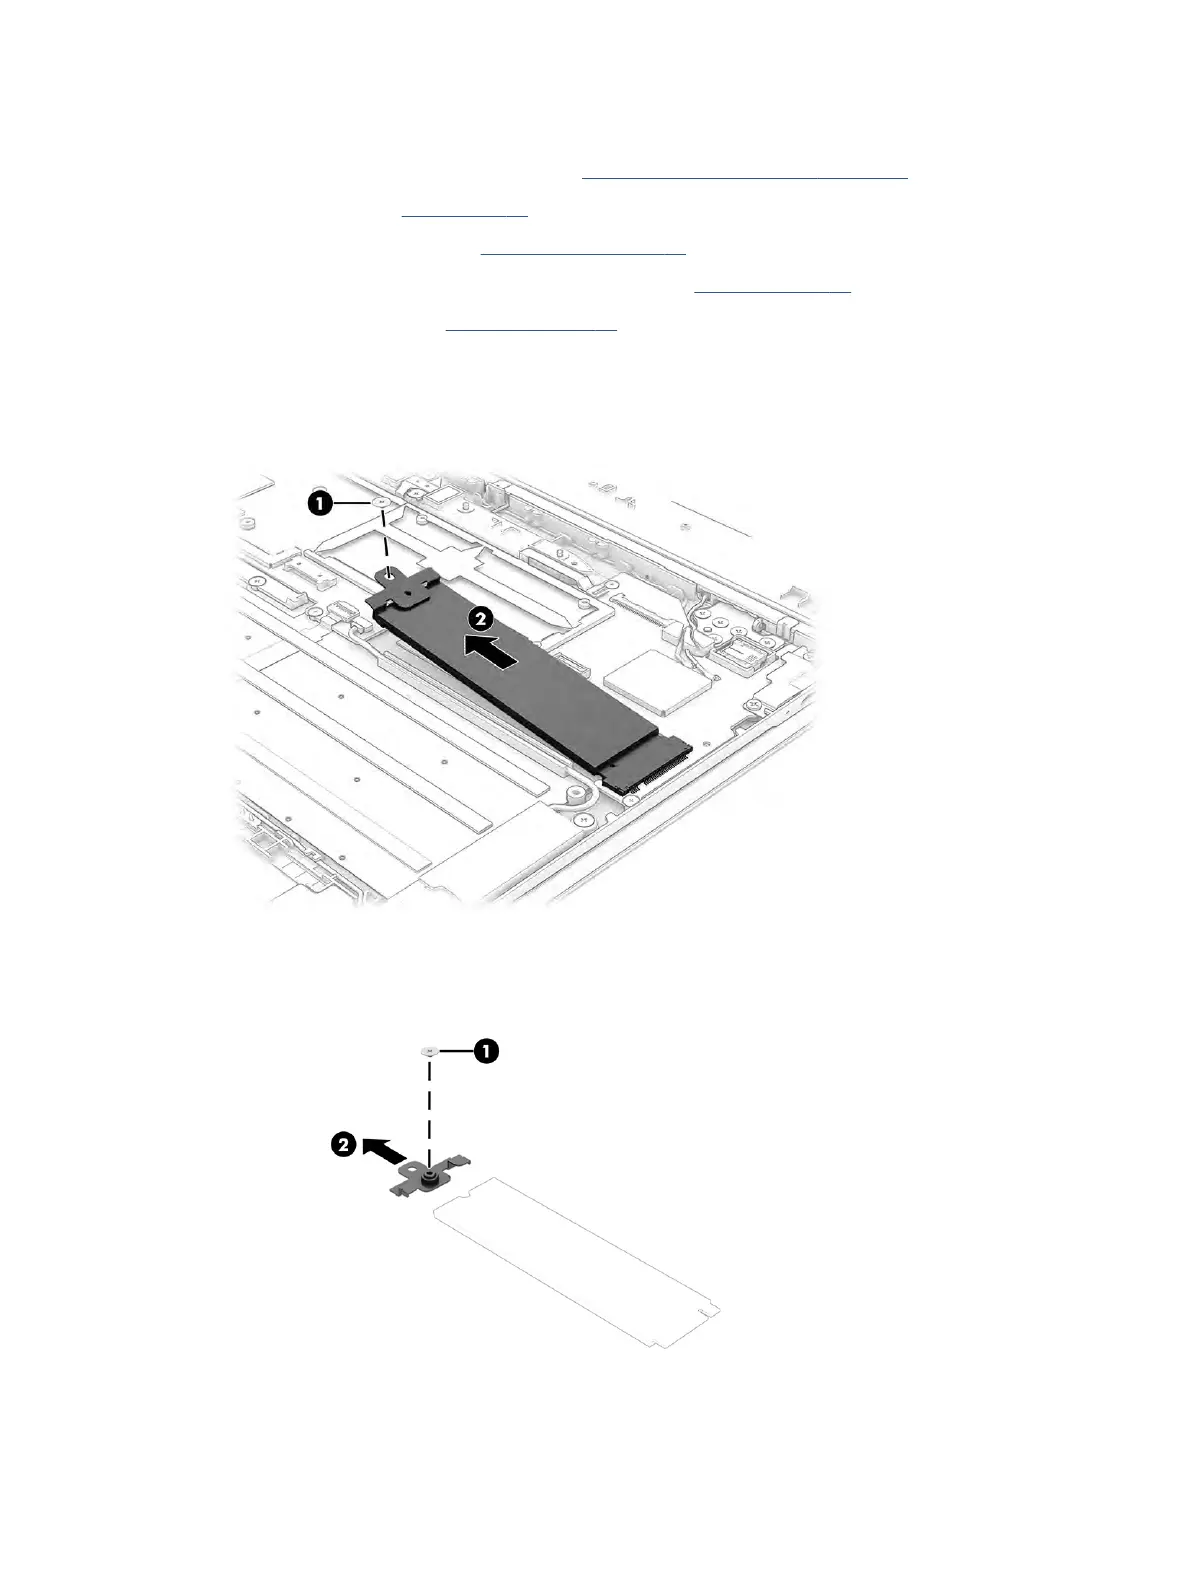
Remove the solid-state drive:
1. Remove the Phillips M1.4 × 1.2 screw (1) that secures the drive to the computer.
2. Pull the drive away from the socket to remove it (2).
3. To remove the bracket from the solid-state drive, remove the Phillips M1.4 × 1.2 screw (1) that secures
the bracket to the drive, and then remove the bracket from the drive (2). Install the bracket on the new
solid-state drive.
To install the solid-state drive, reverse the removal procedures.
38 Chapter 6 Removal and replacement procedures for authorized service provider parts
 Loading...