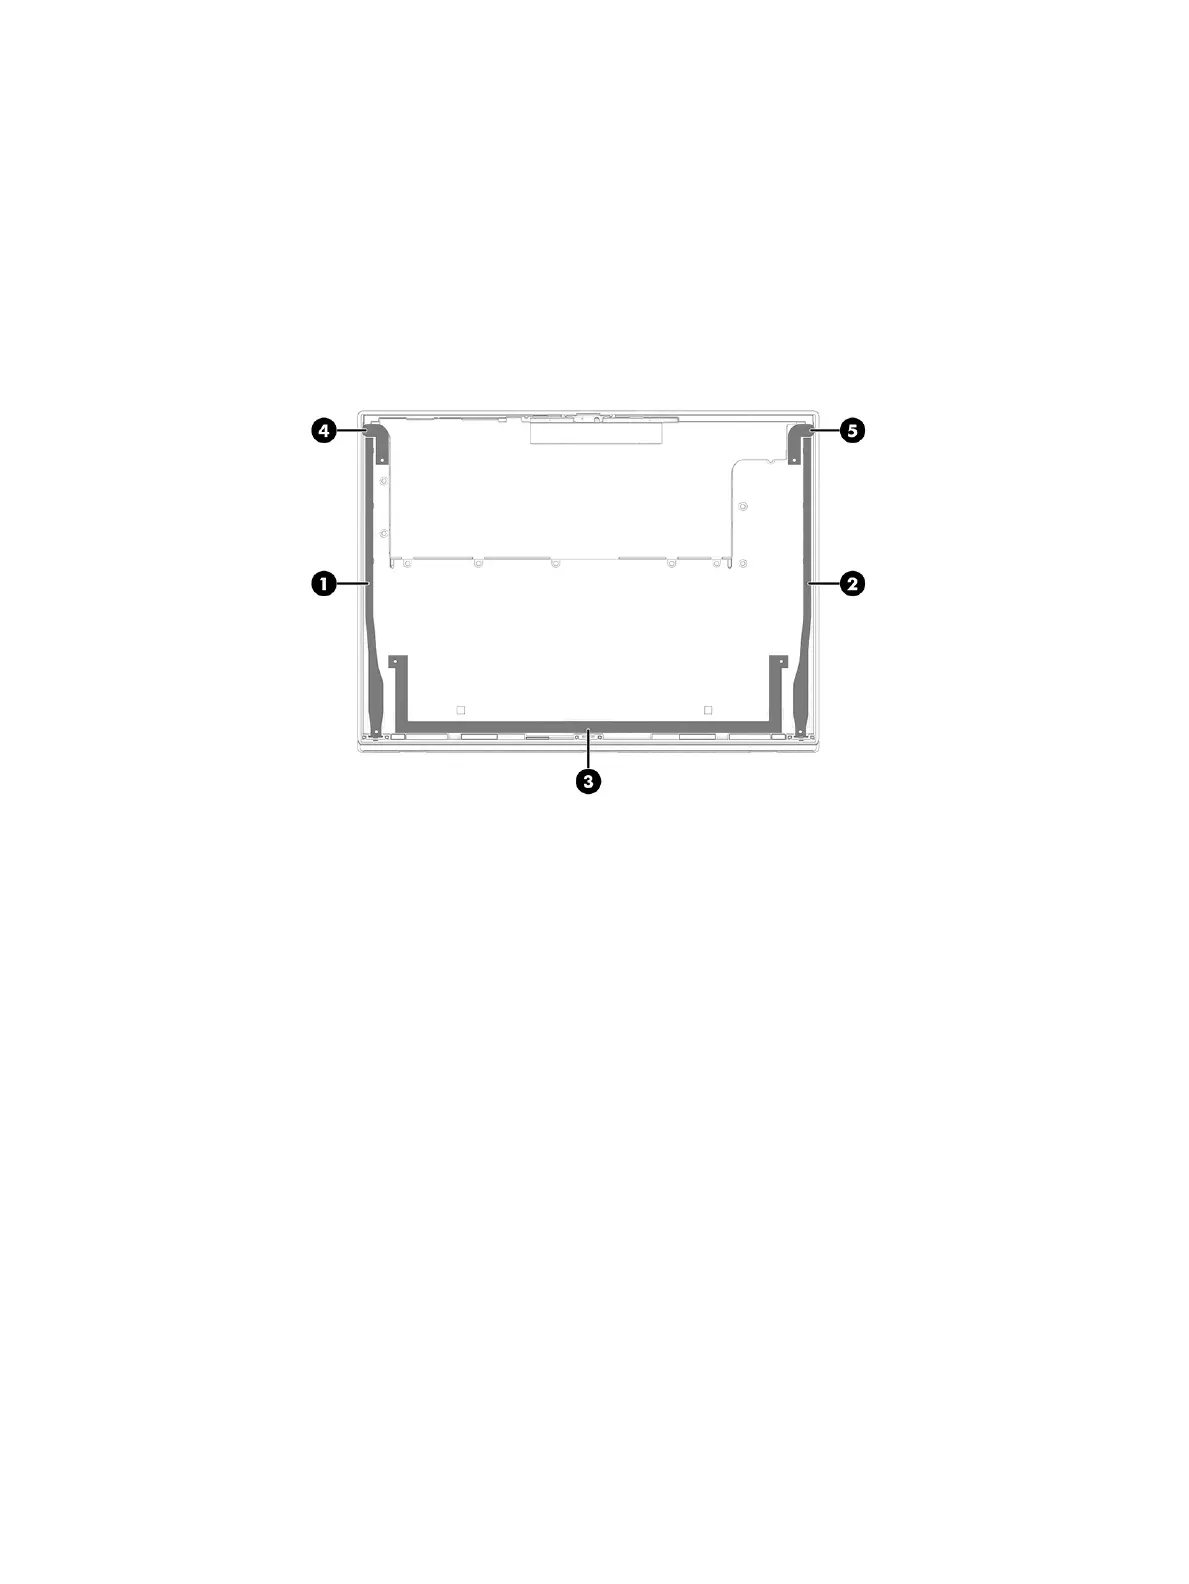
c. Five strips of tape secure the panel to the display. Remove this tape in the following order:
- Long vertical strips along the left (1) and right (2) sides. If the tabs on the ends of the tape break
before it is fully removed, you can use a suction cup and pick to lift the panel so you can gain
access to the tape. HP recommends using a rounded hook tool (crochet tool) to remove the tape.
Use tweezers to rotate and pull the tape out vertically (see step f).
- One horizontal strip along the bottom (3). You may need to use a suction cup to pull up the panel
to access the bottom strip. Use tweezers to rotate and pull the tape out horizontally (see step f).
- Two horizontal, short strips near the top left (4) and right (5) corners of the display.
d. Use tweezers to pull the cover in each corner o the bottom of the display panel (1). The bottom
will be closest to you in this position.
e. Use tweezers to grasp and pull the end of the tape out from behind the panel. While turning the
tweezers, wrap the tape around the tweezers (2) as you continue to pull the tape out from behind
the display panel (3). You must pull the tape multiple times before it is completely removed.
Component replacement procedures 47