Removing a secondary 3.5-inch hard drive
1. Prepare the computer for disassembly (Preparation for disassembly on page 19).
2. Remove the access panel (Access panel on page 20).
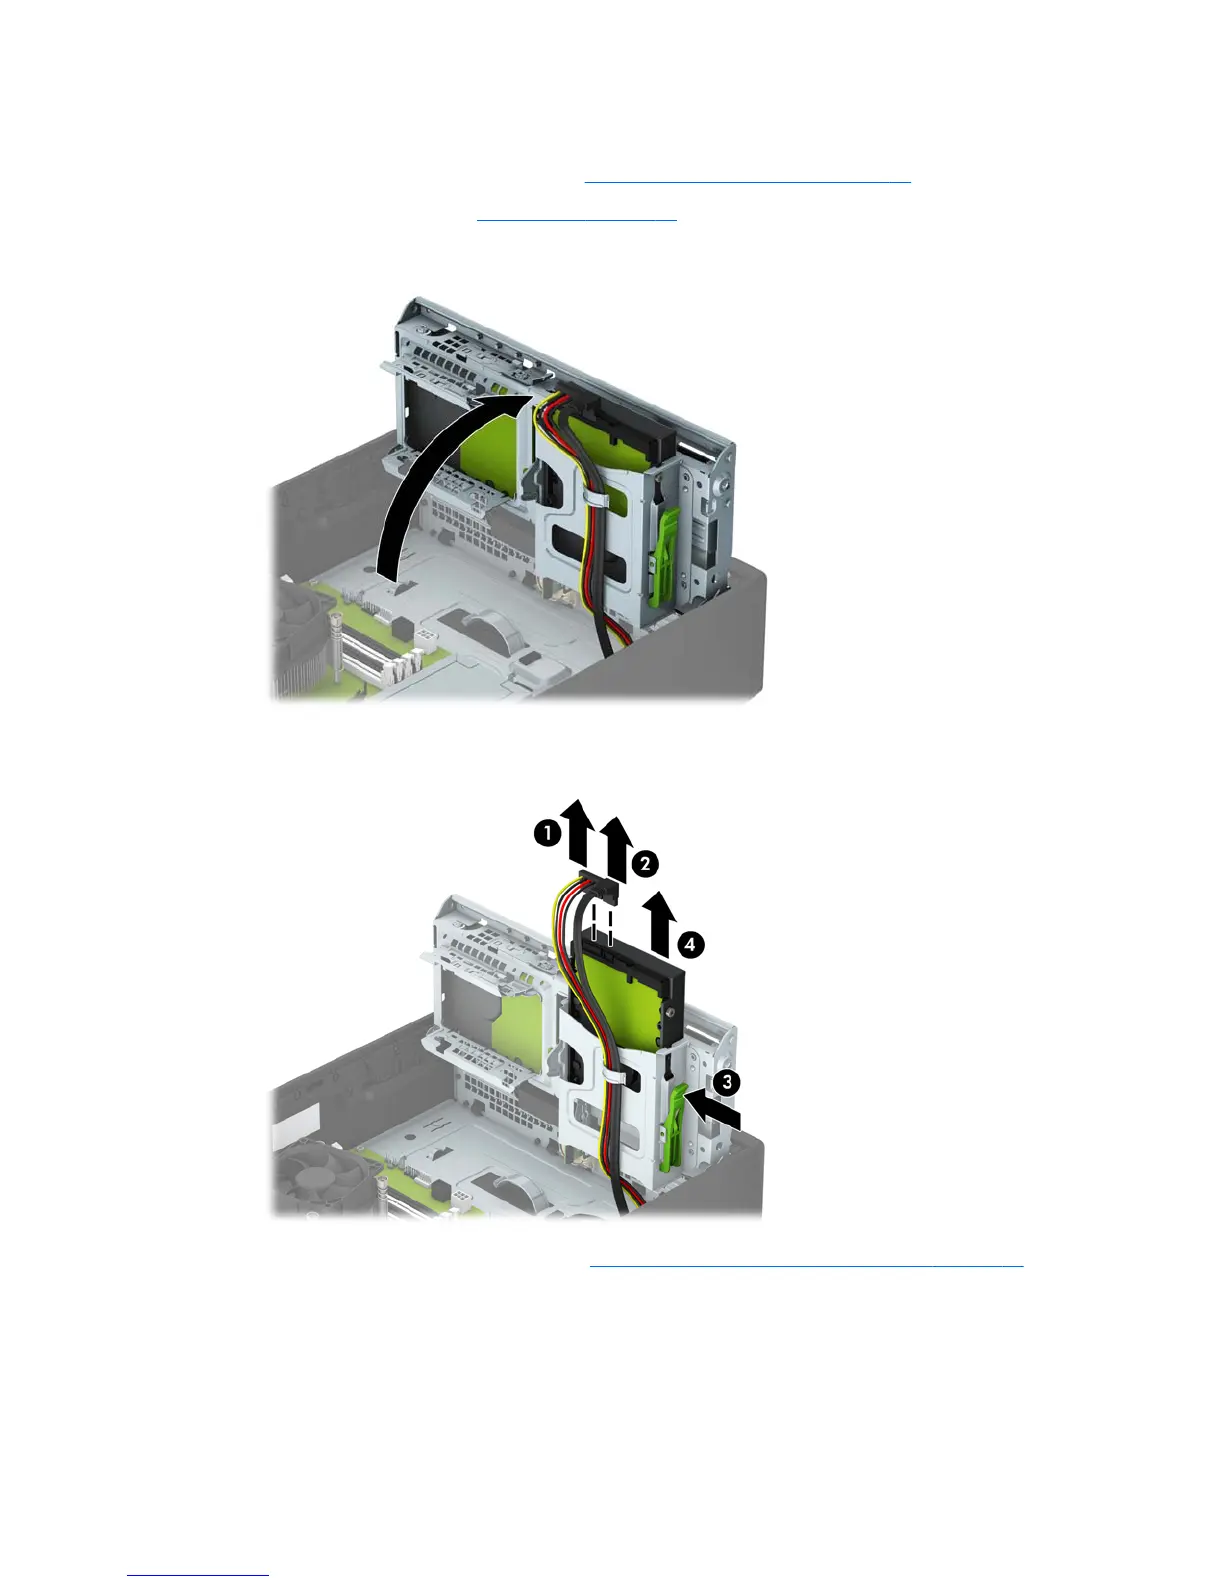
3. Rotate the drive cage to its upright position.
4. Disconnect the power cable (1) and data cable (2) from the rear of the hard drive. Press the latch on the
side of the drive cage (3), and then slide the drive out of the drive bay (4).
5. If you are installing a new drive, refer to Installing a secondary 3.5-inch hard drive on page 40. If you
are not installing a new drive, rotate the drive cage down and replace the access panel.
Drives 39
 Loading...