13
Figure 10 Screw anchor and screw
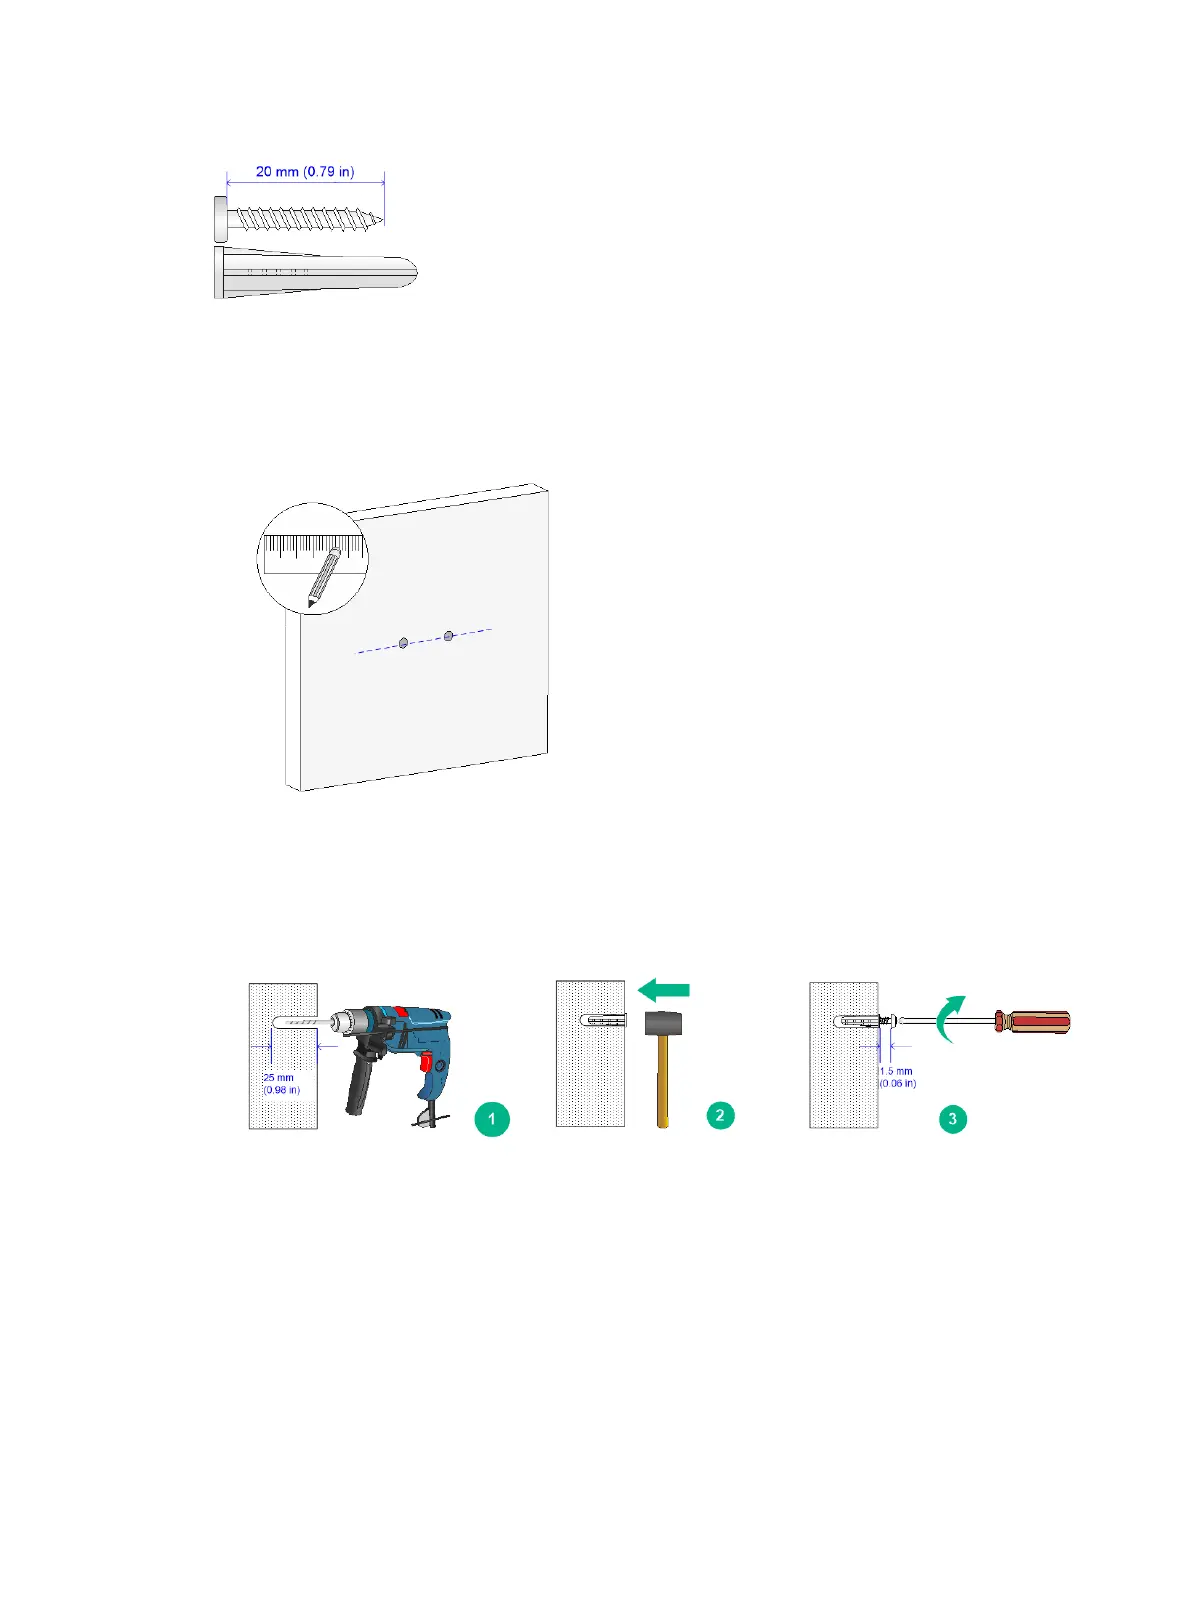
To mount the switch on a wall:
1. Mark two installation holes on the wall. Make sure the two holes are on the same horizontal line.
See Table 6 for the distance requirement between the two holes.
Figure 11 Installing the switch on a wall (1)
2. Drill two holes with a diameter of 6 mm (0.24 in) and a depth of 25 mm (0.98 in) at the marked
locations. Hammer the screw anchors into the wall and use a Phillips screwdriver to fasten the
screw into the screw anchor. Leave 1.5 mm (0.06 in) between the screw head and the wall for
hanging the switch.
Figure 12 Installing the switch on a wall (2)
3. Align the installation holes in the switch rear with the screws on the wall and hang the switch on
the screws. Make sure the port side faces down and the left and right sides are perpendicular to
the ground.
 Loading...