2-6
Installing the Switch 408
Installation Procedures
2. Verify the Switch Passes Its Self Test
Before mounting the switch in its network location, you should first
check that it is working properly by plugging it into a power source
and verifying that it passes its self test.
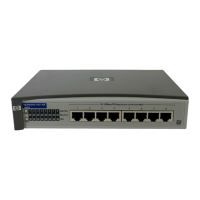
1. Connect the adapter’s power cord to the power connector on the
back of the switch, and then plug the AC power adapter into a
nearby properly grounded electrical outlet.
2. Check the LEDs on the switch. The LED behavior is described on
the next page.
Note
The Switch 408 does not have a power switch. It is powered
on when the AC power adapter is connected to the switch
and to a power source.
Caution
Use only the AC power adapter supplied with the switch.
Use of other adapters, including those that came with other
HP network products, may result in damage to the equip-
ment.
12 - 13V
1.0 - 0.8A
Connect power cord to
the power connector
 Loading...