Main rear frame
The main rear frame is secured with 15 screws. To remove it, you must first remove the rear logo
cover, which is held on with four screws.
To remove the main rear frame:
1. Prepare the computer for disassembly (see
Preparing to disassemble the computer on page 33).
2. Remove the stand (see
Stand on page 34).
3. Remove the left and right rear panels (see
Rear panels on page 46).
4. Remove the left cap (see
Left cap on page 60).
5. Remove the right cap (see
Right cap on page 66).
6. Remove the rear logo cover (see
Rear logo cover on page 71).
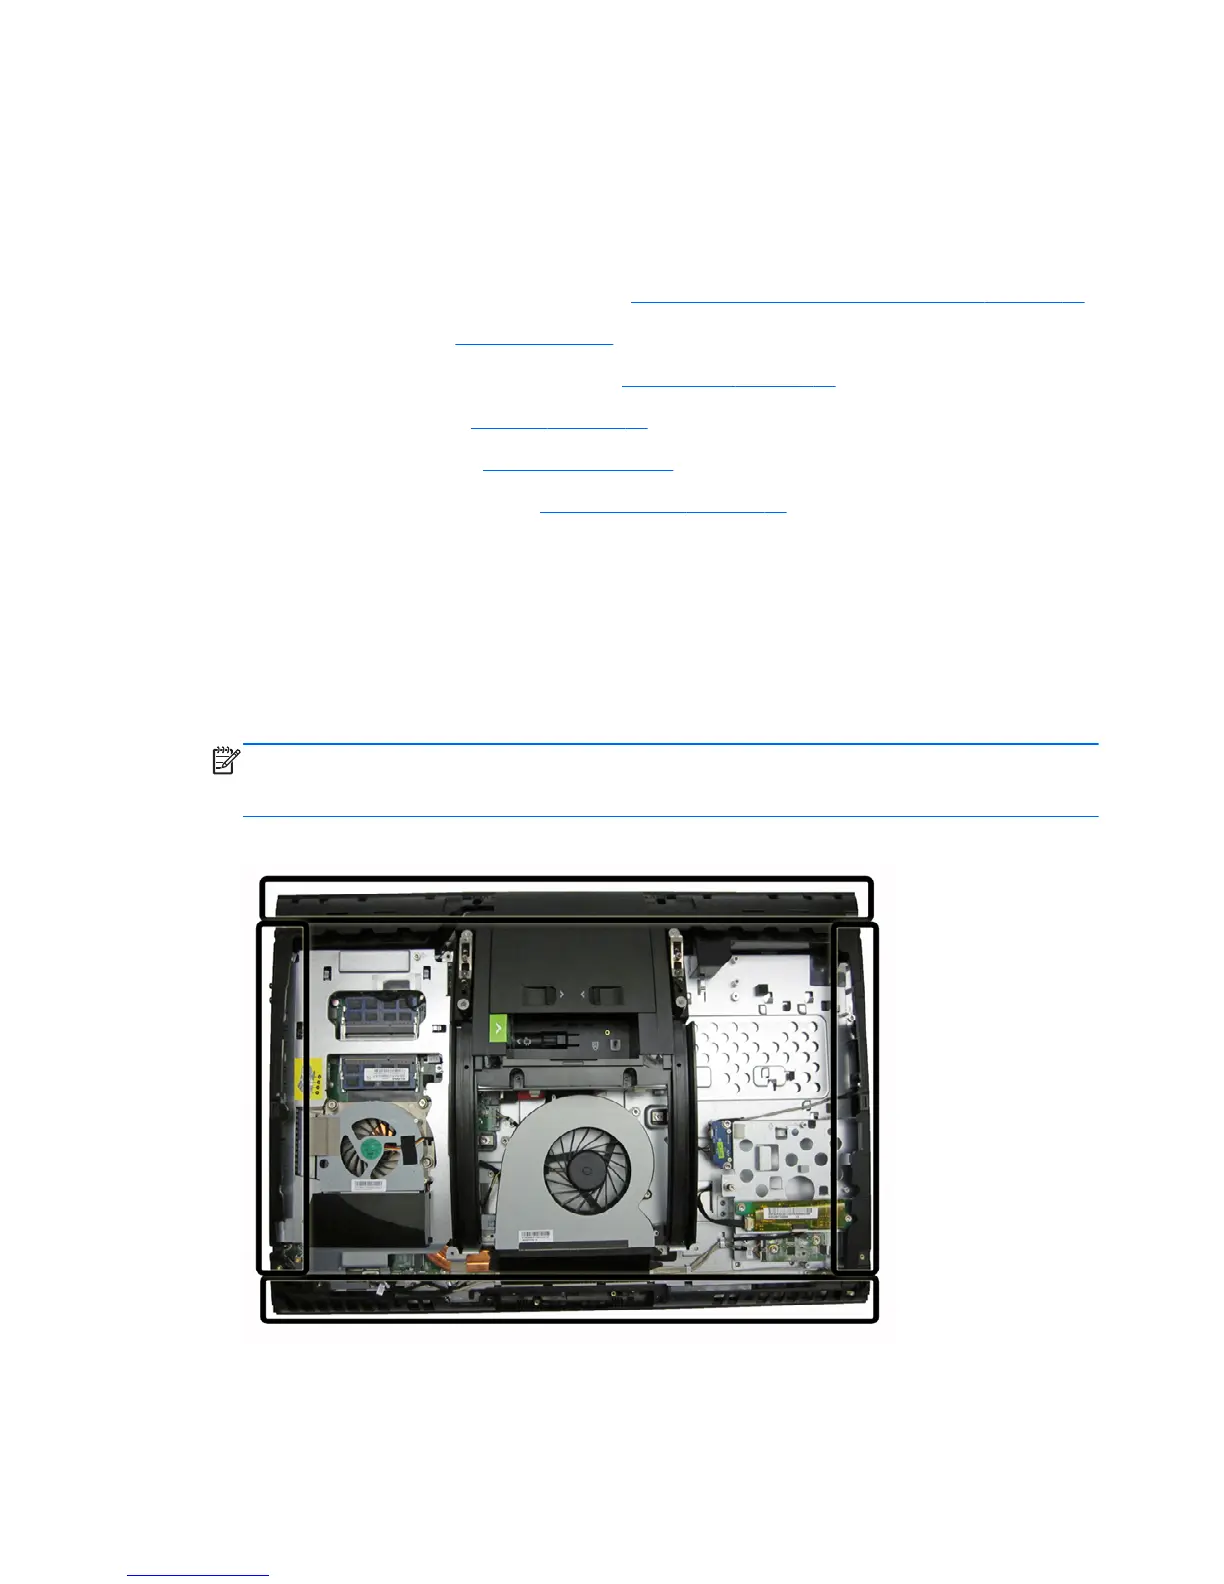
7. Remove the 15 screws that secure the frame to the computer, as follows:
●
Top: 6 screws
●
Bottom: 4 screws
●
Left: 3 screws
●
Right: 2 screws
NOTE: Be sure to mark the locations of the rear frame screws as you remove them. If you also
remove the display panel, it is difficult to determine which screws are used for which component
if you do not have them marked.
Figure 7-48 Removing the main rear frame
8. Lift the frame from the computer.
To replace the main rear frame, reverse the removal procedures.
74 Chapter 7 Removal and Replacement Procedures
 Loading...