CPU cooler
NOTE: The CPU cooler spare part kit includes replacement thermal material.
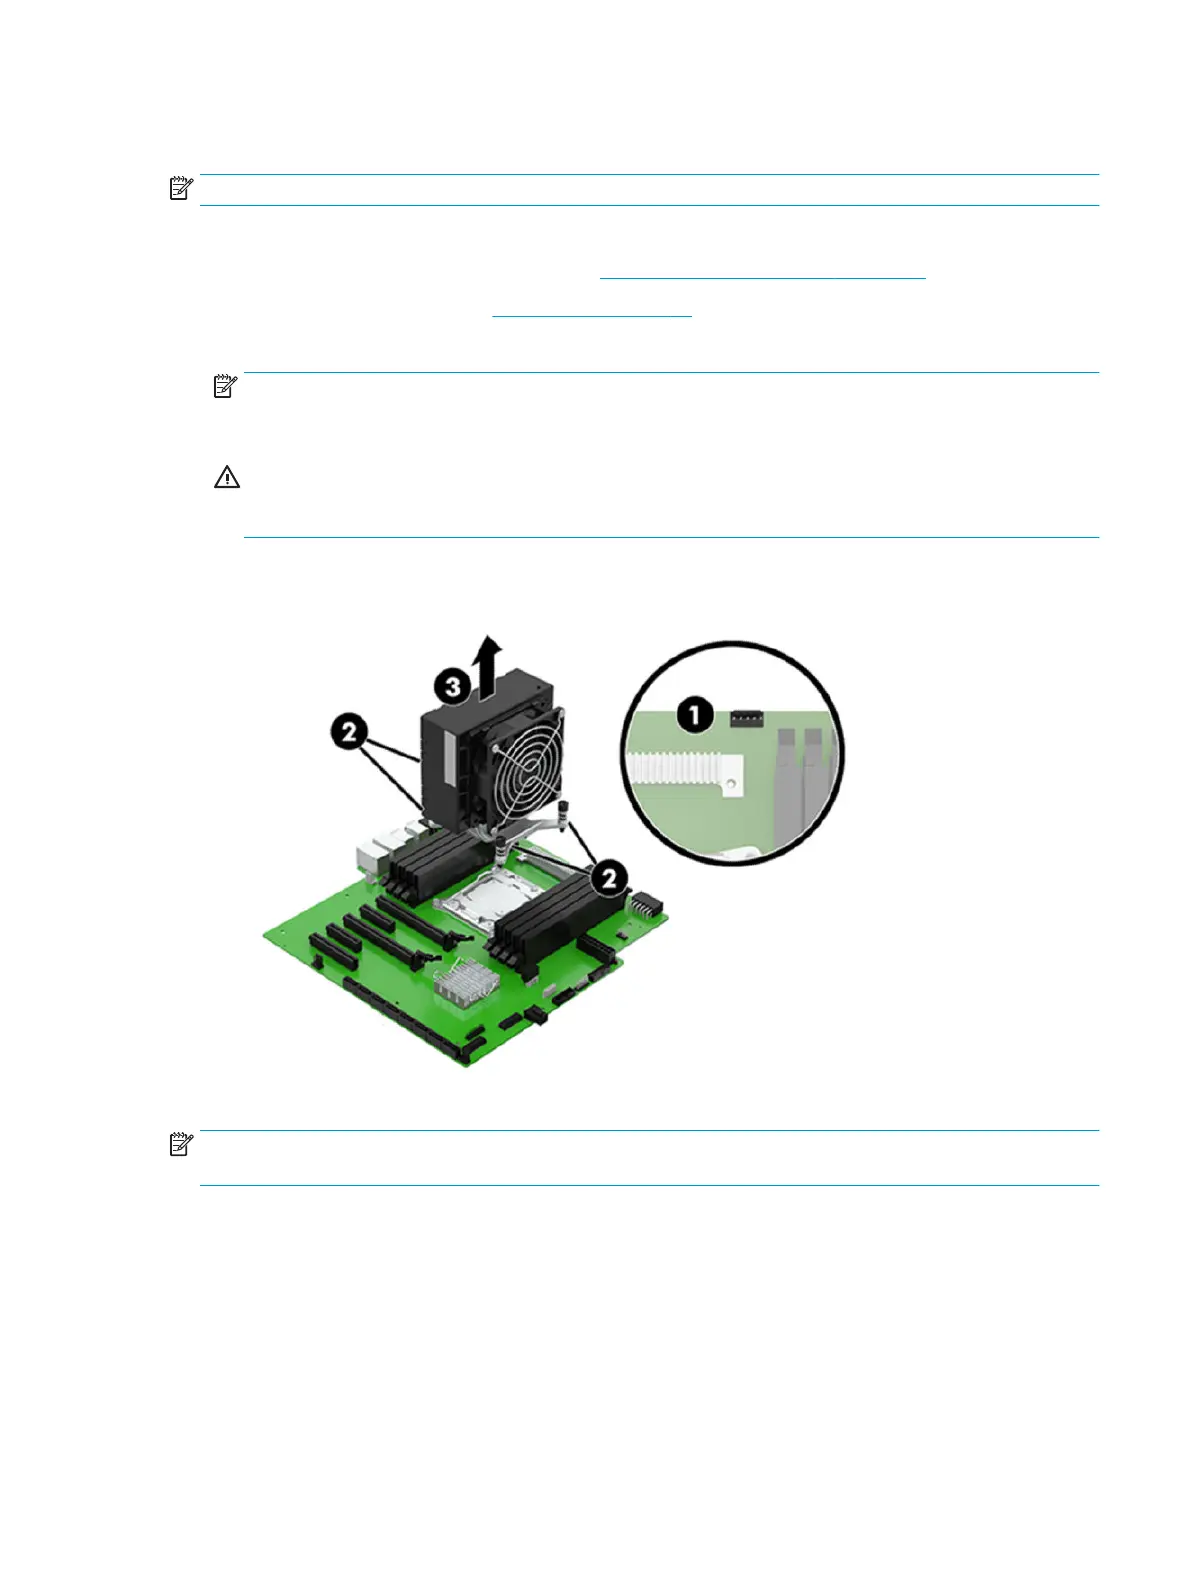
Follow these steps to remove the CPU cooler:
1. Prepare the computer for disassembly (see Preparation for disassembly on page 15).
2. Remove the access panel (see Access panel on page 17).
3. Disconnect the CPU cooler fan cable (1) from the system board.
NOTE: Models with Intel Core X-series processors with 14 cores and above use a CPU cooler with a 6-
pin receptacle. The system board has a 5-pin connector. A 6-to-5 pin cable adapter is used to plug into
the 5-pin header on the system board.
CAUTION: When removing the CPU cooler, loosen all screws a little at a time to ensure the processor
remains level. Do not fully loosen one screw, and then move on to the next screw. Failure to follow this
sequence can result in damage to the CPU cooler, the processor, and the system board.
4. Loosen the four slotted Torx15 captive screws (2) that secure the CPU cooler to the system board.
5. Remove the CPU cooler (3).
Reverse this procedure to install the CPU cooler.
NOTE: If the old CPU cooler is being reinstalled, new thermal material must be applied. If a new CPU cooler is
being installed, thermal material is already preinstalled on the base of the CPU cooler.
CPU cooler 23
 Loading...