Step 12 Install the 5288 V3. For details, see 3.4 Installing the Server.
Step 13 Connect all internal cables such as power and network cables. For details, see 3.5 Connecting
External Cables.
Step 14 Power on the 5288 V3. For details, see 4.1 Powering On the Server.
----End
Installing a Rear Hard Disk Backplane for Two Disks
Step 1 Wear an ESD wrist strap. For details, see 1 Safety Instructions.
Step 2 Remove the rear hard disk backplane to be replaced. For details, see 7.53 Removing the Rear
Hard Disk Backplane.
Step 3 Take the spare rear hard disk backplane out of its ESD bag.
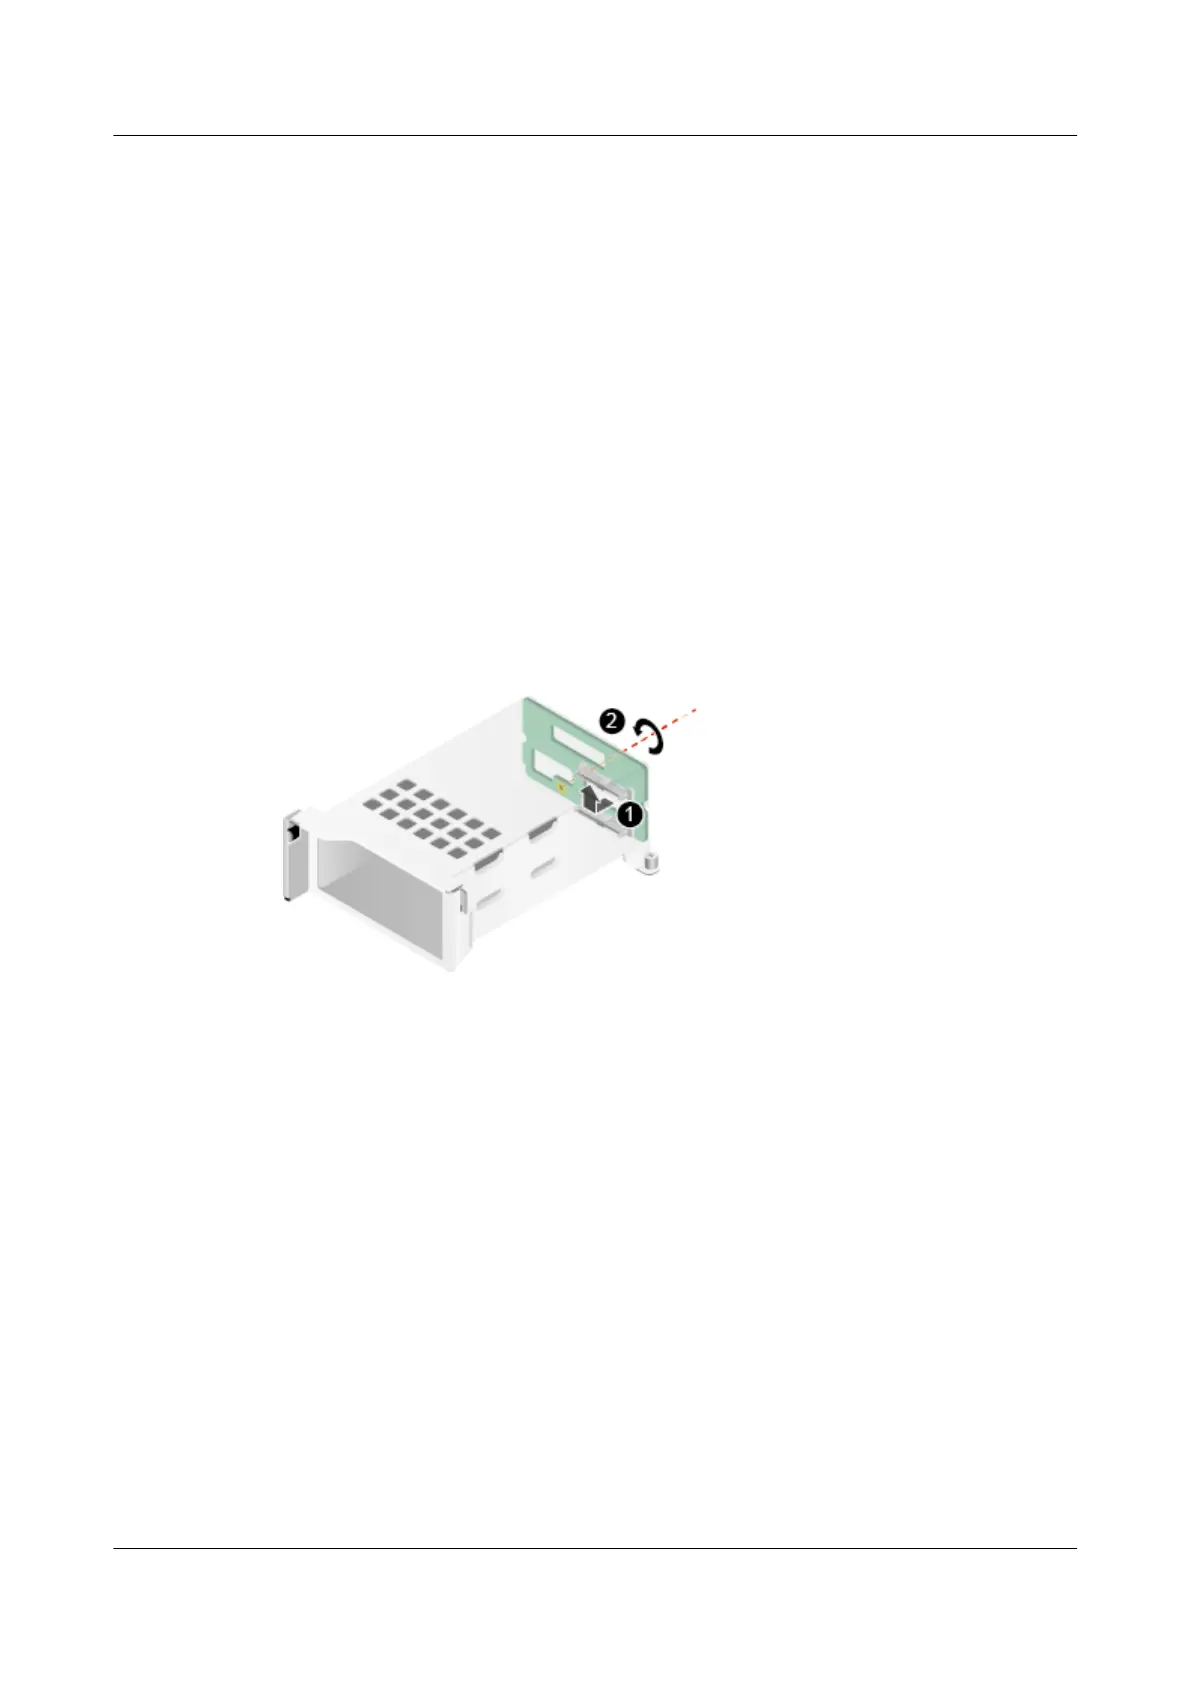
Step 4 Install the rear hard disk backplane in the rear hard disk module in the arrow direction, and
tighten the screw on the hard disk backplane. See Figure 7-115.
Figure 7-115 Installing a rear hard disk backplane for two disks
Step 5 Install all hard disks in the rear hard disk backplane.
Step 6 Install the rear hard disk module in the 5288 V3 chassis, and tighten the screws on the
module. See Figure 7-116.
5288 V3 Server
User Guide
7 Replacing Parts
Issue 26 (2018-11-19) Copyright © Huawei Technologies Co., Ltd. 231
 Loading...


