Maintenance
HPR400XD Auto Gas – 806160 5-61
Torch lead test
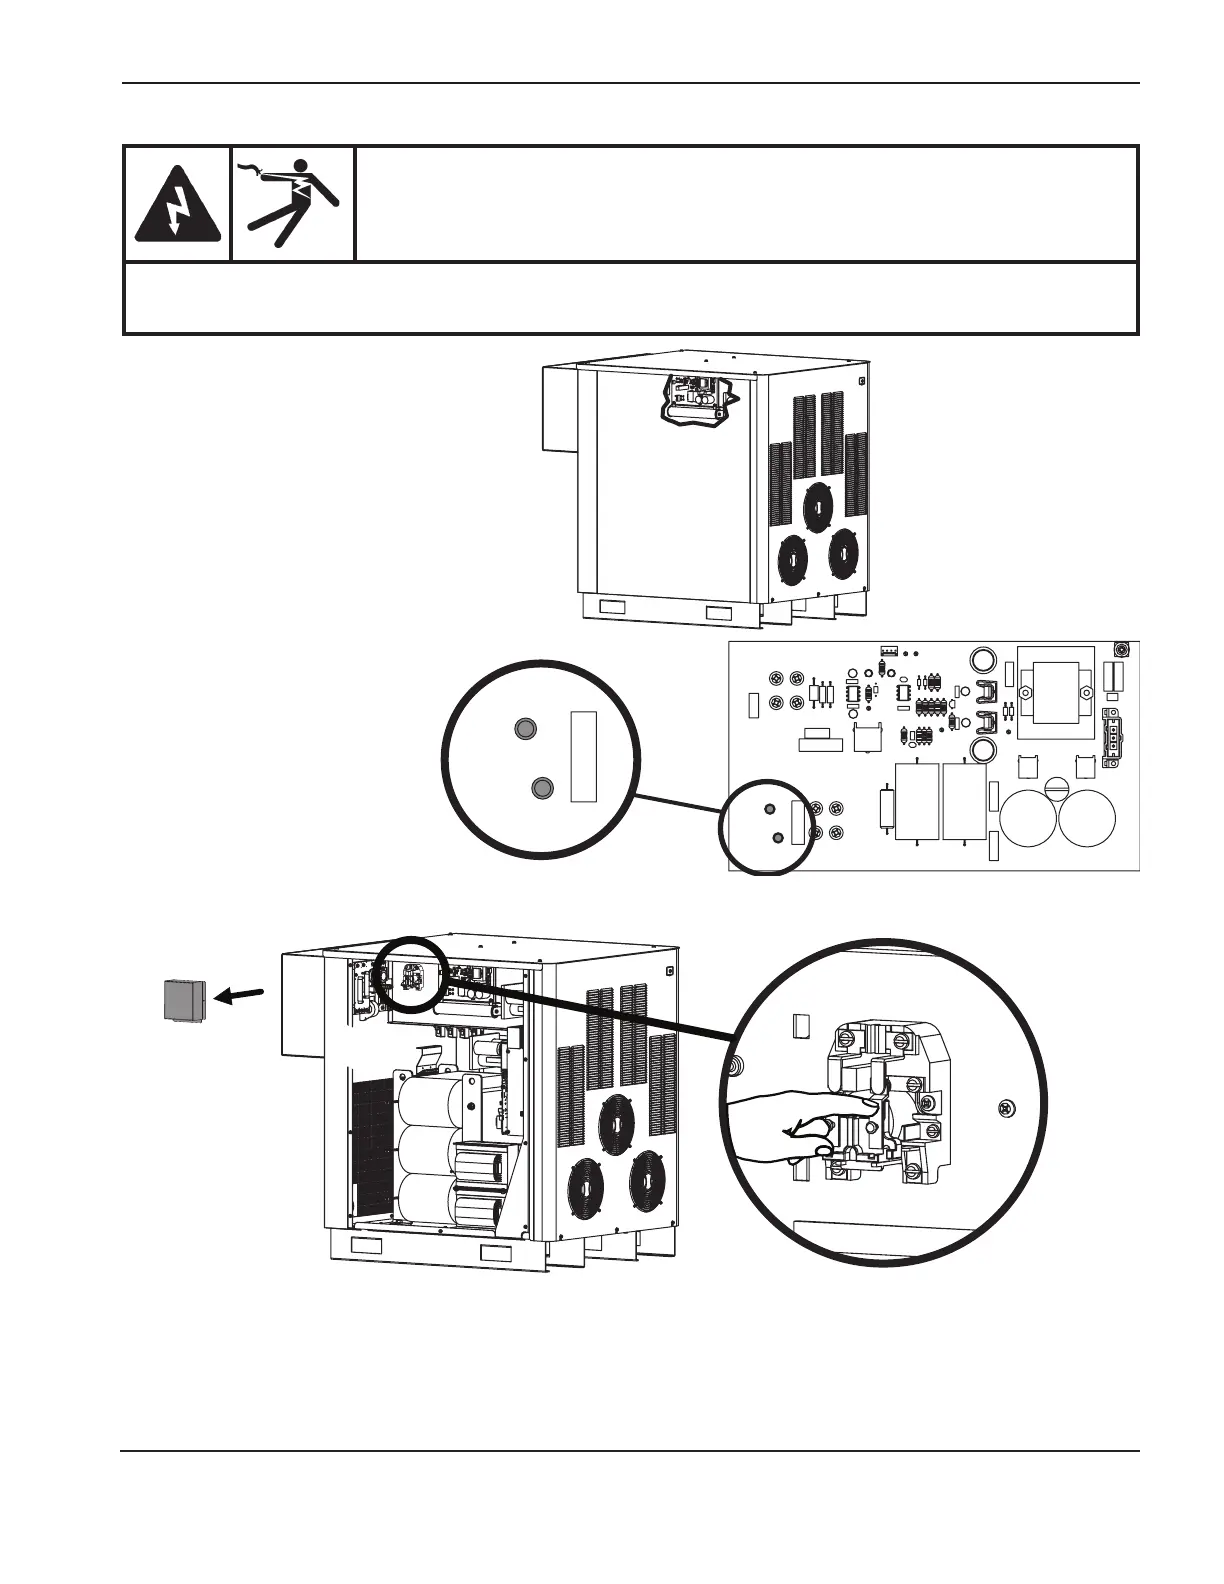
1. Turn OFF all power to the system.
2. Locate the start-circuit assembly.
H8
WORK
H9
NOZZLE
H8
WORK
H9
NOZZLE
+–
D1
D2
3. Install a temporary jumper wire
between H8 (work) and H9
(nozzle) on the start circuit
PCB1.
4. Locate the pilot arc relay (CR1) and remove the dust cover. Have a second person close the contact.
5. Measure the ohm value between the nozzle and the plate. The reading should be less than 3 ohms. A measurement
of greater than 3 ohms indicates a faulty connection between the torch and ignition console or between the ignition
console and the power supply.
6. Verify that the pilot arc wire on the torch lead is not damaged. If it is damaged replace the lead. If it is not damaged,
replace the torch head.
WARNING
SHOCK HAZARD
Always use caution when servicing a power supply when plugged in and the covers are removed.
Dangerous voltages exist within the power supply which could cause injury or death.

 Loading...