InstallatIon
HPR400XD Auto Gas – 806160 3-43
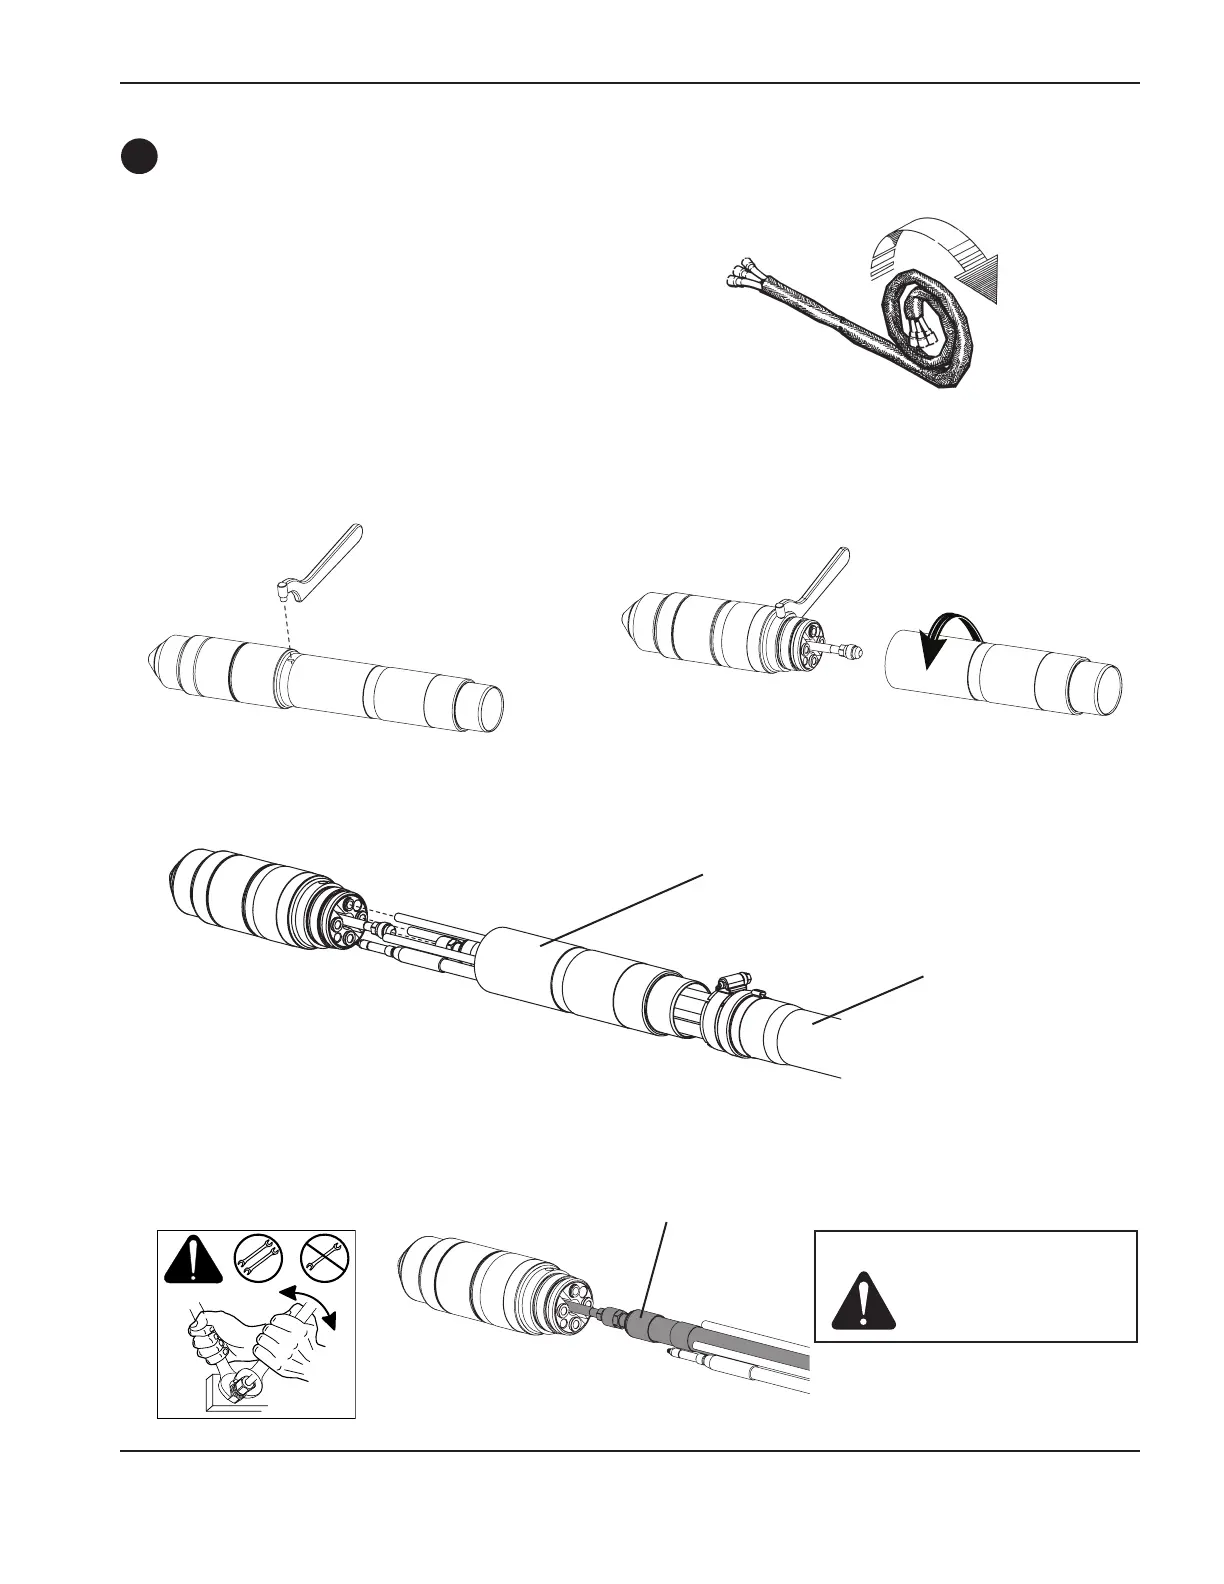
Torch connections
Connect the torch to the torch lead assembly
1. Uncoil the first 2 meters (6.5 ft) of the leads on a flat surface.
2. Hold the torch assembly in place with the spanner wrench (104269) and remove the mounting sleeve from the torch
assembly.
3. Push back the braided cover and slide the sleeve over the leads. Align the torch with the hoses in the lead assembly.
The hoses must not be twisted. They are taped together to help prevent twisting.
4. Connect the coolant return hose (red).
Braided cover
Sleeve
Coolant return hose
Caution: Never use PTFE
tape on any joint
preparation.

 Loading...