Upgrading the system memory 8-5
Upgrading the system memory
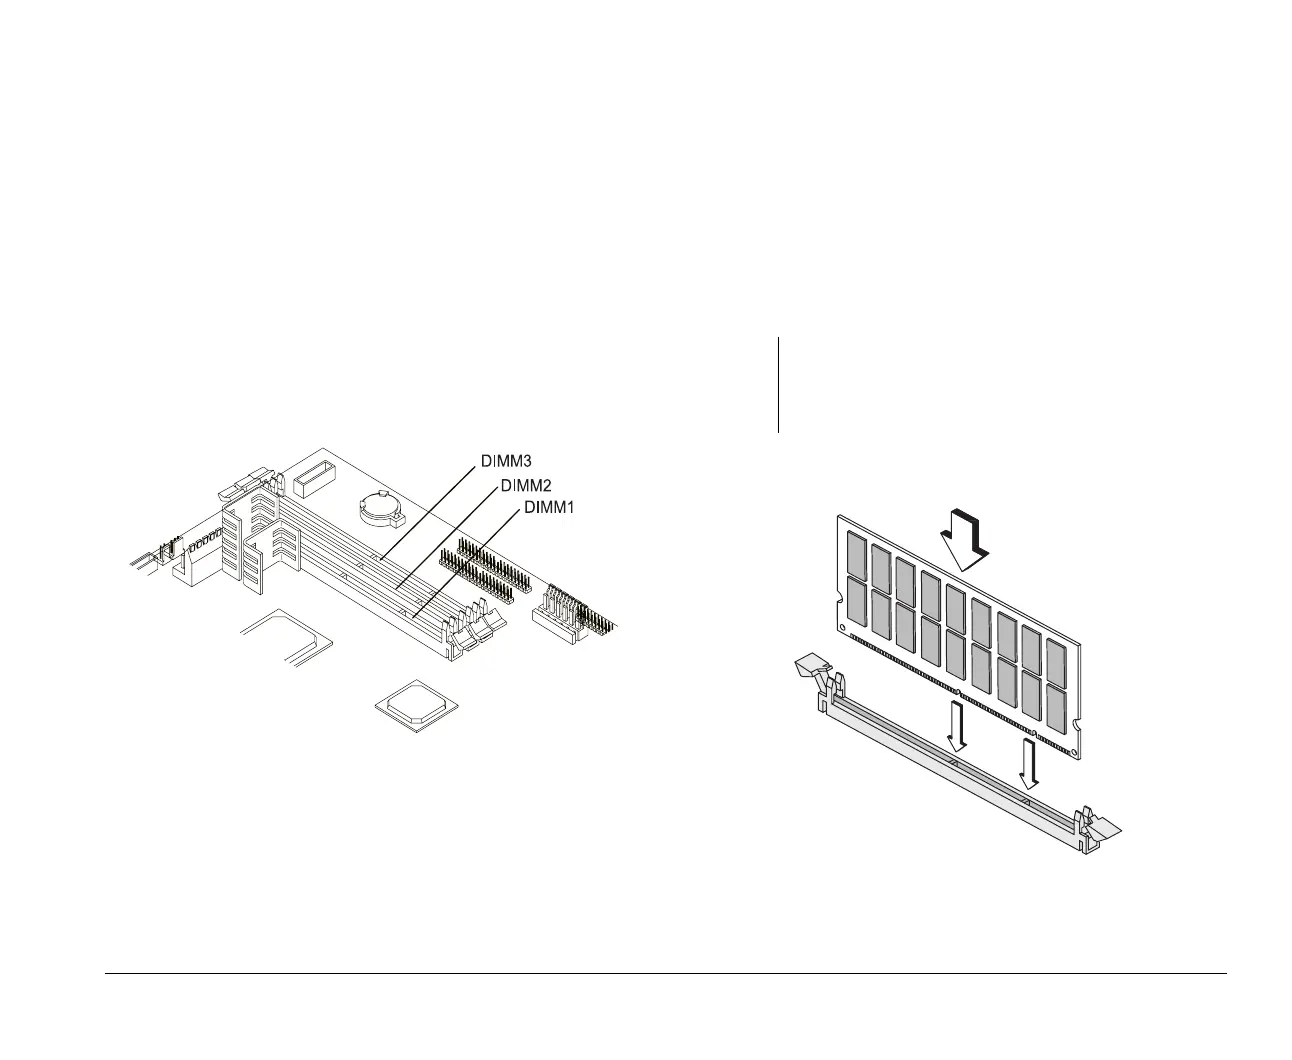
Your system board has three system memory module
sockets: DIMM1, DIMM2, and DIMM3. These sockets hold
Dual Inline Memory Modules (DIMMs) that contain 3.3V
single- or double-sided synchronous DRAM (SDRAM). You
may install up to a maximum of 384 MB of system memory
into these sockets. For possible memory address
configurations, see the table “Memory map” on page A-1.
The following figure shows the location of the DIMM sockets
on the system board.
Installing memory modules
To install a DIMM:
1.
Open the clips on the socket.
2.
Align the DIMM with the socket.
3.
Press the DIMM into the socket until the clips lock into
the DIMM
.
Note:
The DIMM socket is slotted to ensure proper installation. If
you insert a DIMM but it does not fit easily into the socket,
you may have inserted it incorrectly. Turn the DIMM around
and try to insert it again.
v65xahb.book : chap-8.fm Page 5 Friday, January 16, 1998 4:27 PM
 Loading...


