Replacing a memory module
Notes:
v See “Installing a memory module” on page 34 for notes and information that
you must consider when you install DIMMs.
v Confirm that the server supports the DIMM that you are installing, see
http://www.ibm.com/systems/info/x86servers/serverproven/compat/us/.
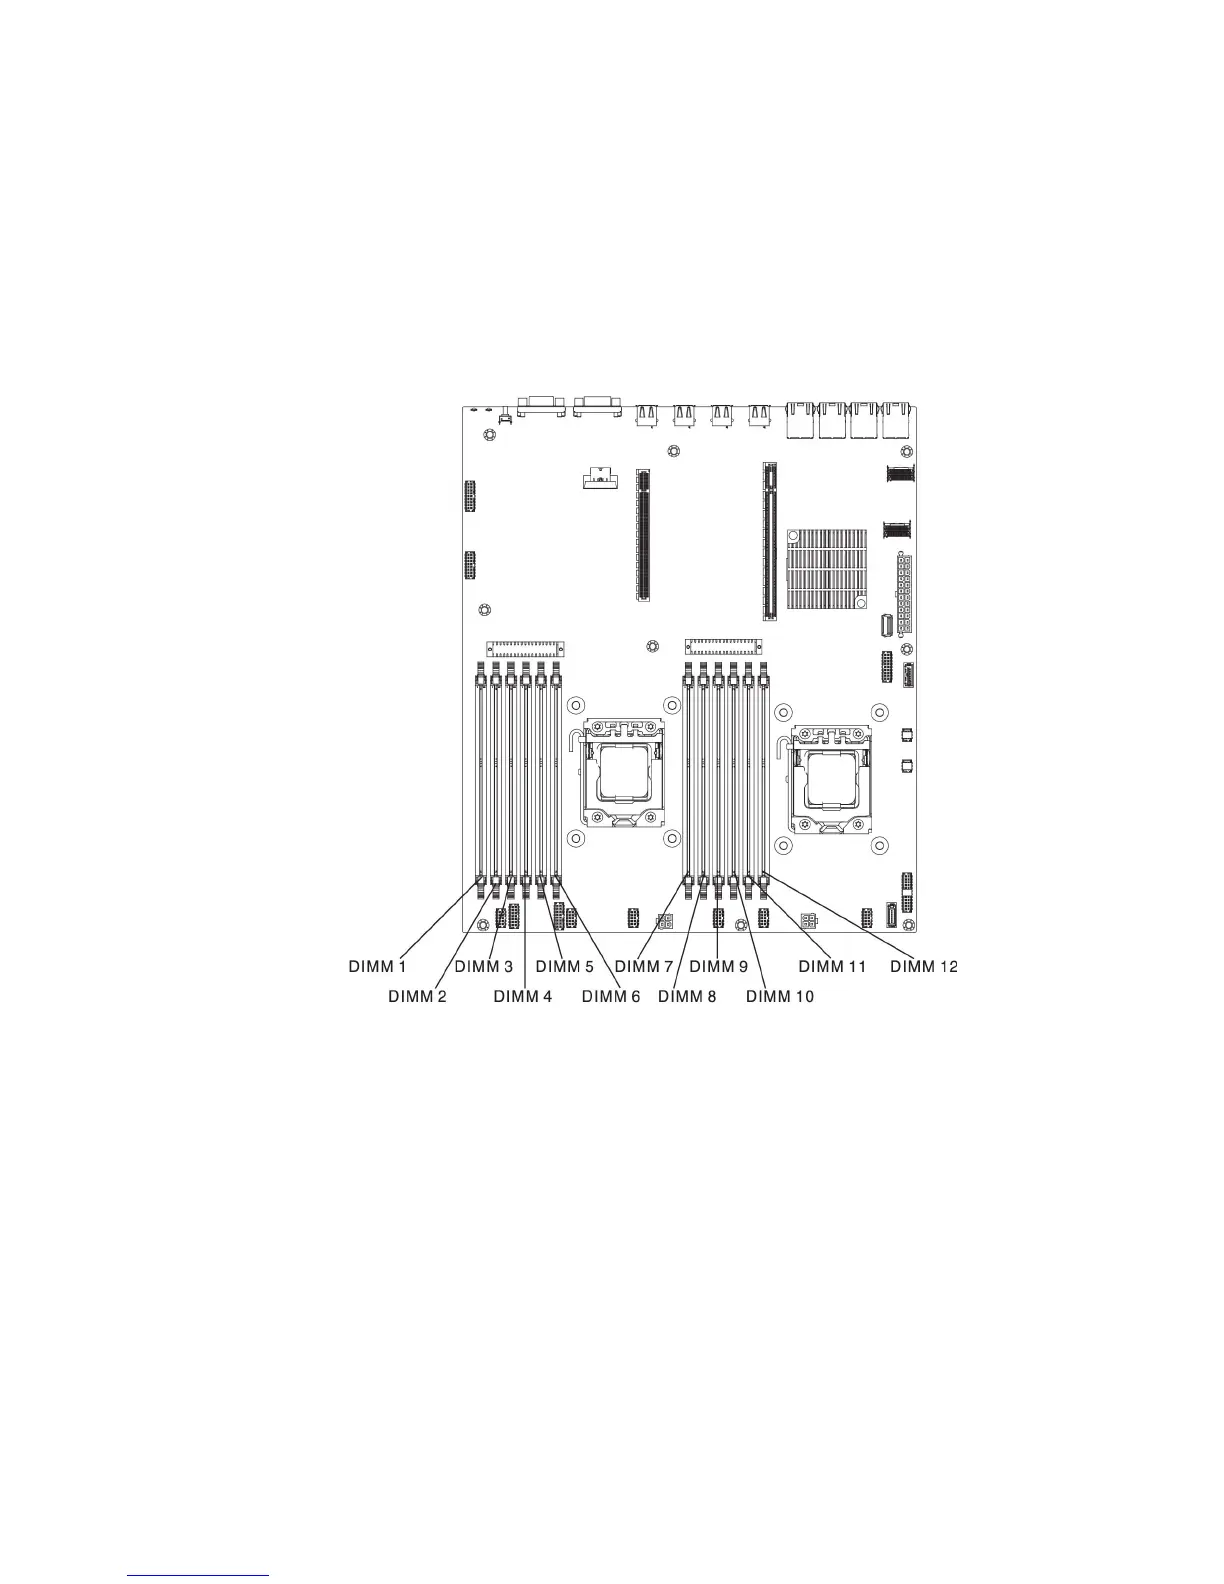
The following illustration shows the location of the DIMM connectors on the
system board.
To install a DIMM, complete the following steps:
1. Read the safety information that begins on page Safety and “Installation
guidelines” on page 30.
2. Turn off the server (see “Turning off the server” on page 21) and all attached
peripheral devices. Disconnect all power cords; then, disconnect all external
cables as necessary to replace the device.
3. Remove the top cover (see “Removing the server top cover” on page 362).
4. Touch the static-protective package that contains the DIMM to any unpainted
metal surface on the outside of the server. Then, remove the DIMM from the
package.
5. Open the retaining clip on each end of the DIMM connector.
Attention: To avoid breaking the retaining clips or damaging the DIMM
connectors, open and close the clips gently.
Chapter 6. Removing and replacing components 313
 Loading...