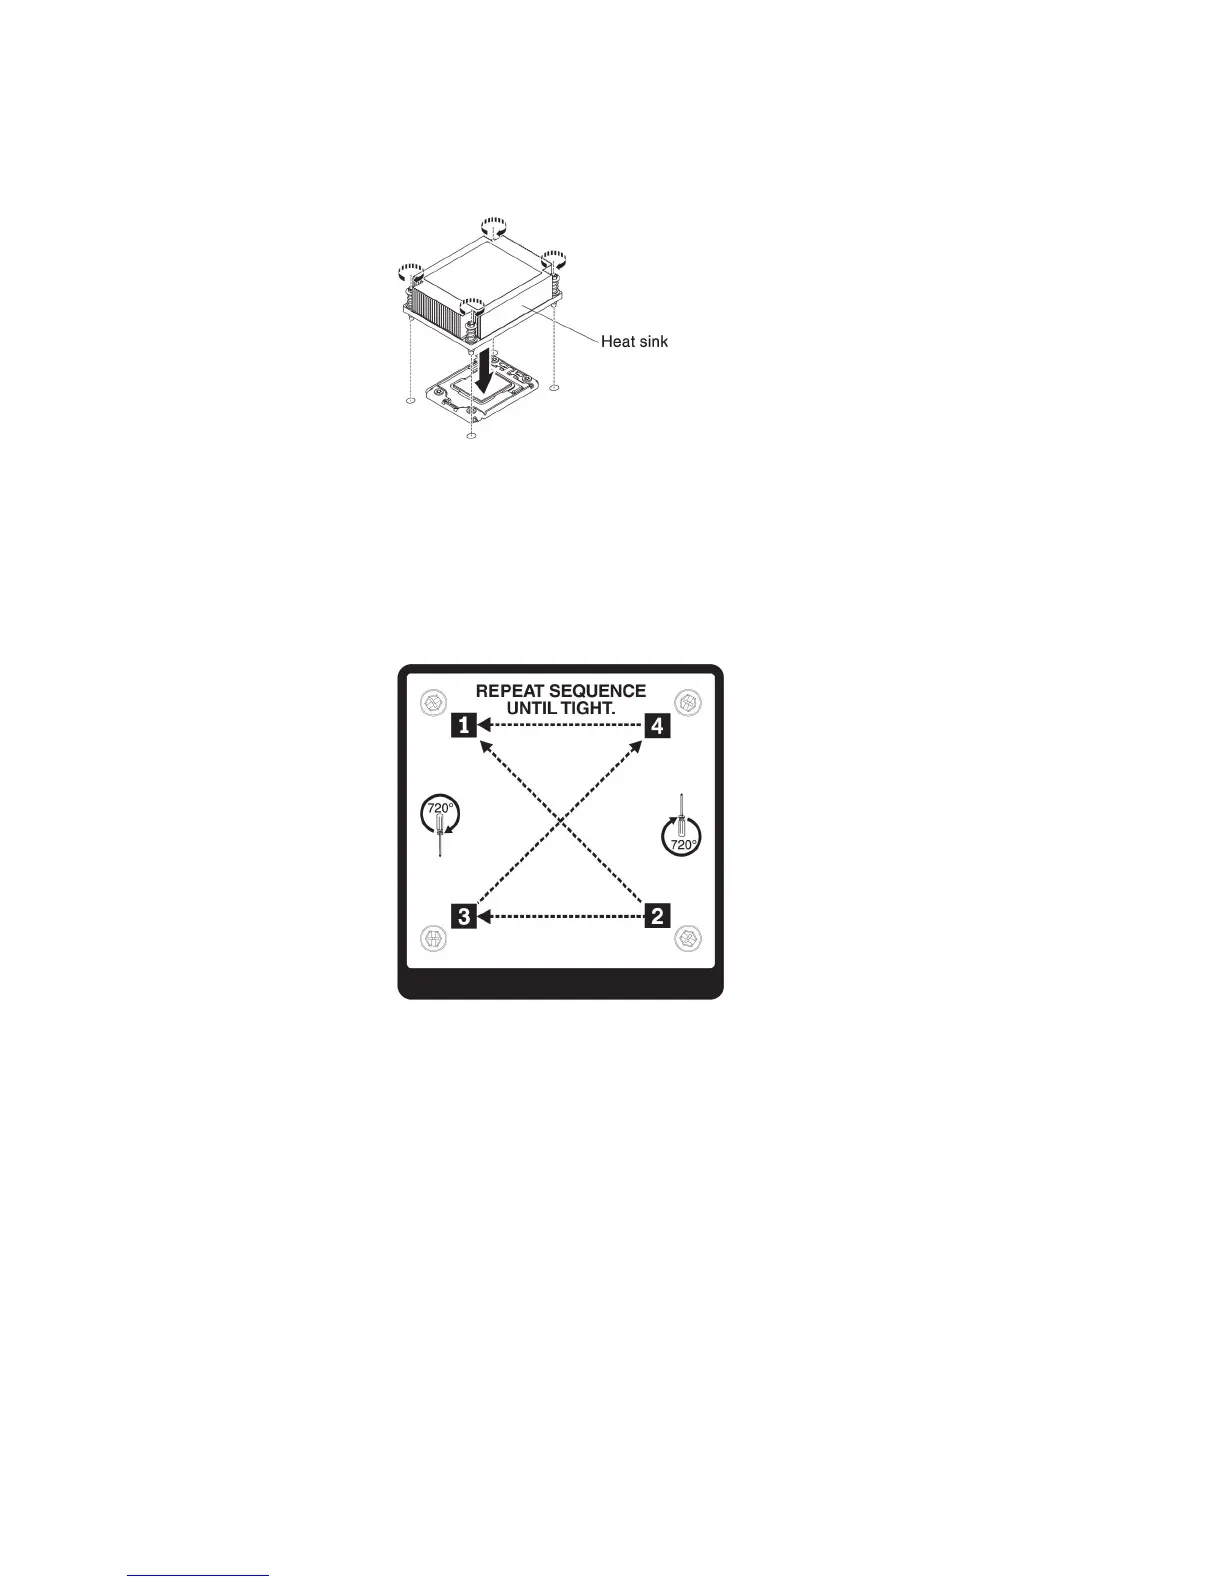
b. Align the screws on the heat sink with the screw holes on the system
board; then, place the heat sink on the microprocessor with the
thermal-grease side down.
c. Press firmly on the captive screws and tighten them with a screwdriver.
The follow illustration shows the sequence in tightening the screws, which
is also shown on top of the heat sink. Begin with the screw labeled as "1",
then "2", "3" and finally "4". If possible, each screw should be rotated two
full rotations at a time. Repeat until the screws are tight. Do not
overtighten the screws by using excessive force. If you are using a torque
wrench, tighten the screws to 8.5 Newton-meters (Nm) to 13 Nm (6.3
foot-pounds to 9.6 foot-pounds).
10. If you installed the second microprocessor, install the two fans on Fan
connector 4 and Fan connector 6 of the system board respectively (see
Replacing a hot-swap fan assembly).
11. Reinstall the air baffle, (see Replacing the microprocessor air baffle).
12. Reconnect any cables that you have disconnected from the adapters or system
board.
If you have other devices to install or remove, do so now. Otherwise, go to
“Completing the installation” on page 65.
54 System x3530 M4 Type 7160: Installation and Service Guide
 Loading...