To install a hot-swap ac power supply, complete the following steps:
1. Read the safety information that begins vii and “Installation guidelines” on page
167.
2. Touch the static-protective package that contains the hot-swap power supply to
any unpainted metal surface on the server; then, remove the power supply from
the package and place it on a static-protective surface.
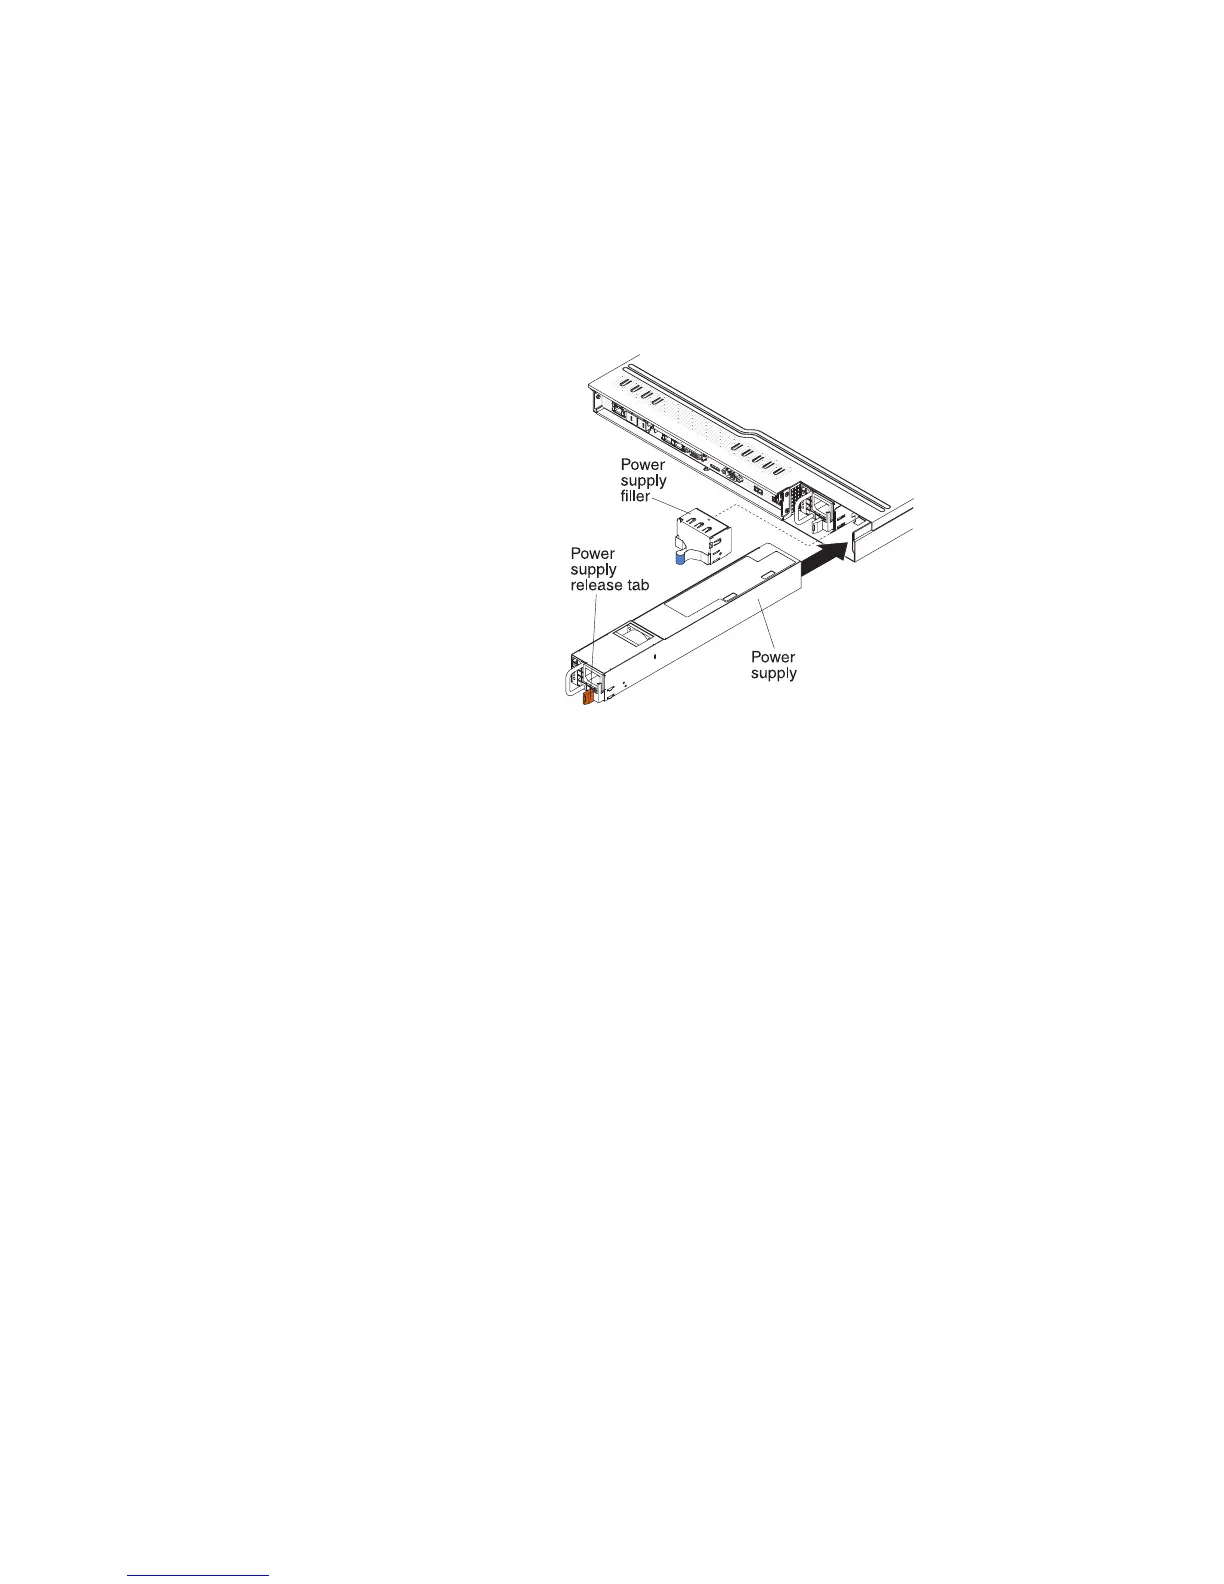
3. If you are installing a hot-swap power supply into an empty bay, remove the
power-supply filler panel from the power-supply bay.
4. Grasp the handle on the rear of the power supply and slide the power supply
forward into the power-supply bay until it clicks. Make sure that the power
supply connects firmly into the power-supply connector.
5. Route the power cord through the handle so that it does not accidentally
become unplugged.
6. Connect the power cord for the new power supply to the power-cord connector
on the power supply.
7. Connect the other end of the power cord to a properly grounded electrical
outlet.
8. Make sure that the ac power LED and the dc power LED on the ac power
supply are lit, indicating that the power supply is operating correctly. The two
green LEDs are to the right of the power-cord connector.
Removing a hot-swap fan assembly
Attention: To ensure proper server operation, replace a failed hot-swap fan within
30 seconds.
To remove a hot-swap-fan, complete the following steps:
1. Read the safety information that begins on page “Safety” on page vii and
“Installation guidelines” on page 167.
2. Remove the cover (see “Removing the cover” on page 174).
Chapter 5. Removing and replacing server components 213
 Loading...


