a. Clean the grease from the heat sink and apply new grease on the
microprocessor.
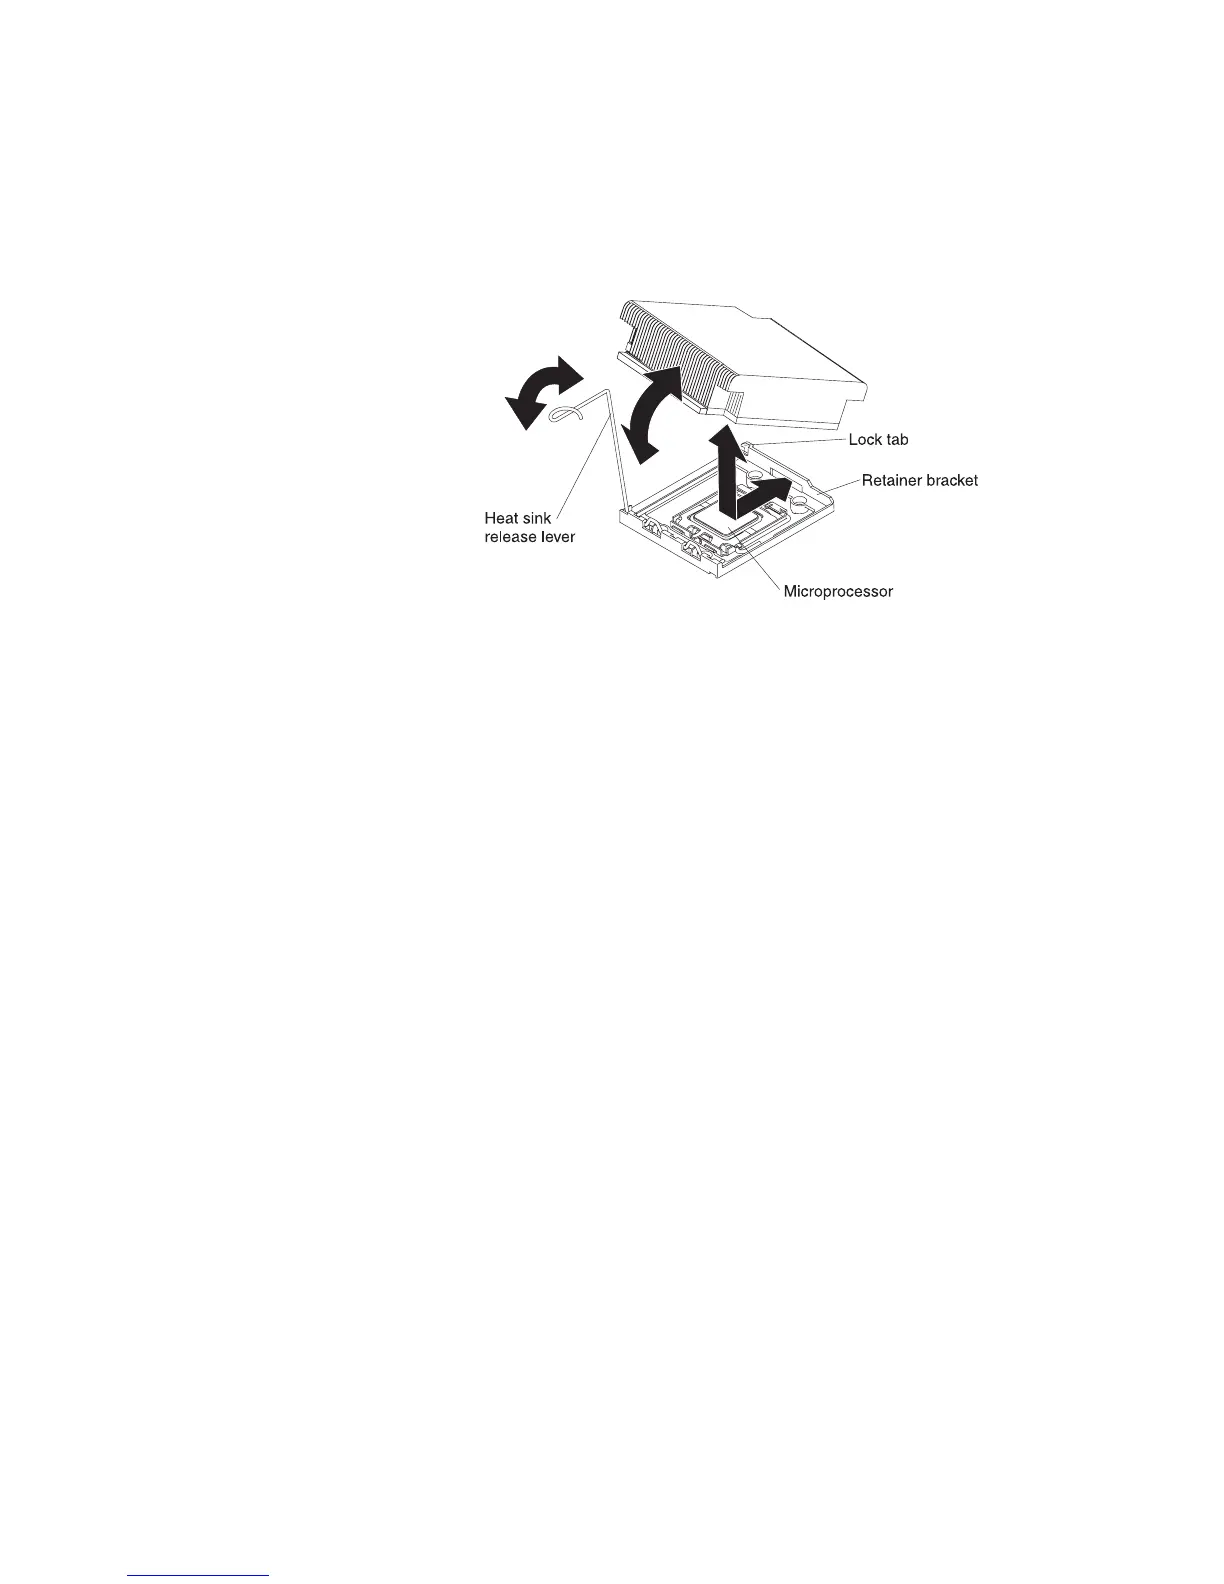
b. Align the heat sink on top of the microprocessor.
c. Lower the rear flange of the heat sink into the opening in the retainer
bracket and press down firmly on the front of the heat sink until it is seated
securely.
d. Rotate the heat-sink release lever to the closed position and hook it
underneath the lock tab.
4. If you installed the second microprocessor, install the sixth fan (see “Installing a
hot-swap fan assembly” on page 215).
5. If you removed the microprocessor 2 air baffle, install it (see “Installing the
microprocessor 2 air baffle” on page 176).
Thermal grease
The thermal grease must be replaced whenever the heat sink has been removed
from the top of the microprocessor and is going to be reused or when debris is
found in the grease.
When you are installing the heat sink on the same microprocessor that is was
removed from, make sure that the following requirements are met:
v The thermal grease on the heat sink and microprocessor is not contaminated.
v Additional thermal grease is not added to the existing thermal grease on the heat
sink and microprocessor.
Note:
v Read the Safety information on page vii.
v Read the “Installation guidelines” on page 167.
v Read “Handling static-sensitive devices” on page 169.
To replace damaged or contaminated thermal grease on the microprocessor and
heat sink, complete the following steps:
1. Place the heat sink on a clean work surface.
2. Remove the cleaning pad from its package and unfold it completely.
3. Use the cleaning pad to wipe the thermal grease from the bottom of the heat
sink.
Note: Make sure that all of the thermal grease is removed.
4. Use a clean area of the cleaning pad to wipe the thermal grease from the
microprocessor; then, dispose of the cleaning pad after all of the thermal grease
248 IBM System x3550 M3 Types 4254 and 7944: Problem Determination and Service Guide
 Loading...


