– 16 –
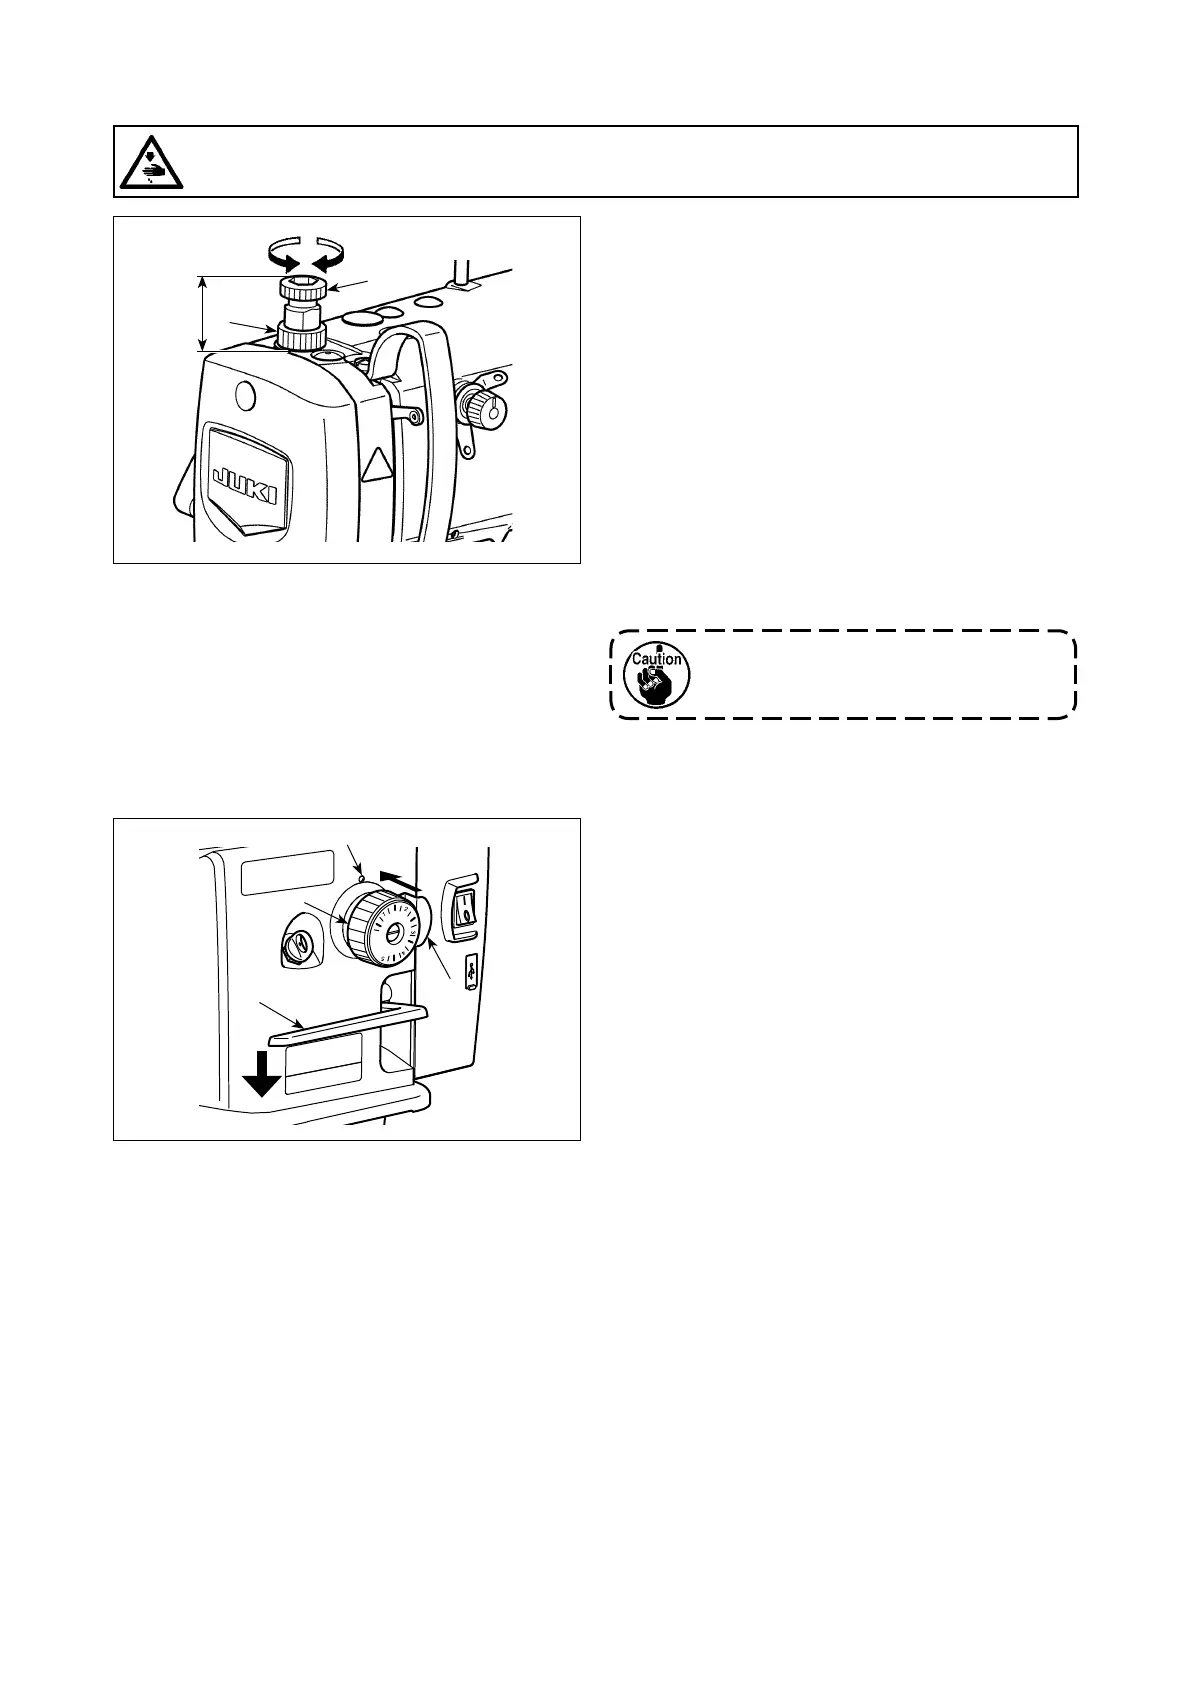
3-6. Presser foot pressure
WARNING :
Turn OFF the power before starting the work so as to prevent accidents caused by abrupt start of the
sewing machine.
1) Loosen nut
❷
. As you turn presser spring regula-
tor
❶
clockwise (in direction
A
), the presser foot
pressure will be increased.
2) As you turn the presser spring regulator
❶
count-
er-clockwise (in direction
B
), the pressure will be
decreased.
3) After adjustment, tighten nut
❷
.
The standard value of the height
C
of presser spring
regulator
❶
is as follows :
• S type : 31.5 to 29 mm
(approx. 40 to 45 N / 4 to 4.5 kg)
• H type : 31.5 to 28 mm
(approx. 50 to 60 N / 5 to 6 kg)
AB
C
❶
❷
To avoid personal injury, never put your
ngers under the presser foot.
* The dial calibration is in millimeters.
1) Turn stitch length dial
❶
in the direction of the
arrow, and align the desired number to marker dot
A
on the machine arm.
2) To change over the feed scale mark from "large"
to "small", turn stitch dial
❶
while pressing feed
lever
❷
in the direction of the arrow and pressing
stopper
❸
in the direction of arrow
B
(toward the
back of the arm).
3)
To change over the feed scale mark from "small" to
"large", turn stitch dial
❶
while pressing stopper
❸
in the direction of arrow
B
(toward the back of the
arm).
4) Release stopper
❸
to x stitch dial
❶
.
3-7. Adjusting the stitch length
A
B
❸
❶
❷

 Loading...


