– 18 –
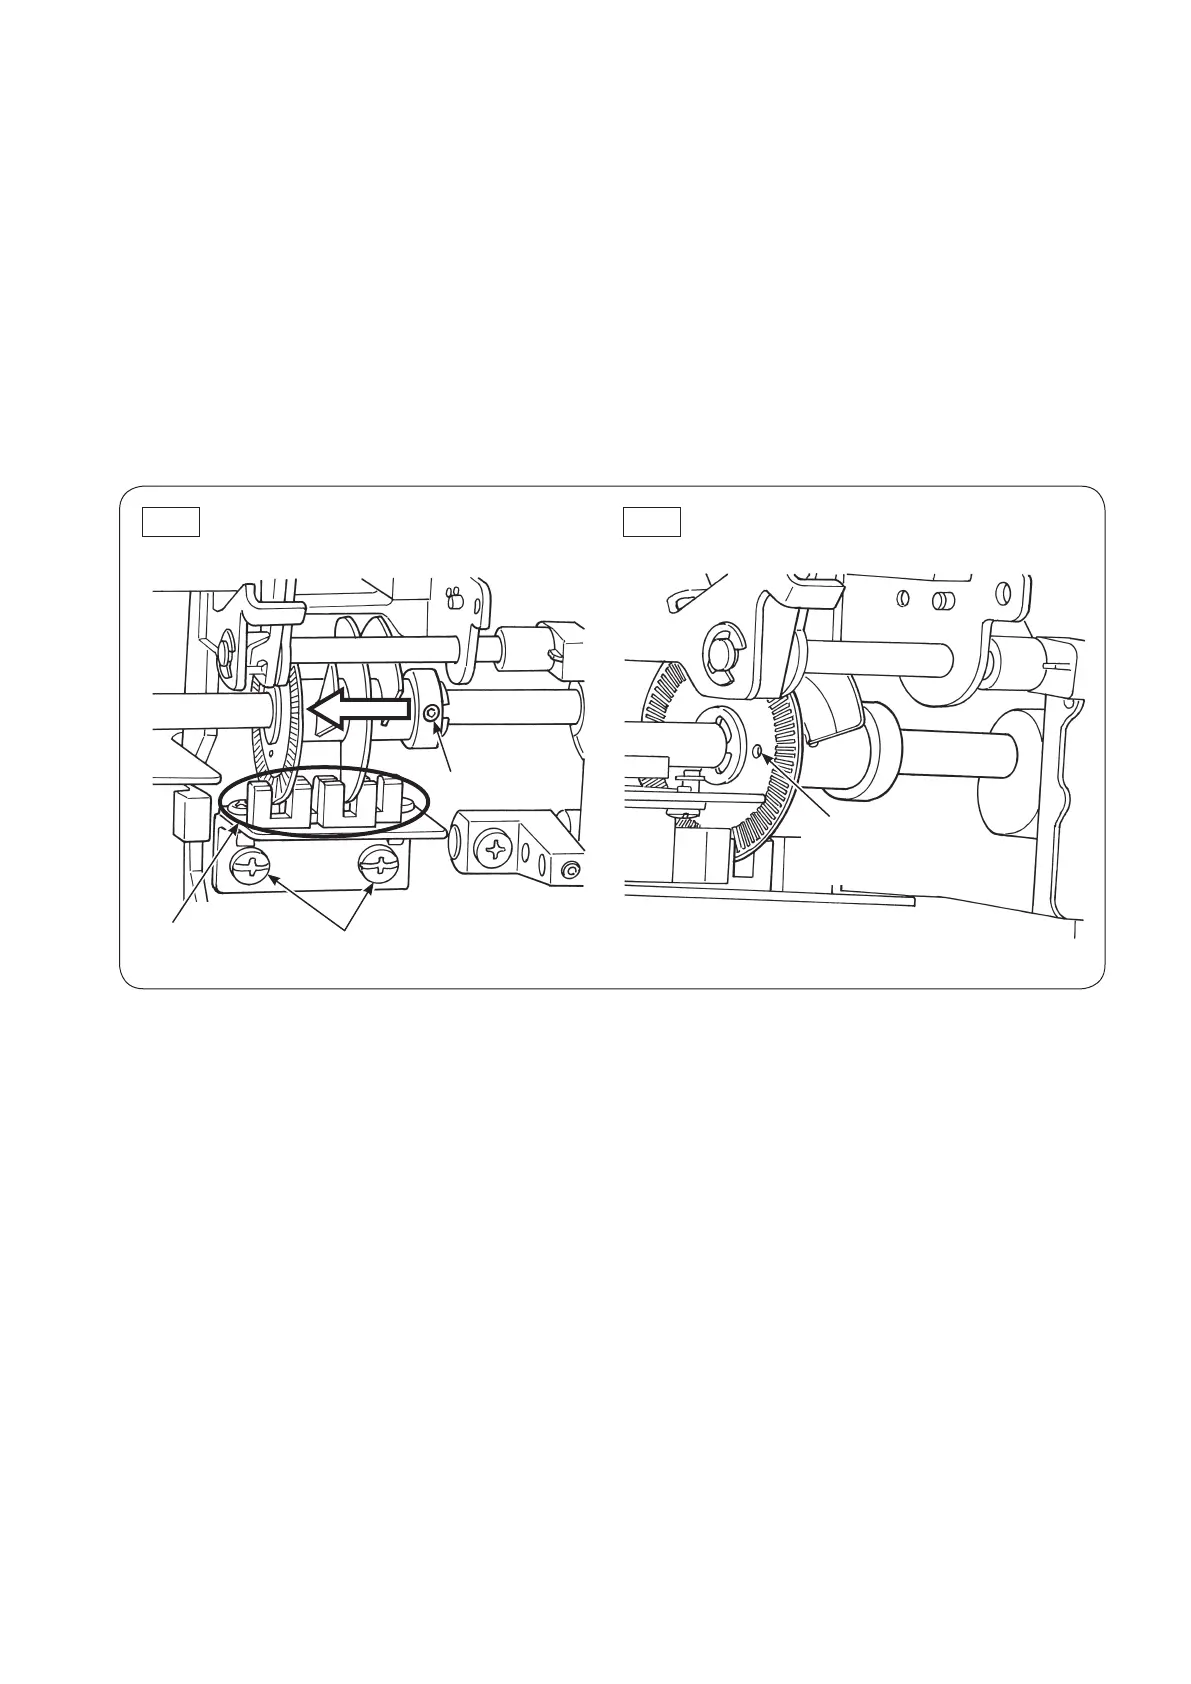
6-6 Adjusting the shield
○
Carryouttheadjustmentoftheshieldafteryouhavecheckedthefeedtiming.
Adjustmentprocedure
1. Loosen the setscrew of the shield collar. (Fig. 1)
2.Turnthehandwheeltobringtheneedlebartoitslowestdeadpoint.
3.Intheaforementionedstate,adjustsothatthemarkingholeintheshieldisbroughttothelowestposition.
Then, tighten the setscrew of the collar. (Fig. 2)
(Caution) After tightening the setscrew, check to make sure that the shield does not come in contact with
the sensor.
If the former comes in contact with the latter, loosen the sensor setscrew and adjust the lateral
position of the sensor.
Fig.1 Fig.2
When the needle bar is brought
to its lower dead point
Turn the marking
hole directly
downward.
Install the shield while eliminating
the lateral backlash by pressing it in
the direction of the arrow.
Setscrew
Sensor
Sensor setscrew
 Loading...