Optional Accessories
Product Name Description
Battery Pack
●
BN-VG114E
●
BN-VG121E
●
Provides a longer recording time than the bat-
tery pack that comes with this unit. It can also
be used as a spare battery pack.
Battery Charger
●
AA-VG1
●
Enables the battery pack to be charged with-
out using this unit.
DVD Writer
●
CU-VD3
(GZ-HM350/GZ-
HM330)
●
Enables the images recorded on this unit to be
copied to a DVD without using a PC.
DVD Writer
●
CU-VD50
(GZ-HM350/GZ-
HM330)
●
Creates DVDs and functions as an external
DVD drive when connected to a PC. In addi-
tion, created DVDs can be played back by
connecting the CU-VD50 to a TV.
Component Cable
●
QAM1266-001
●
For viewing in high picture quality.
USB Cable
●
QAM0852-001
(GZ-HM350/GZ-
HM330)
●
Connects this unit to a BD writer or a recom-
mended USB external hard disk drive (see ta-
ble below).
Seagate FreeAgent™ Desk series
LaCie Design by Neil Poulton series
Memo:
●
For more information, refer to the catalog.
●
BN-VG114E is the same battery pack that comes with this unit.
Approximate Recording Time (Using Battery)
Battery
Pack
Actual Re-
cording
Time
(GZ-
HM350/GZ-
HM330)
Actual Re-
cording
Time
(GZ-
HM300)
Continuous
Recording
Time
(GZ-HM350/
GZ-HM330)
Continuous
Recording
Time
(GZ-
HM300)
BN-
VG114E
(Supplied)
55 m 1 h 1 h 40 m 1 h 45 m
BN-
VG121E
1 h 25 m 1 h 30 m 2 h 30 m 2 h 40 m
●
The above are values when “LIGHT” is set to “OFF” and “LCD BACK-
LIGHT” is set to “STANDARD”.
●
The actual recording time may be shorter if zooming is used or if re-
cording is stopped repeatedly.
(It is recommended to prepare battery packs ready for three times the
expected recording time.)
●
When the battery life is reached, the recording time becomes shorter
even if the battery pack is fully charged.
(Replace the battery pack with a new one.)
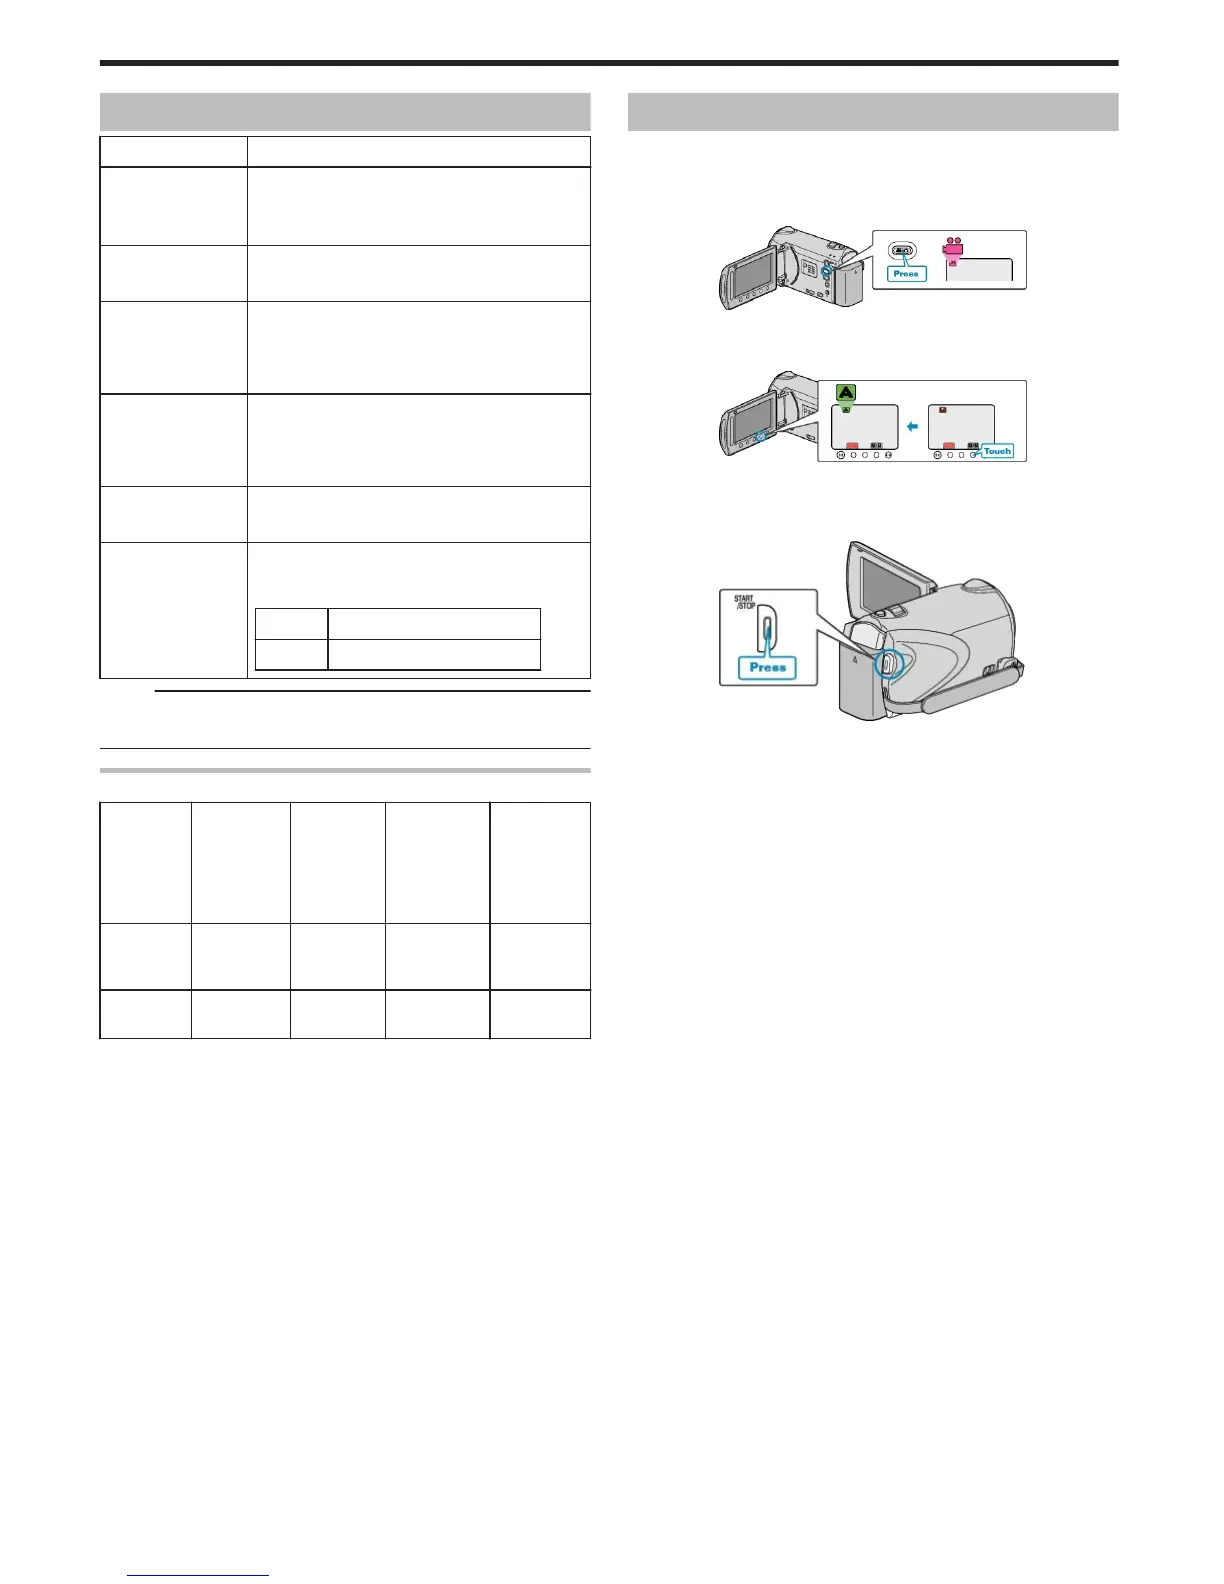
Taking Videos in Auto Mode
You can record without worrying about the setting details by using the au-
to mode.
1
Open the LCD monitor and select the video mode.
(Open the lens cover for GZ-HM300.)
.
●
The video mode icon appears.
2
Check if the recording mode is Auto.
.
●
If the mode is Manual, touch the G/H button.
The mode changes between Auto and Manual with every touch.
3
Start recording.
.
●
Press again to stop.
Getting Started
20
 Loading...