1-26 (No.MB385)
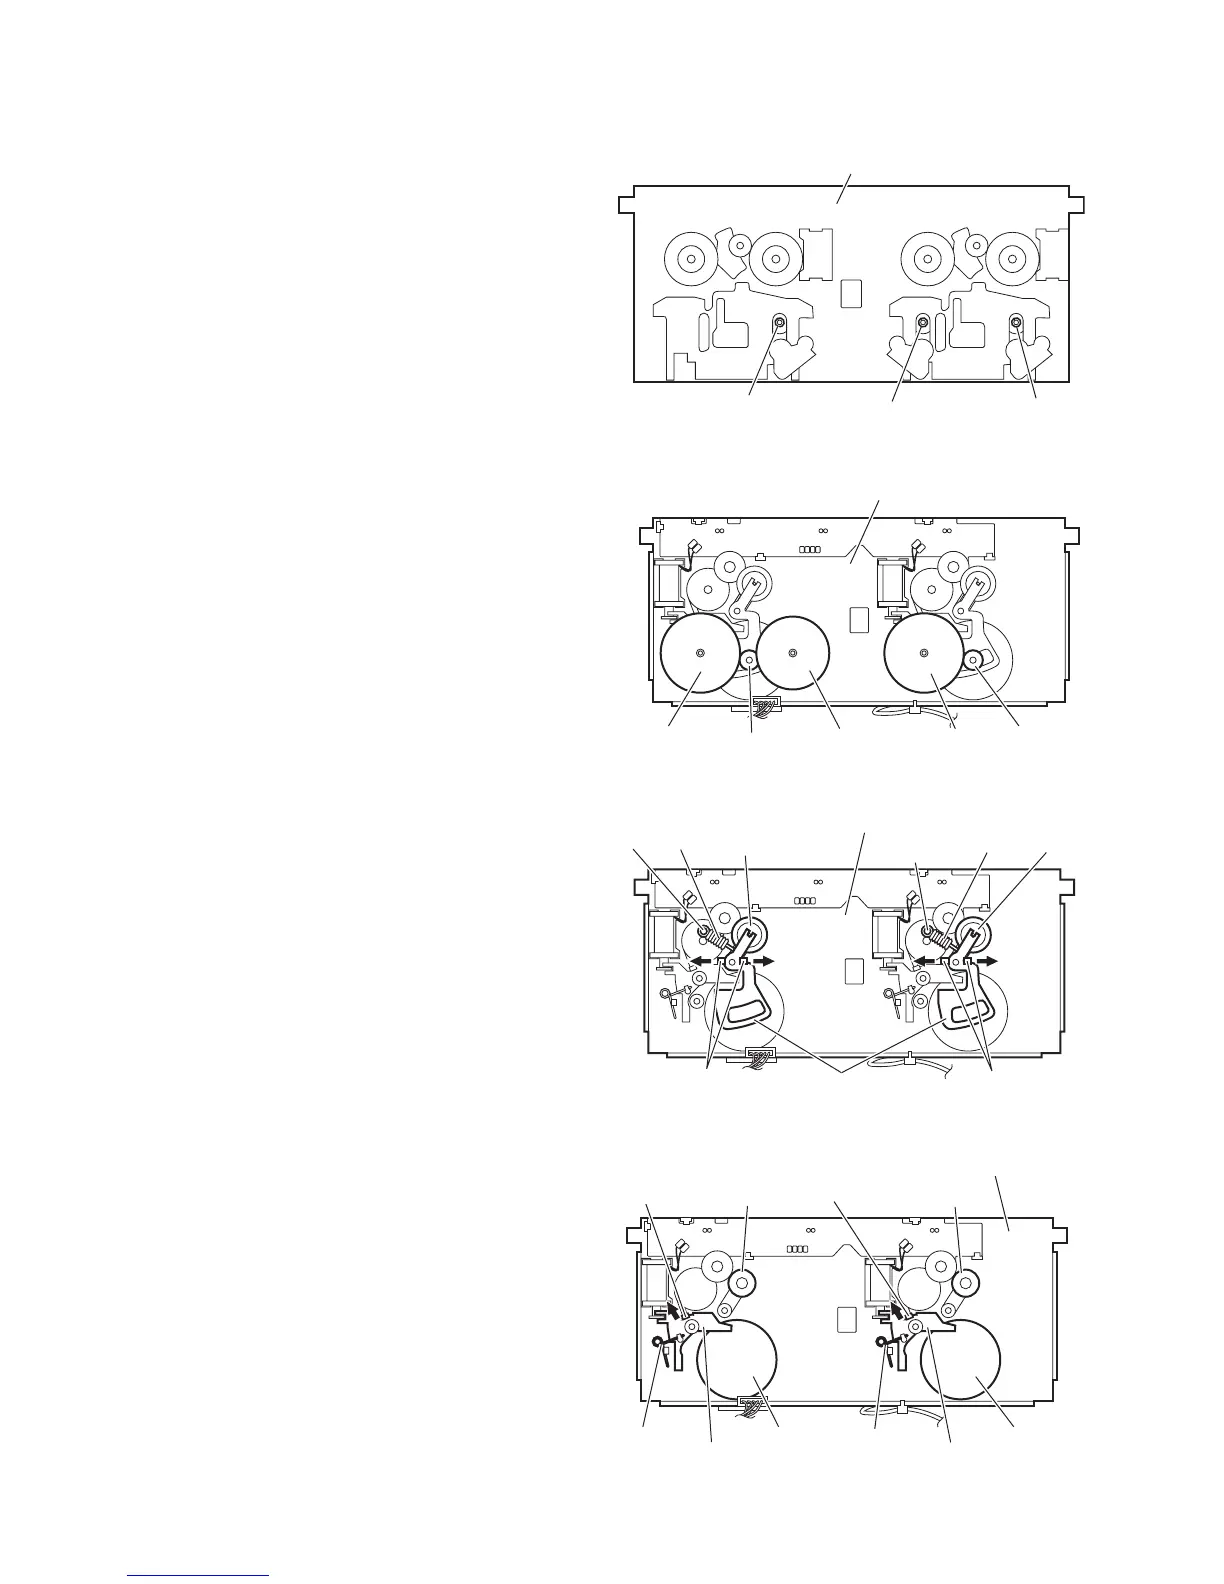
3.3.3 Removing the clutch assemblies
(See Figs.4 to 7)
• Prior to performing the following procedures, remove the main
motor, main belts and F/R belts.
• Remove the wires of the main motor as required.
(1) From the front side of the cassette mechanism assembly,
remove the three slit washers attaching the flywheel 1, fly-
wheel 2 and flywheel 3. (See Fig.4.)
(2) From the back side of the cassette mechanism assembly,
pull out the flywheel 1, flywheel 2 and flywheel 3. (See
Fig.5.)
(3) Remove the stoppers in an upward direction. (See Fig.5.)
(4) Remove the springs from the sections b. (See Fig.6.)
(5) Release the claws c in the direction of the arrow, remove
the plates and pulleys. (See Fig.6.)
(6) Release the claws d in the direction of the arrow, remove
the guide arms. (See Fig.7.)
Note:
When attaching the guide arms, attach the springs with
them as before. (See Fig.7.)
(7) Remove the cam gears in an upward direction. (See Fig.7.)
(8) Take out the clutch assemblies from the cassette mecha-
nism assembly. (See Fig.7.)
Fig.4
Fig.5
Fig.6
Fig.7
Cassette mechanism assembly
Slit washer
Slit washer
Slit washer
Flywheel 2
Flywheel 1
Cassette mechanism assembly
Flywheel 3
Stopper
Stoppe
Plates
Cassette mechanism assembly
c
b
b
Spring
Spring
Pulley
Pulley
c
Cam gearCam gear
Guide arm
Guide arm
Spring
Spring
Cassette mechanism assembly
Clutch assemblyClutch assembly
d
d

 Loading...