(No.MB368)1-23
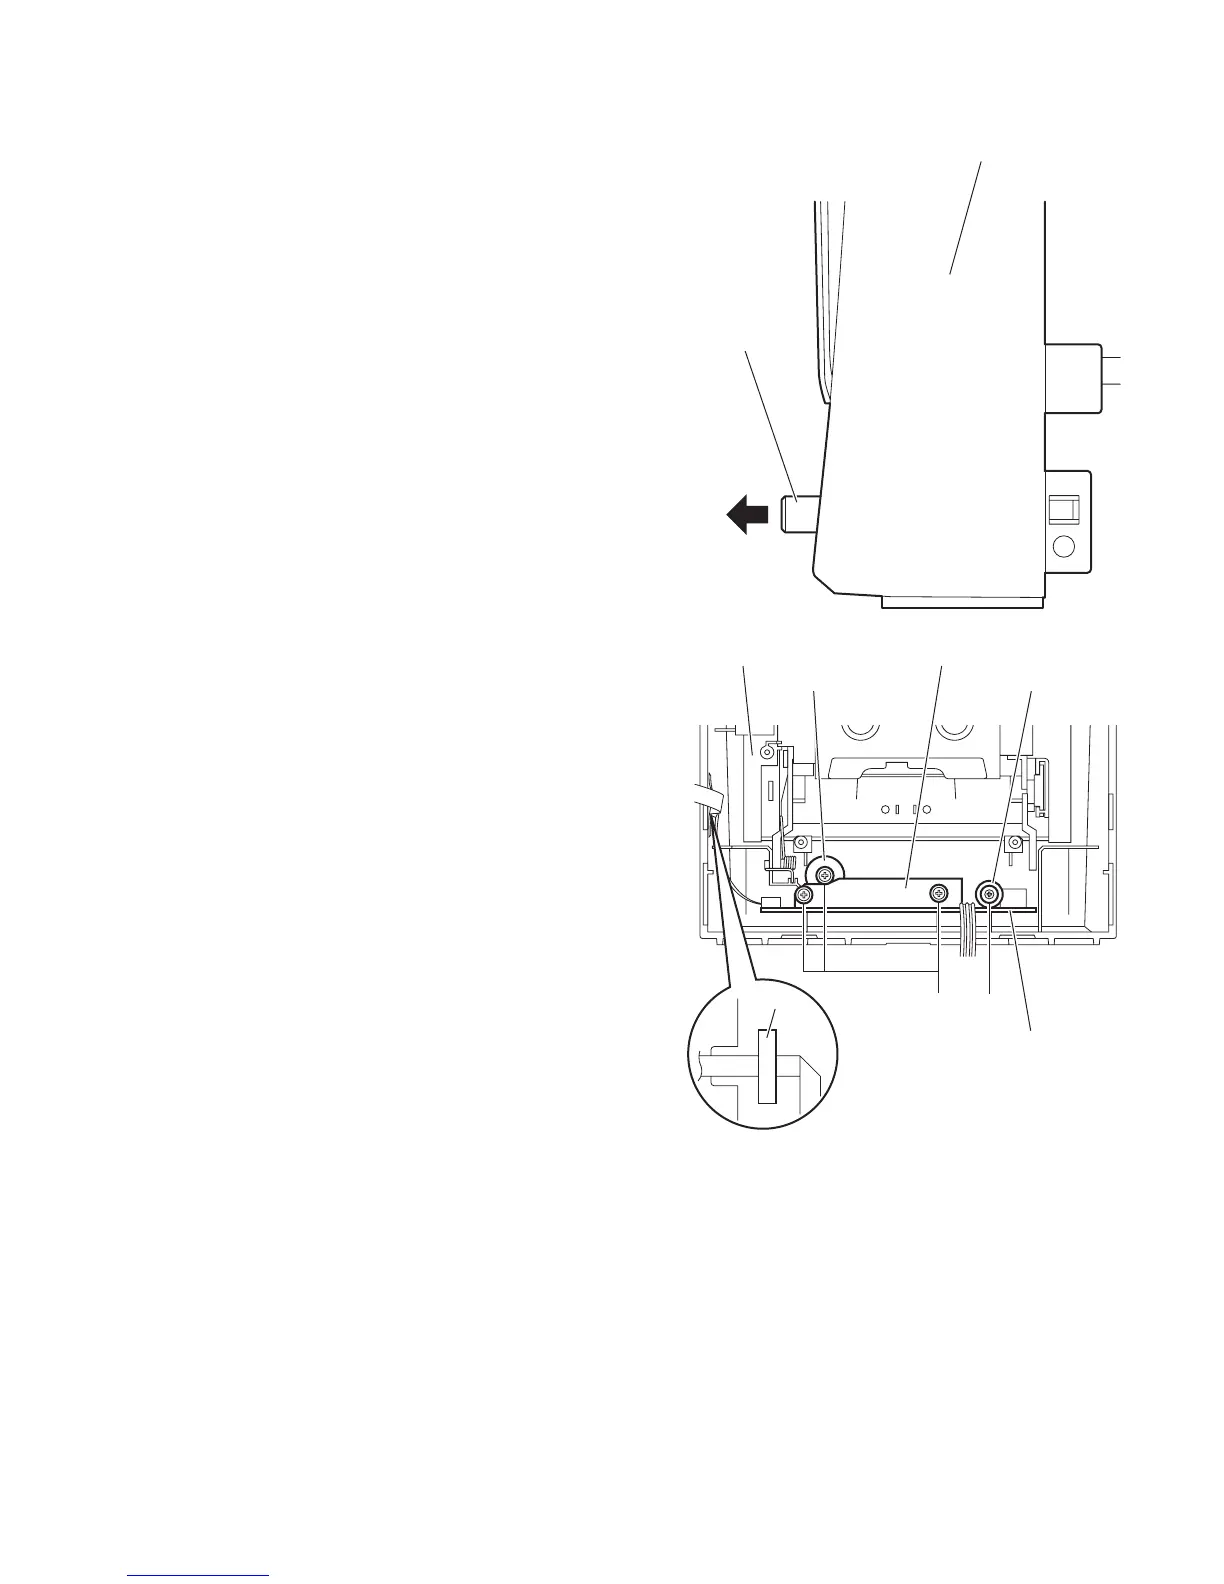
3.1.19 Removing the microphone amplifier board
(See Figs.26 and 27)
• Remove the metal cover, front panel assembly and cassette B
mechanism assembly.
(1) From the front side of the front panel assembly, pull out the
microphone volume knob. (See Fig.26.)
(2) From the inside of the front panel assembly, remove the
two screws Y and remove the support 1 board. (See
Fig.27.)
(3) Remove the screw Y and remove the support 2 board.
(See Fig.27.)
(4) Remove the screw Z and remove the support 3 board. (See
Fig.27.)
(5) Take out the microphone amplifier board from the front
panel assembly.
Reference:
After attaching the microphone amplifier board, fix the card
wire with the spacer as before.
Fig.26
Fig.27
Front panel assembly
Microphone
volume knob
Support 3 boardSupport 2 board
Spacer
Front panel assembly Support 1 board
Microphone amplifier board
Y Z
 Loading...