(No.MB368)1-43
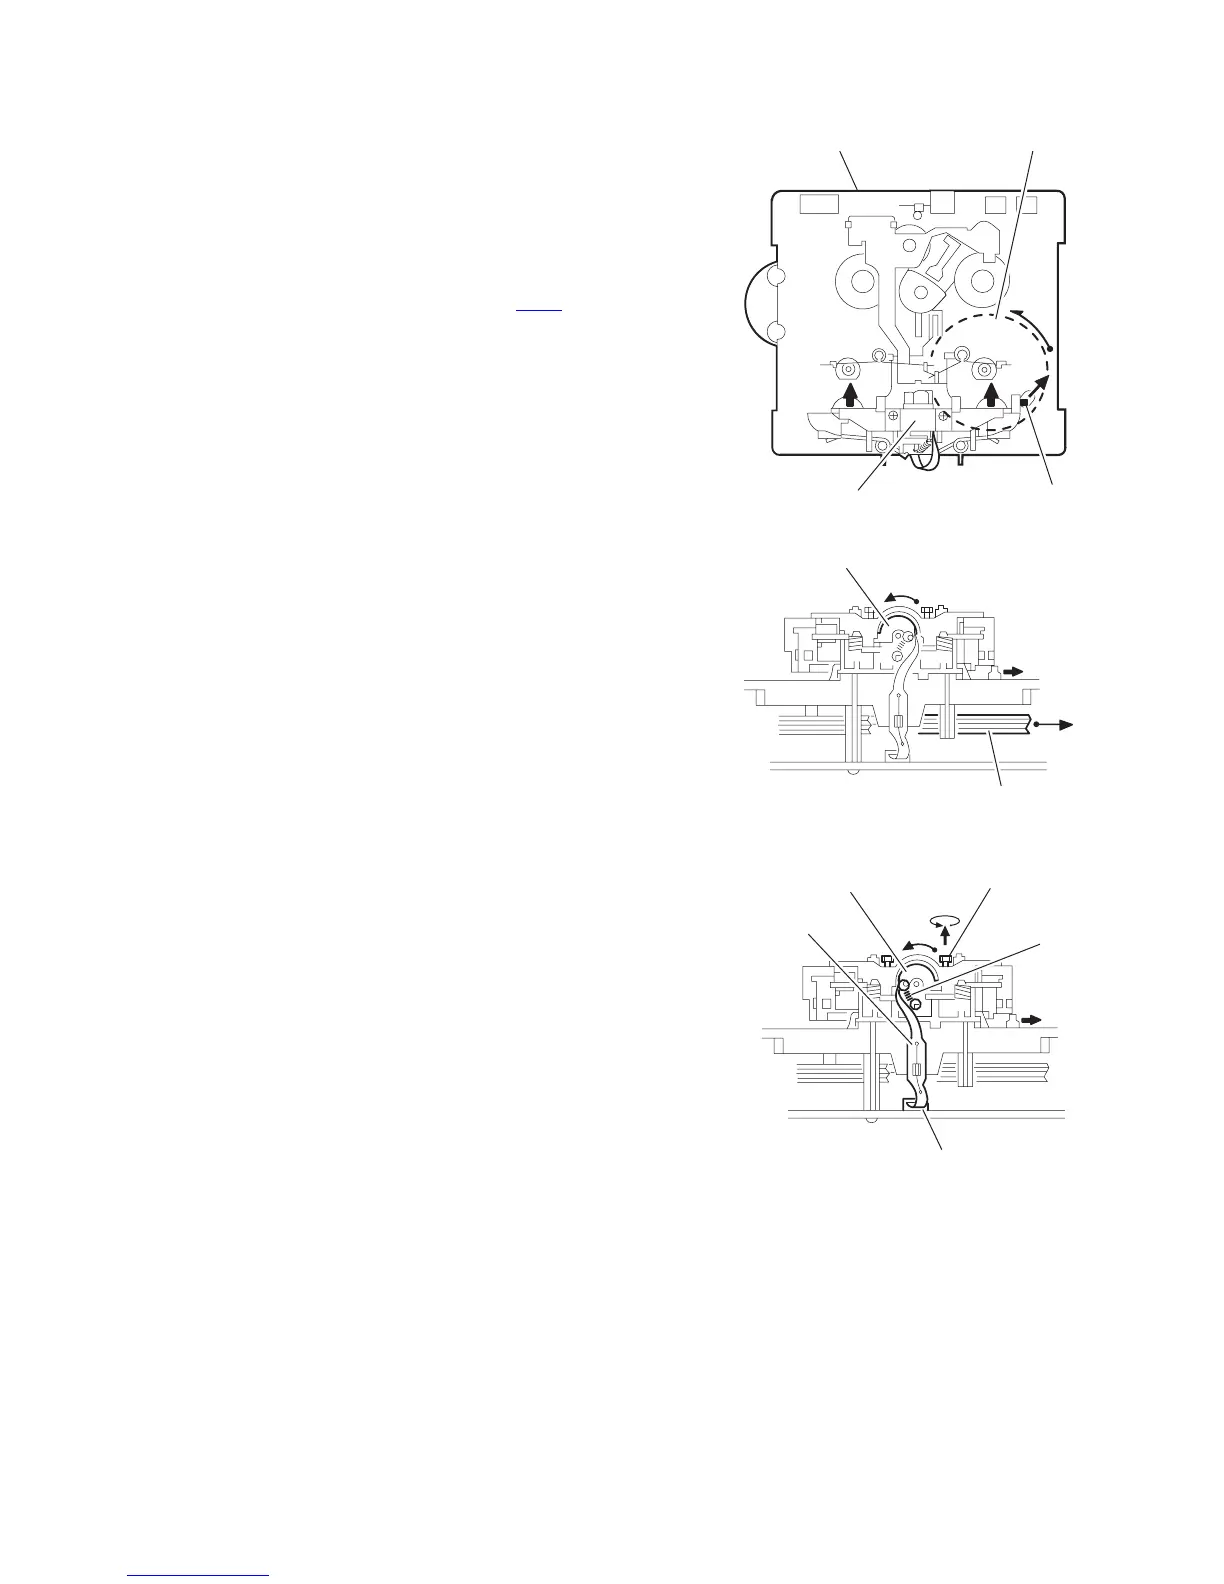
3.4 Cassette mechanism assembly [B MECHA]
3.4.1 Removing the Play/Record & Clear head
(See Fig.1~3)
(1) While moving the trigger arm on the right side of the head
mount in the direction of the arrow, turn the flywheel R
counterclockwise until the head mount comes ahead and
clicks.
(2) The head turns counterclockwise as you turn the flywheel
R counterclockwise (See Fig.2 and 3).
(3) Disconnect the flexible wire from connector CN31
on the
head amplifier & mechanism control board.
(4) Remove the spring from the back of the head.
(5) Loosen the azimuth screw for reversing attaching the head.
(6) Remove the head on the front side of the head mount.
Fig.1
Fig.2
Fig.3
Cassette mechanism assembly
Fly wheelR
Trigger armHead mount
Head
Fly wheel R
Azimuth screw
for reversing
Flexible wire
Spring
CN31
Head amplifer & mecha control board
Head
 Loading...