Step 1 Testmode STOP state [ t s m e ]
Step 2
Press the ENTER button five times.
MANUAL auxiliary adjustment mode [ _ M N U _ Y O B I _ ]
Step 3 Press once the MD PLAY button. Initial setting → Temperature measuring mode [ T M P : _ _ _ _ ]
Step 4 Press once the ENTER button. Offset "0" setting → A signal offset tentative measurement [ H A o : _ _ _ ]
Step 5 Press once the ENTER button. B signal offset tentative measurement [ H B o : _ _ _ ]
Step 6 Press once the ENTER button. E signal offset tentative measurement [ H E o : _ _ _ ]
Step 7 Press once the ENTER button. F signal offset tentative measurement [ H F o : _ _ _ ]
Step 8 Press once the ENTER button. Offset tentative measurement → Laser ON [ L O N : _ _ _ _ _ _ ]
Step 9 Press once the ENTER button. Innermost periphery move → RF side FG rough adjustment [ R F g : _ _ ]
Step 10 Press once the ENTER button. Focus ATT (A signal) tentative setting [ S A g : ]
Step 11 Press once the ENTER button. Focus ATT (B signal) tentative setting [ S B g : ]
Step 12 Press once the ENTER button. RF side pit section TG adjustment [ P T G : _ _ ]
Step 13 Press once the ENTER button. Pit section COUT level setting [ P C H : _ ]
Step 14 Press once the ENTER button. Outer periphery move → RF side groove TG adjustment [ G T G : _ _ ]
Step 15 Press once the ENTER button. Groove section COUT level setting [ G C H : _ ]
Step 16 Press once the ENTER button. RF side TCRS adjustment [ R C G : _ _ ]
Step 17 Press once the ENTER button. Tracking ATT (A signal) setting [ S E G : ]
Step 18 Press once the ENTER button. Tracking ATT (B signal) setting [ S F G : ]
Step 19 Press once the ENTER button. Indication of tracking EFMIO measurement [ g M I : _ _ _ ]
Step 20 Press once the ENTER button. RF side pit section FG adjustment [R F G : _ _ ]
Step 21 Press once the ENTER button. Focus ATT (A signal) setting [ S A G : ]
Step 22 Press once the ENTER button. Focus ATT (B signal) setting [ S B G : ]
Step 23 Press once the ENTER button. Offset "0" setting → A signal offset measurement [ H A O : _ _ _ ]
Step 24 Press once the ENTER button. B signal offset measurement [ H B O : _ _ _ ]
Step 25 Press once the ENTER button. E signal offset measurement [ H E O : _ _ _ ]
Step 26 Press once the ENTER button. F signal offset measurement [ H F O : _ _ _ ]
Step 27 Press once the ENTER button. TCRS signal offset measurement [ T C O : _ _ _ ]
Step 28 Press once the ENTER button. A signal offset measurement [ L A O : _ _ _ ]
Step 29 Press once the ENTER button. B signal offset measurement [ L B O : _ _ _ ]
Step 30 Press once the ENTER button. E signal offset measurement [ L E O : _ _ _ ]
Step 31 Press once the ENTER button. F signal offset measurement [ L F O : _ _ _ ]
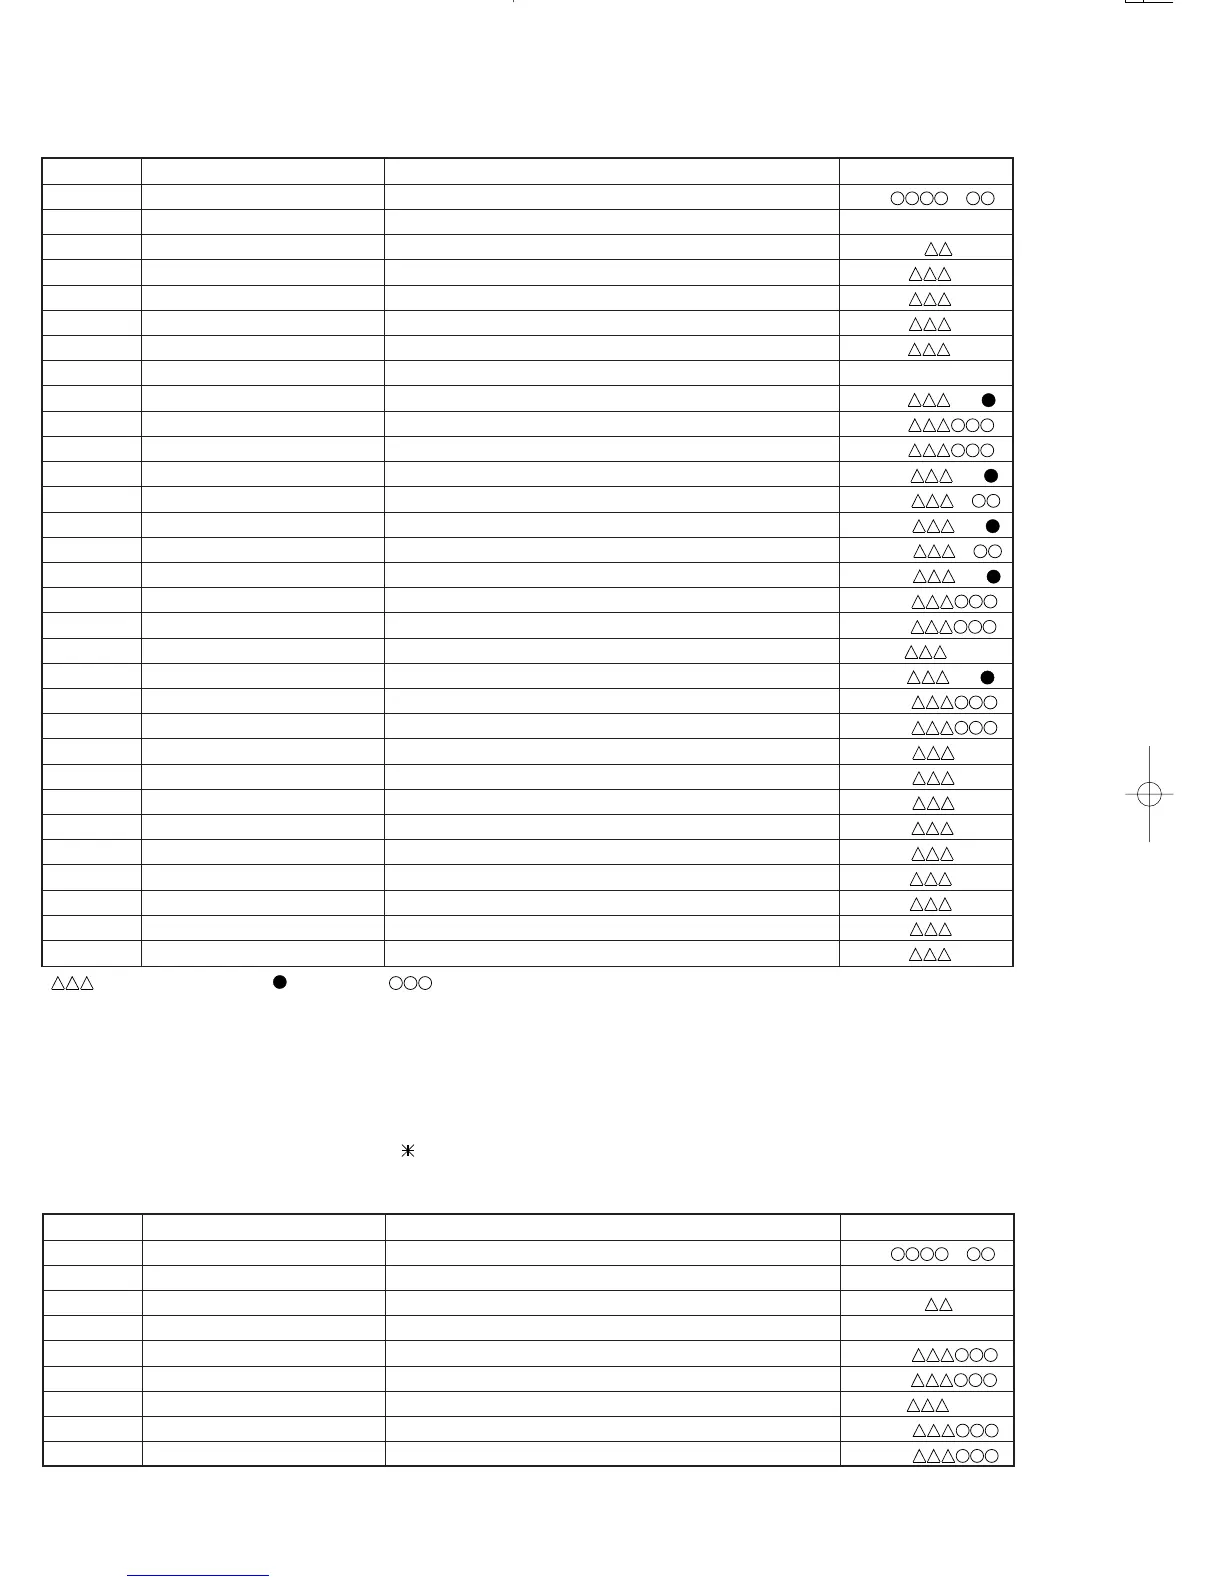
5. MANUAL auxiliary adjustment mode (only low reflection disc)
Step No.
Setting Method
Remarks Display
•
: Measurement value, : Set value, : Account value
• If the jog key upward/downward is pressed during setting indication, the setting increases/decreases, and the new setting is stored in RAM.
• If the REC button is pressed, the setting returns step by step excepting the following case.
A signal offset (HAO) → Offset tentative setting → RF side FG adjustment (RFG)
RF side TCRS adjustment (RCG) → RF side groove TG adjustment (GTG)
RF side groove TG adjustment (GTG) → Innermost periphery move → RF side pit section adjustment (PTG)
RF side pit TG adjustment (PTG) → RF side FG rough adjustment (RFg) → Laser lighting (LON)
Laser lighting (LON) → Offset "0" setting → A signal offset tentative measurement (HAo)
If the measurement value is within the OK range, "
" appears on the 8th character.
Step 1 Testmode STOP state [ t s m e ]
Step 2
Press the ENTER button six times.
MANUAL adjustment menu [ _ M N U _ A J S T _ ]
Step 3 Press once the MD PLAY button. Initial setting → Temperature measuring mode [ T M P : _ _ _ _ ]
Step 4 Press once the ENTER button. Laser ON [ L O N : _ _ _ _ _ _ ]
Step 5 Press once the ENTER button. Innermost periphery move → Tracking ATT (E signal) setting [ P E G : ]
Step 6 Press once the ENTER button. Tracking ATT (F signal) setting [ P F G : ]
Step 7 Press once the ENTER button. Indication of tracking EFMIO measurement [ P M I : _ _ _ ]
Step 8 Press once the ENTER button. Focus ATT (A signal) setting [ H A G : ]
Step 9 Press once the ENTER button. Focus ATT (B signal) setting [ H B G : ]
6. MANUAL adjustment mode
High reflection disc
Step No.
Setting Method
Remarks Display
• If the MD STOP button is pressed while the MANUAL adjustment menu is displayed, the state is changed to the TEST mode STOP
state.
• If the REC button is pressed, the setting returns step.
 Loading...