TIMER/DELETE
TIMER/DELETE
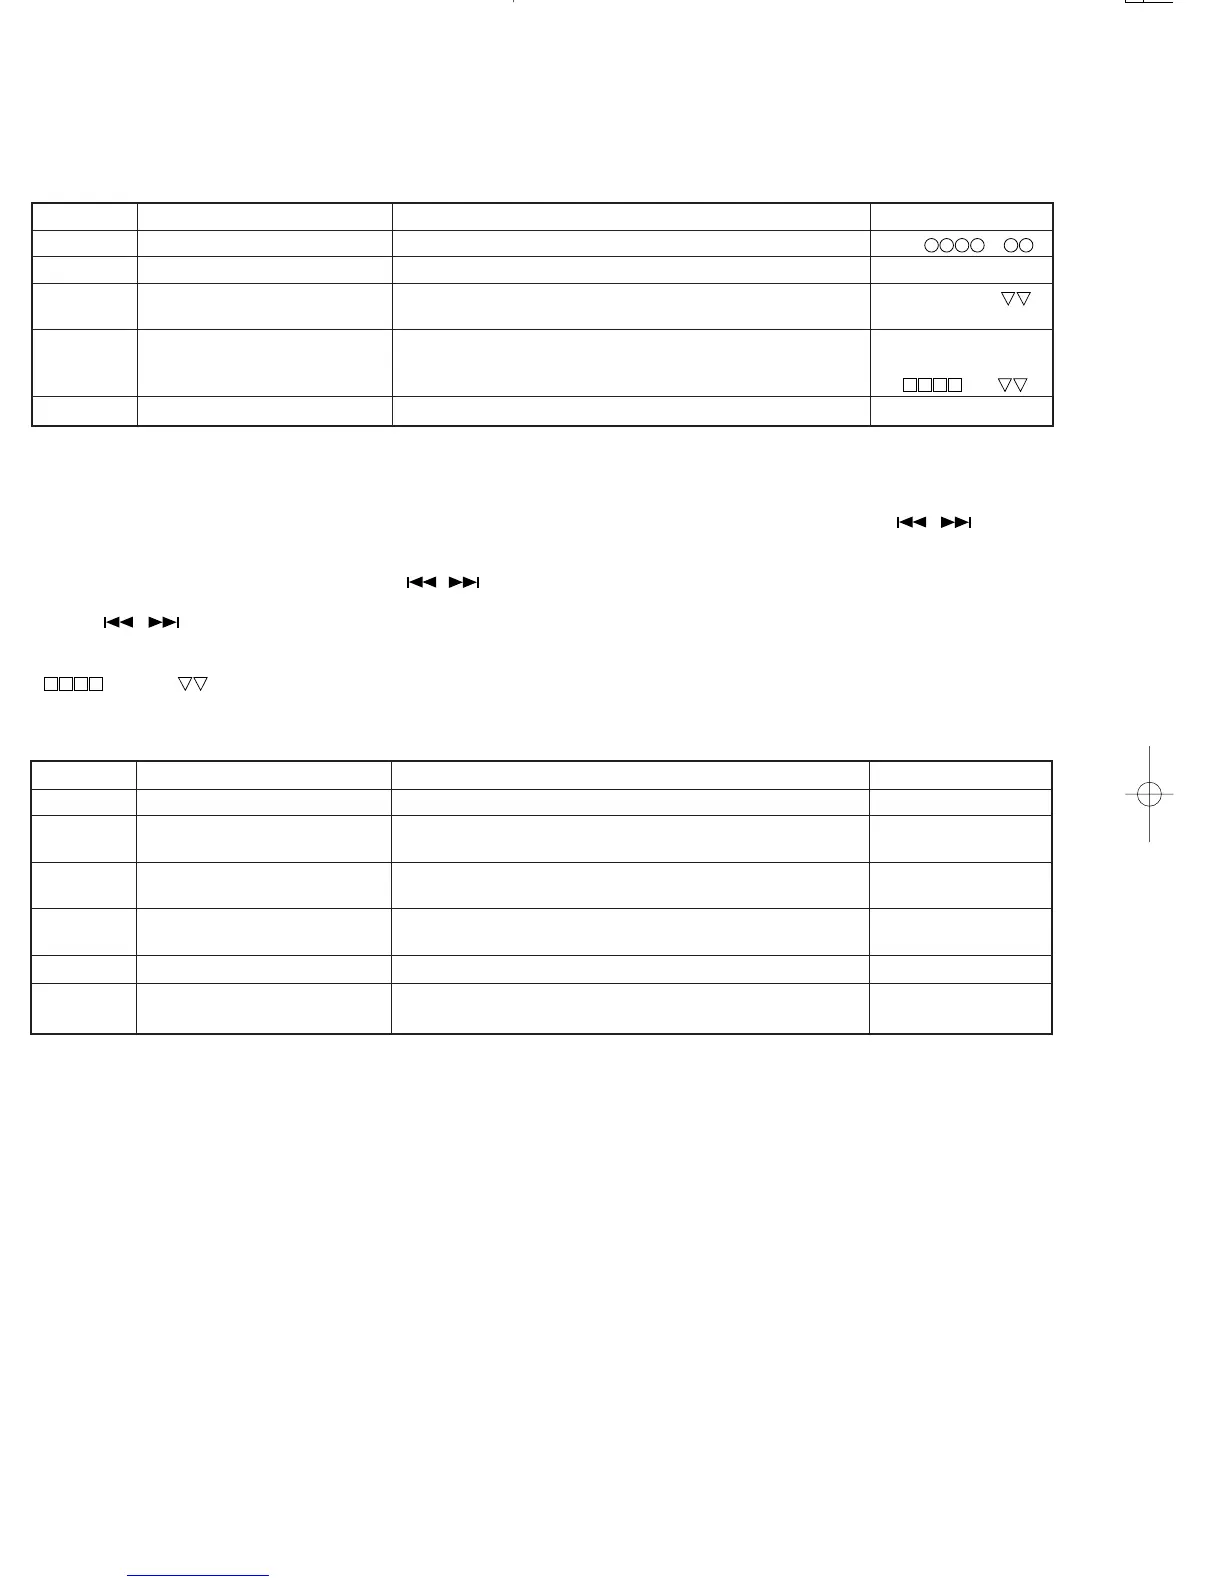
9. TEST-REC mode
Step 1 Testmode STOP state [ t s m e ]
Step 2
Press the button.
TEST-REC menu [ T E S T _ R E C _ _ ]
Step 3 Press once the DISPLAY/ ADRES setting (indication of address initial value) [ a 0 0 5 0 _ p w ]
CHARAC button.
Step 4 Press once the MD PLAY button. During search the search output pin 11 is set to "H", and it is
(returned on "L" when continuous playback is started.Address +
C1 error indication) Continuous recording [ a p w ]
Step 5 Press once the MD STOP button. TEST-REC menu [ T E S T _ R E C _ _ ]
Step No.
Setting Method
Remarks Display
• If the MD STOP button is pressed while the TEST-PLAY menu is displayed, TEST mode STOP state is set.
• If the MD PLAY button is pressed while the TEST-REC menu is displayed, continuous record is started from the current pickup position.
• Whenever the button is pressed in the address setting mode, the address changes as follows.
0 0 5 0 → 0 3 C 0 → 0 7 0 0 → 0 8 A 0 → 0 0 5 0 → …………
• Whenever the DISPLAY/CHARACTER button is pressed in the address setting mode, the digit which is changed with - / + changes
as follows.
0 0 5 0 → 0 0 5 0 → 0 0 5 0 → 0 0 5 0 → …………
• The digit of address which has been specified with - / + and DISPLAY/CHARACTER button in the address setting mode is set to +01H/
-01H.
* If the - / + button is held down, the setting changes continuously with 100 ms cycle.
• If the JOG button is pressed in TEST-REC mode and continuous record mode, the laser record power changes.
(Servo gain changes also according to the record power.)
• : Adress, : Laser power cord
10. EJECT mode
Step 1 Testmode EJECT Eject of MD discstate [ _ _ E J E C T _ _ _ ]
Step 2 Press oncethe TIME DISPLAY Max. power output state [ x p w _ _ _ _ _ _ _ ]
button.
Step 3 Press once the TIME DISPLAY Record power output state [ r p w _ _ _ _ _ _ _ ]
button.
Step 4 Press once the DISPLAY Playback power output state [ p p w _ _ _ _ _ _ _ ]
CHARACTER button.
Step 5
Press the STOP button.
EJECTMENU
Step 6
Press the NAME/TOC EDIT button.
CONTROL setting of EEPROM setting
(Refer to CONTROL setting of EEPROM)
Step No.
Setting Method
Remarks Display
 Loading...