Reassembly
94 19 690 01 Rev. --KohlerEngines.com
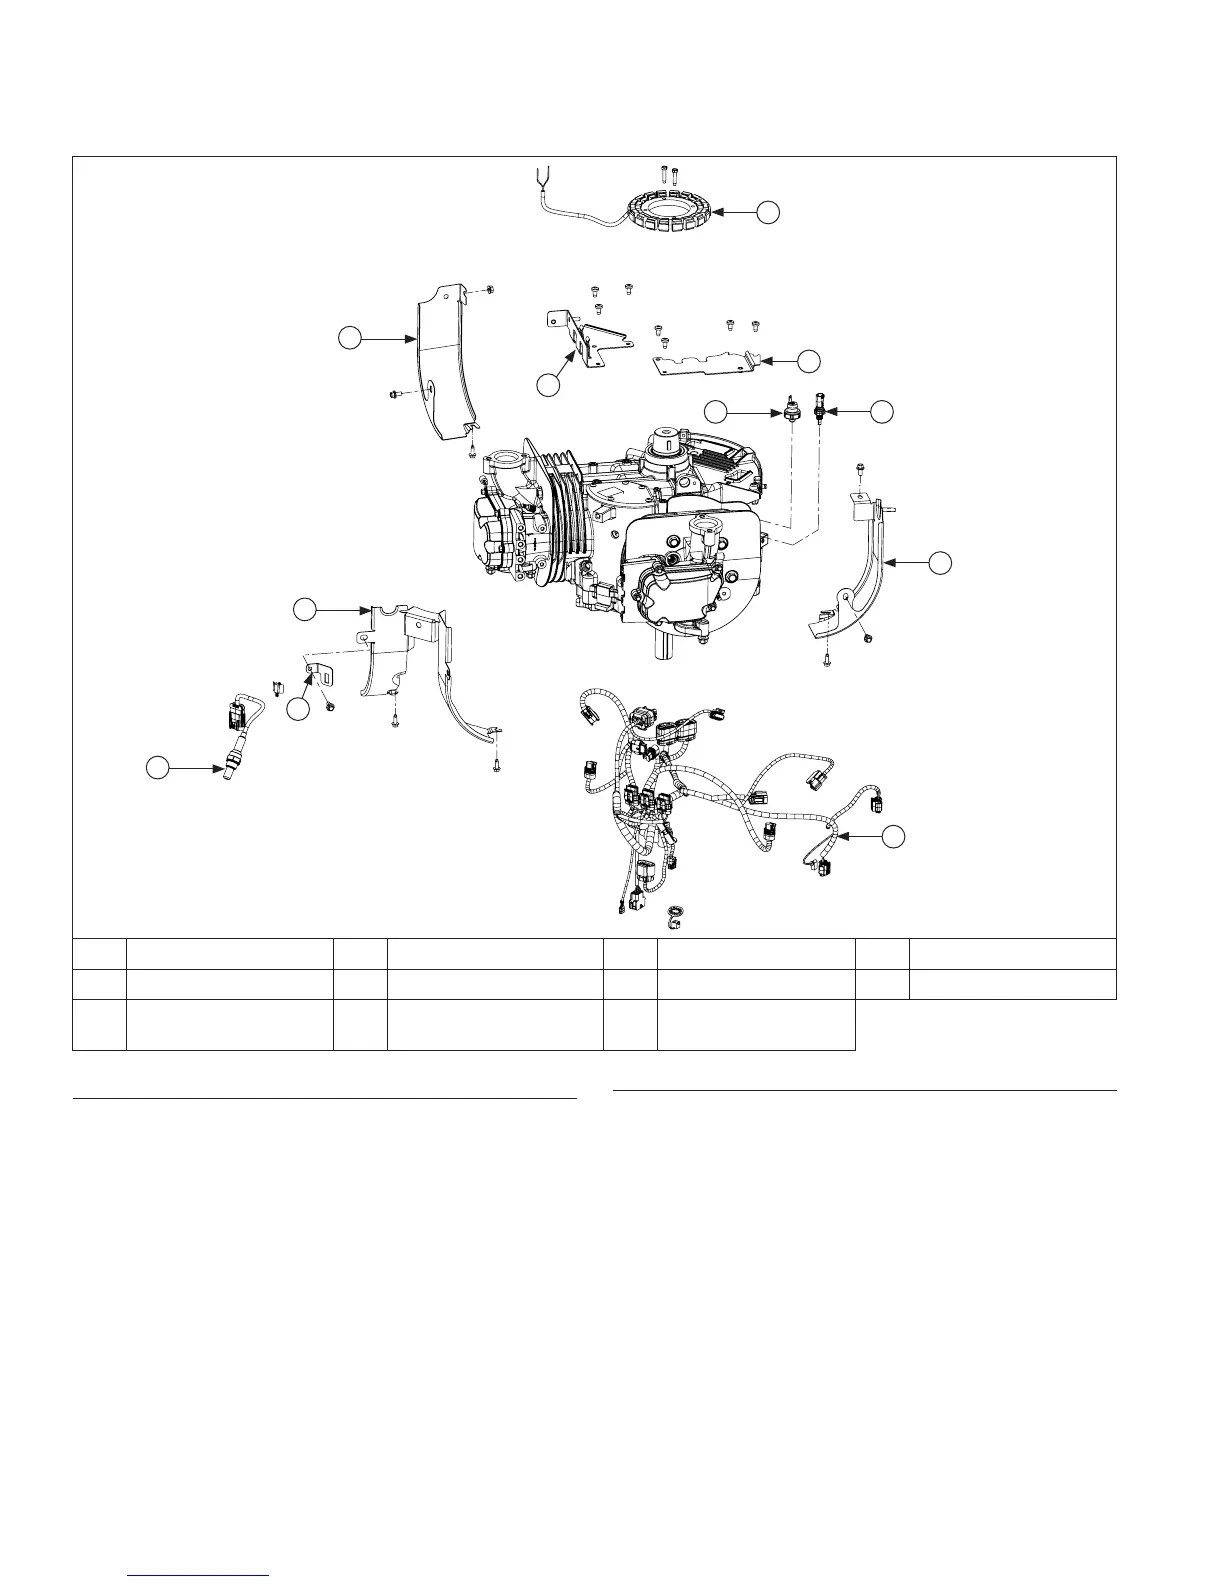
Baffl es/Wire Harness/Stator Components
F
E
D
G
C
A
B
I
H
KJ
A Valley Baffl e B Mounting Bracket C O2 Sensor D Wire Harness
E Cylinder #2 Baffl e F Stator G Cylinder #1 Baffl e H Crankcase Baffl e #1
I Crankcase Baffl e #2 J
Oil Pressure
Switch
K
Oil Temperature
Sensor
Install Valley, Crankcase, and Cylinder Baffl es
1. Install crankcase baffl es. Secure with screws.
Torque M6 screws going into crankcase to 11.3 N·m
(100 in. lb.) into new holes, or 7.7 N·m (68 in. lb.)
into used holes.
2. Install valley baffl e and secure with screws. Torque
M6 screws to 8.2 N·m (73 in. lb.). Reinstall wire
harness clip to baffl e.
3. Install cylinder barrel baffl es. Make sure spark plug
lead is routed through corresponding opening in
each baffl e. Start each screw. Torque M6 screws to
8.2 N·m (73 in. lb.); torque M5 screws to 6.3 N·m
(56 in. lb.) into new holes, or 4.0 N·m (35 in. lb.) into
used holes.
Install Stator and Wire Harness
1. Position stator and wire harness on crankcase,
aligning mounting holes, with stator lead toward
cylinder #1 side. Route stator lead between electric
starter boss, #1 crankcase baffl e, and crankcase
rib.
2. Apply pipe sealant with Tefl on
®
(Loctite
®
PST
®
592™ Thread Sealant or equivalent) to stator
mounting holes and secure with two screws. Torque
screws to 9.3 N·m (82 in. lb.) into new holes, or
4.0 N·m (35 in. lb.) into used holes.
Install harness into baffl e clips in a way that will not
interfere with fl ywheel.
3. Attach harness ground to crankcase.
 Loading...