3.
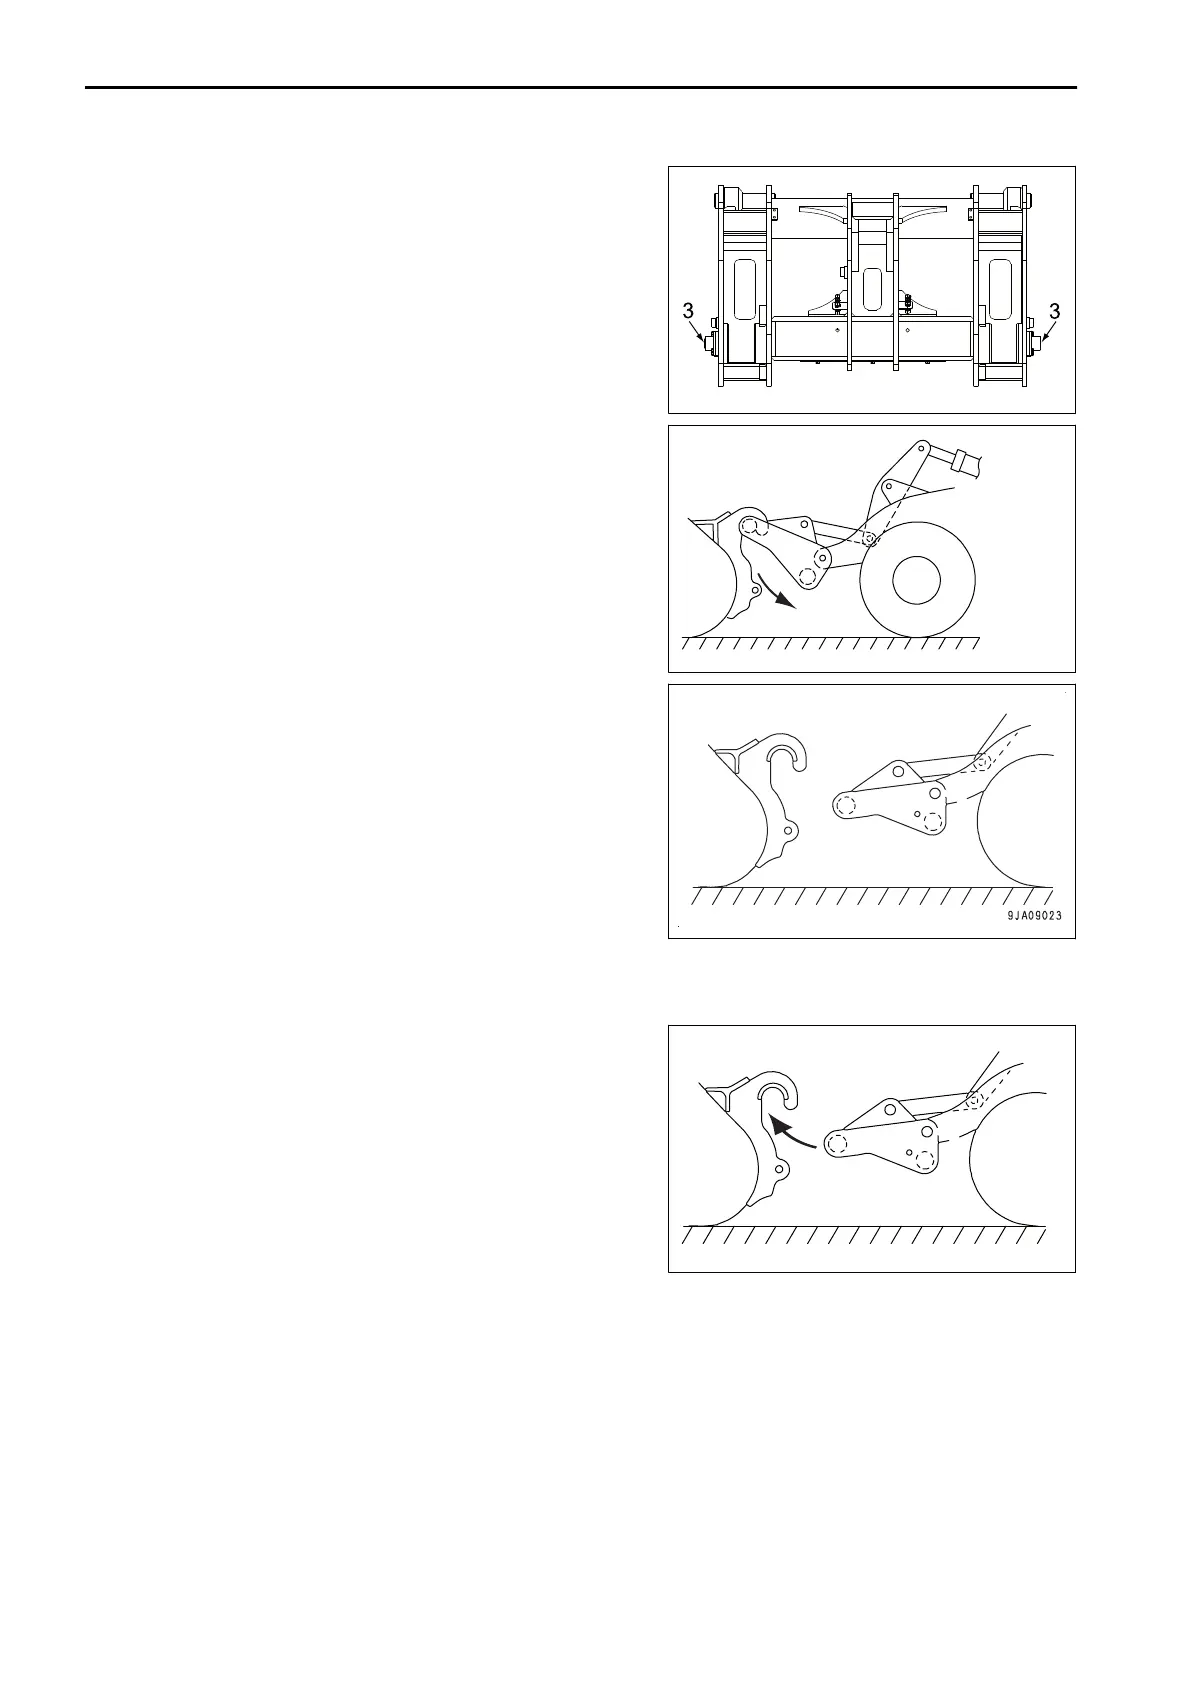
Check that the lock pins
have been removed. The lock pin
indicators (3) may not be visible.
4.
Lower the attachment completely to the ground and set it
in a stable position.
5.
Tilt the coupler forward slowly and lower it slowly so that it
separates from the attachment hook.
6.
Check that the coupler is released from attachment hook.
Put your hand of
f the quick coupler switch.
The switch returns to
NEUTRAL position (N), the quick
coupler release pilot lamp (1) goes out, and the alarm buz-
zer stops sounding.
7.
Drive the machine in reverse slowly to separate the ma-
chine from the attachment.
METHOD FOR INSTALLING ATTACHMENT
(When the 2-point switch)
1.
Set the coupler tilted forward posture on a level ground,
stop
the machine at the
position just before attachment
hook and the coupler tube come to the same line.
Depress the brake pedal to stop the machine with direc-
tional lever at forward.
HANDLE HYDRAULIC TYPE QUICK COUPLER ATTACHMENTS AND OPTIONS
6-18
 Loading...