Using the Operation Panel
2-44
7
Send the file from the computer to the printer.
As the printer receives data, the message display changes to Processing, then when the end of
the data is received, the message display changes to Waiting.
8
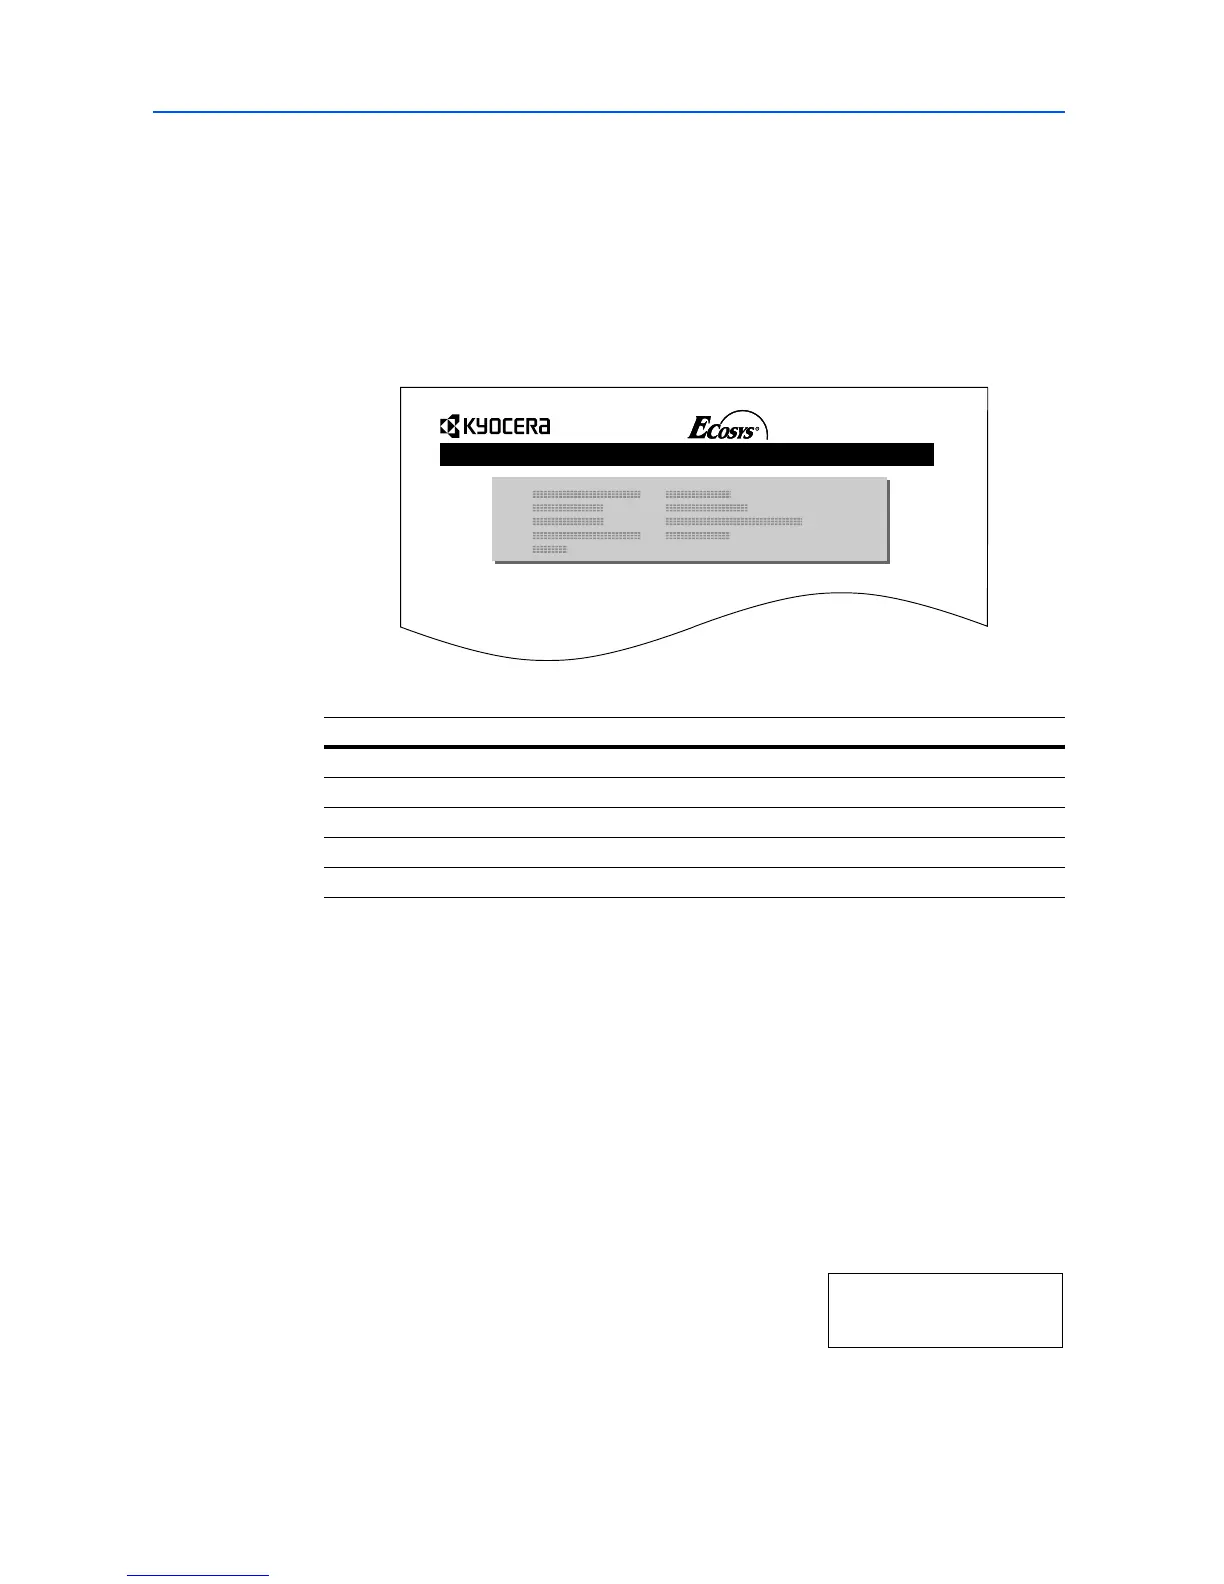
Check that the message display has changed to Waiting, then press [GO]. This writes the file to
the memory card and instructs the printer to automatically print out a memory card write information
page as shown below.
The file is written onto the memory card given a destination name (also referred to as a partition
name) which the printer automatically assigns one after another as follows: DataS001 (first data),
DataS002 (second data), DataS003 (third data)...
The write information page includes the following items:
When the memory card write information page is printed, the display returns to Ready.
9
Repeat the steps above until you have transferred all data (files) that you want to write to the
memory card. Each time you finish writing data, a memory card write information page is printed
from the printer showing the information, but pertaining only to the data just written. To see all data
contained in the memory card at once, print a list of data names as explained. Refer to Printing a
List of Data Names (Partitions) on page 2-46.
Deleting Data
It is possible to use the printer to delete data from a memory card.
Check that the memory card contains data. Otherwise, the >Delete Data menu will not appear on
the message display.
1
Press [Menu].
2
Press or repeatedly until Memory Card > appears.
3
Press .
Item Description
Device Name/Number MEMORY CARD/A is indicated for the memory card.
Partition Type Type of data written (currently only type 2 is supported).
Partition Name The destination name of data written to the memory card.
Write Partition Length The size of the written data on the memory card.
Others Error information.
FS-C8100DN Page Printer
WRITE INFORMATION
Memory Card >
 Loading...