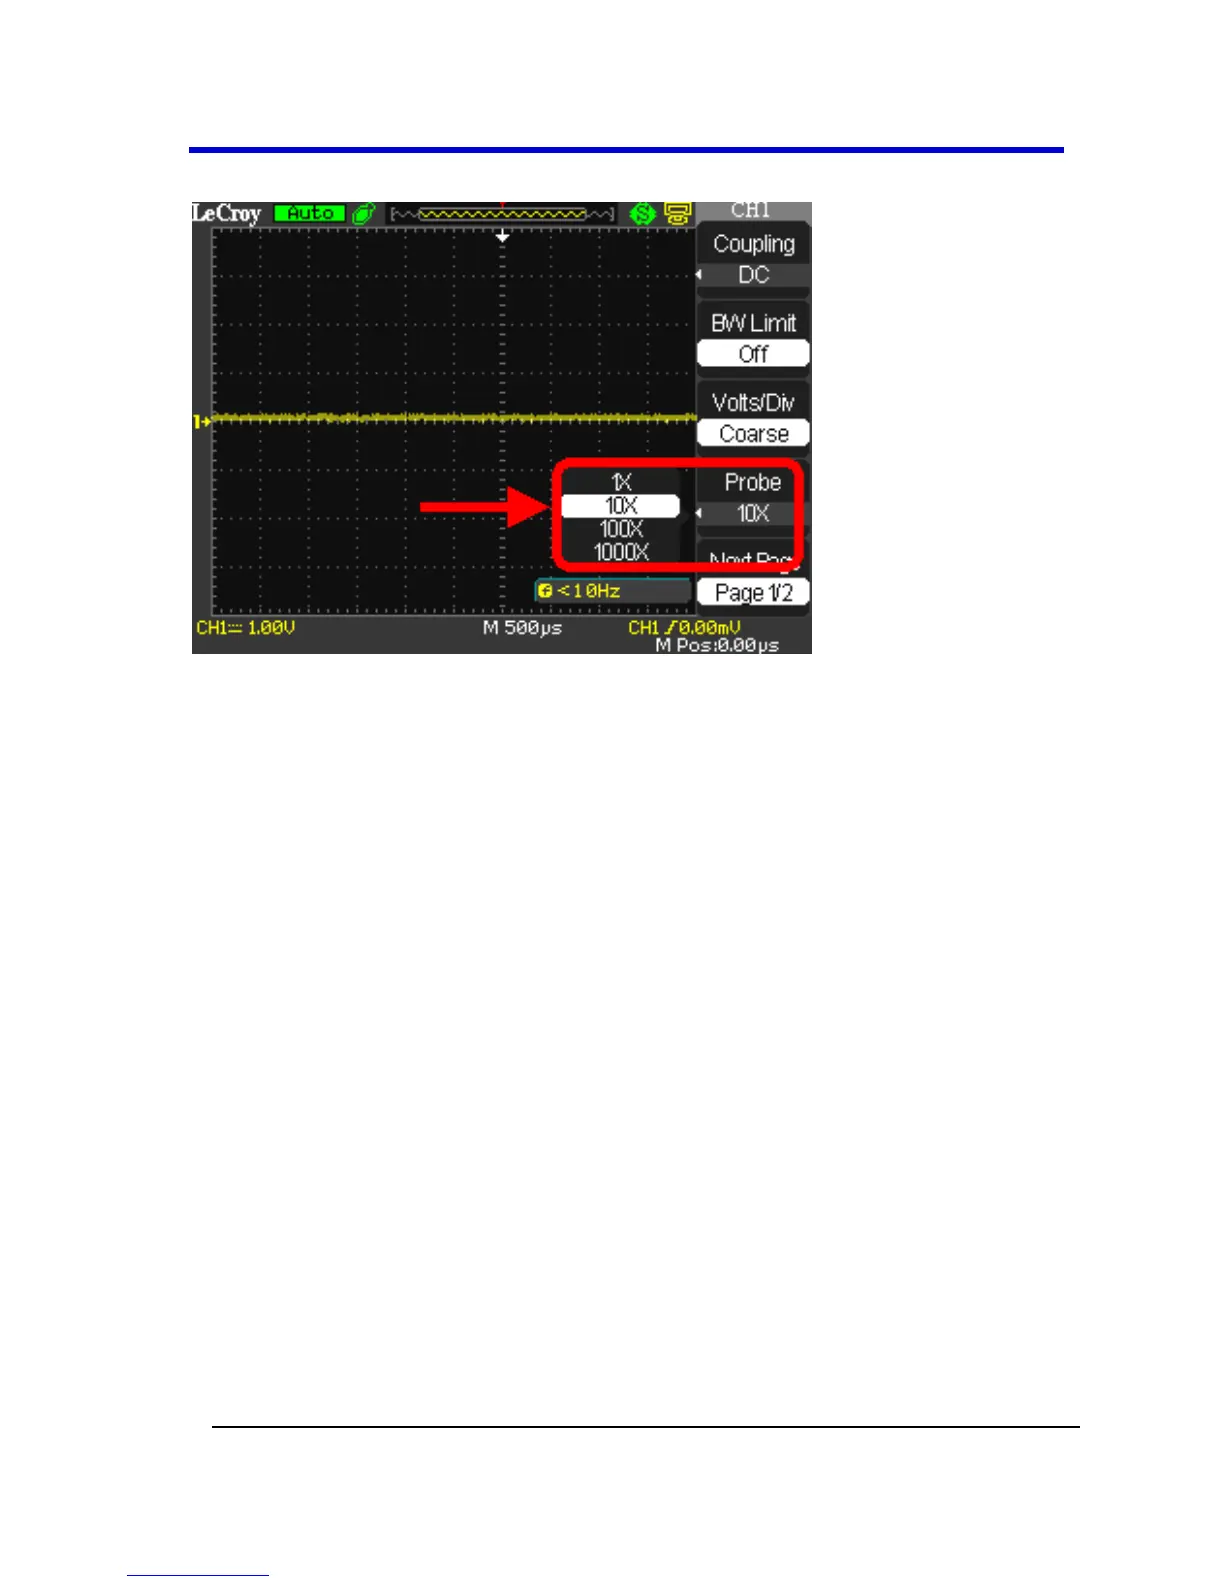
Attenuation options for 1X, 10X, 100X, and 1000X are available as follows:
Select the attenuation that matches your probe.
PLEASE NOTE THE FOLLOWING:
The default setting for the Probe option is 1X.
Be sure that the Attenuation switch on the probe matches the
Probe option in the oscilloscope. Switch settings are 1X and 10X.
When the Attenuation switch on the probe is set to 1X, the system
bandwidth is limited to 10MHz. To use the full bandwidth of the
oscilloscope, be sure to set the switch to 10X.
Viewing Waveforms
Turning On Traces
Turn on a channel trace by pressing the channel front panel button - CH1
or CH2 (or CH3 or 4 on 4 channel models). When you turn on a channel,
the Channel flyout menu opens. You can then set up the vertical settings
and controls for the channel.
 Loading...