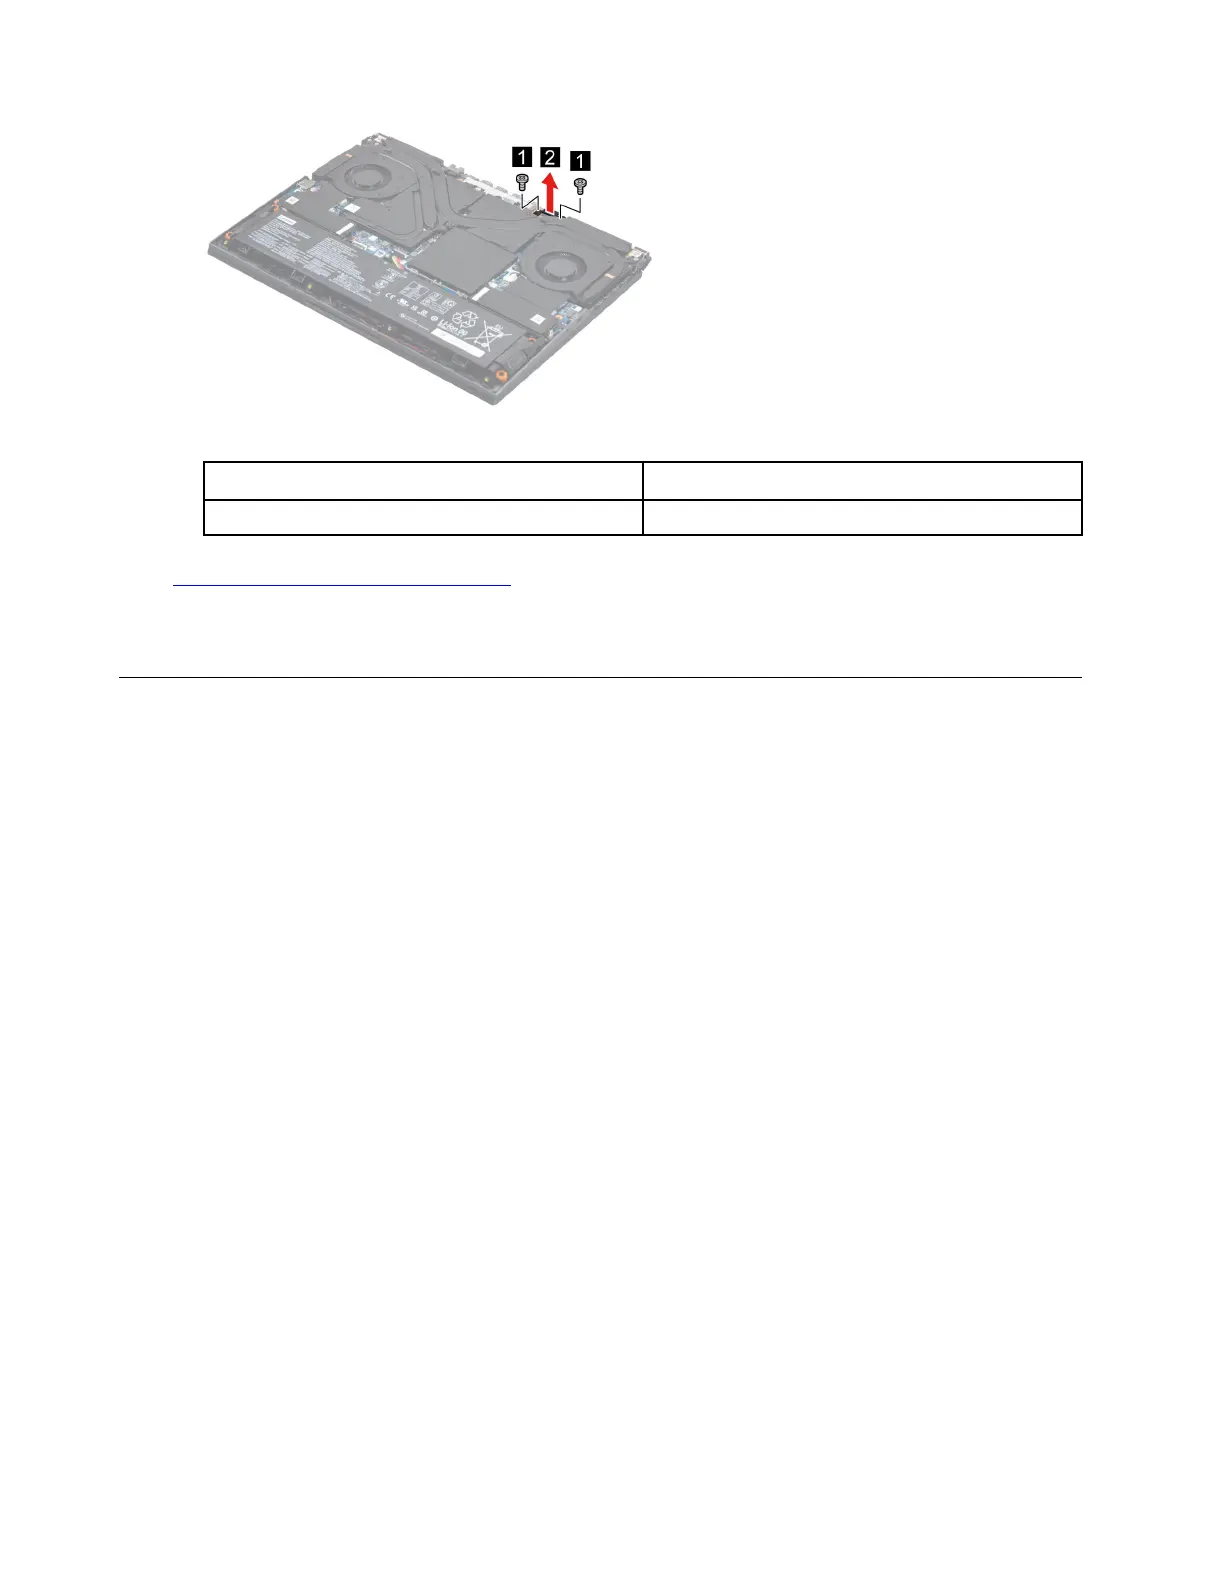
Figure 17. Remove the two screws then remove the DC-in bracket
Screw specifications Number of screws
M2 x L6.0 2
Go to
https://support.lenovo.com/partslookup to look up the Lenovo part number of the following replacement
part:
DC-in bracket
Remove the I/O board
Make sure the following FRU (or CRU) have been removed.
“Remove the lower case” on page 30
“Remove the solid-state drive (SSD) plate” on page 33
“Remove the thermal module” on page 35
Step 1. Disconnect the battery pack cable from the system board.
Attention: Use your fingernails to pull the connector to unplug it. Do not pull the cable.
Step 2. Remove the Left SSD.
Note: For details, see “Remove the solid-state drive (SSD)” on page 34.
Step 3. Detach the I/O board cable and then remove the I/O board.
38
Hardware Maintenance Manual
 Loading...