Camera board bracket
Camera cable
Removable tape
Remove the camera board
Make sure the following FRUs (CRUs) have been removed.
“Remove the LCD module” on page 45
“Remove the LCD bezel (with removable tape)” on page 48
“Remove the hinge cover” on page 48
“Remove the LCD panel” on page 49
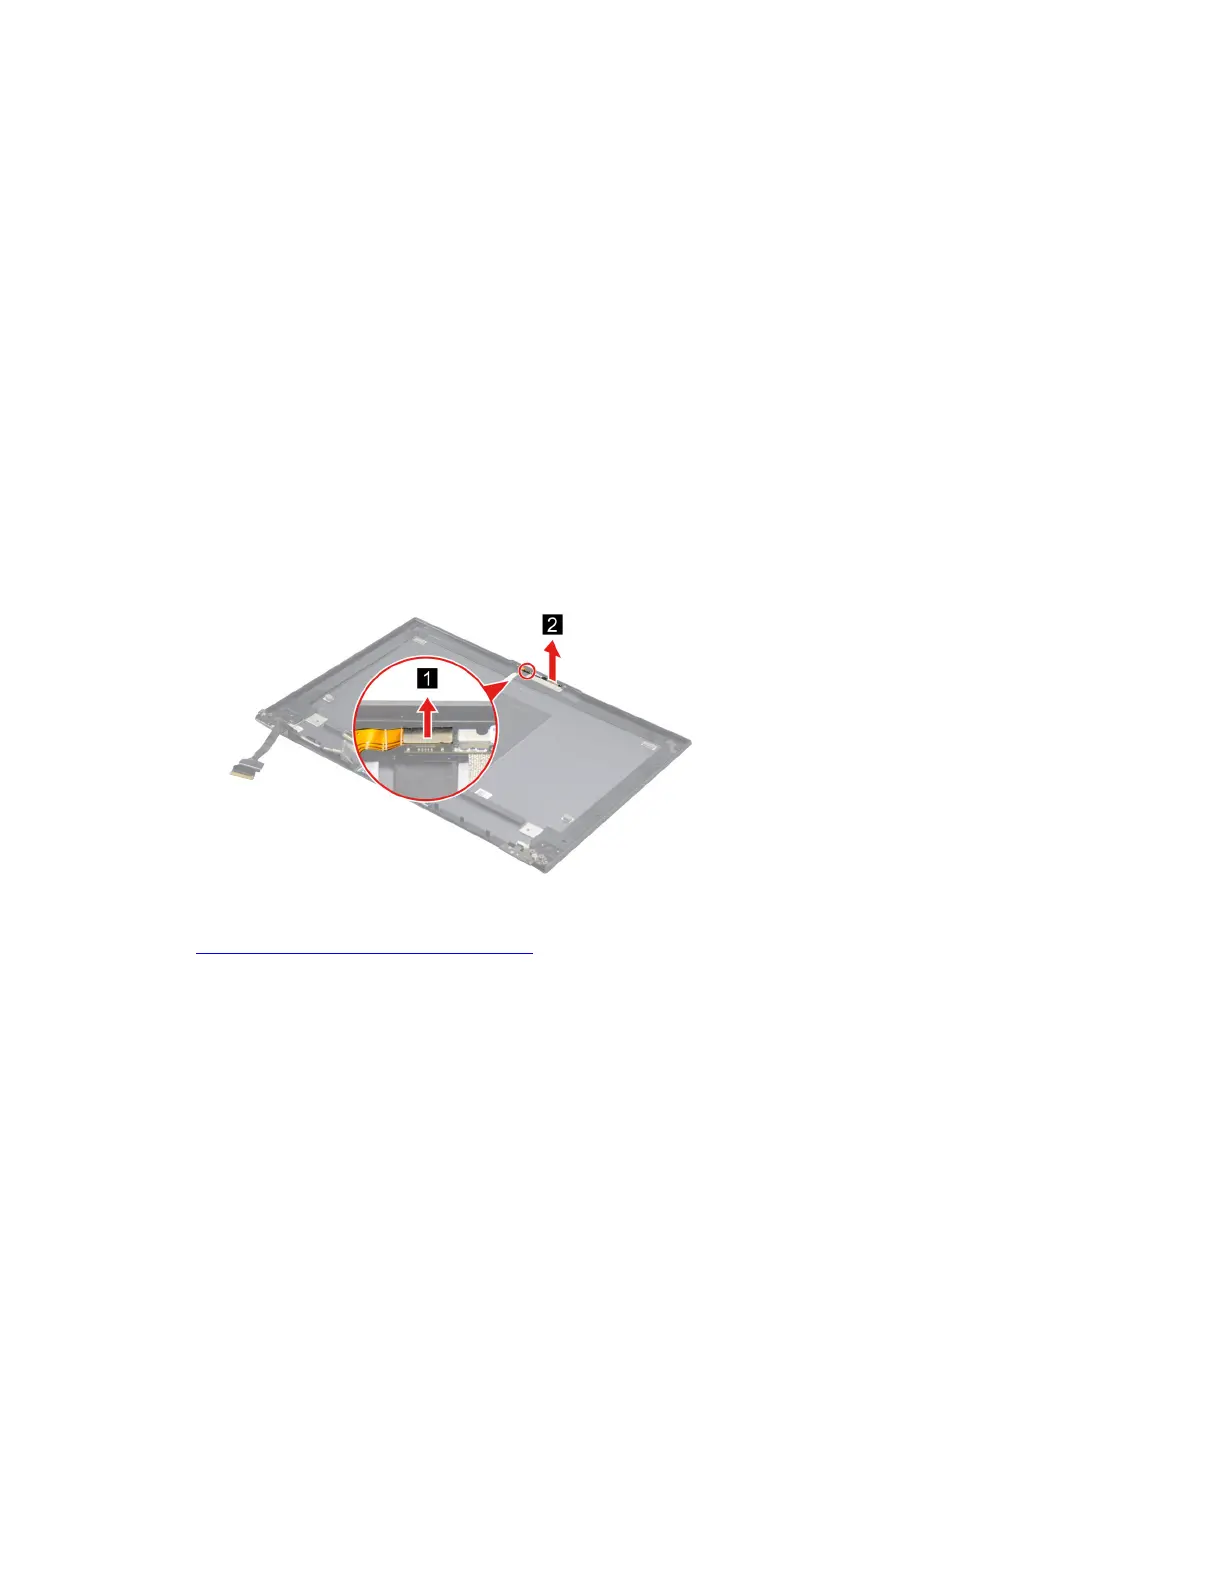
Step 1. Remove two screws and then remove the camera bracket.
Note: For details, see “Remove the camera bracket and camera cable” on page 52.
Step 2. Disconnect cable connected to the camera board and then remove the camera board.
Figure 42. Disconnect cable connected to the camera board and then remove the camera board
Go to https://support.lenovo.com/partslookup to look up the Lenovo part numbers of the following
replacement parts:
Camera board
Removable tape
Remove the EDP cable
Make sure the following FRUs (CRUs) have been removed.
“Remove the LCD module” on page 45
“Remove the LCD bezel (with removable tape)” on page 48
“Remove the hinge cover” on page 48
“Remove the LCD panel” on page 49
Step 1. Detach the EDP cable connector and then release the EDP cable from the cable guide. Remove the
EDP cable.
Chapter 4. Removing a FRU or CRU 53