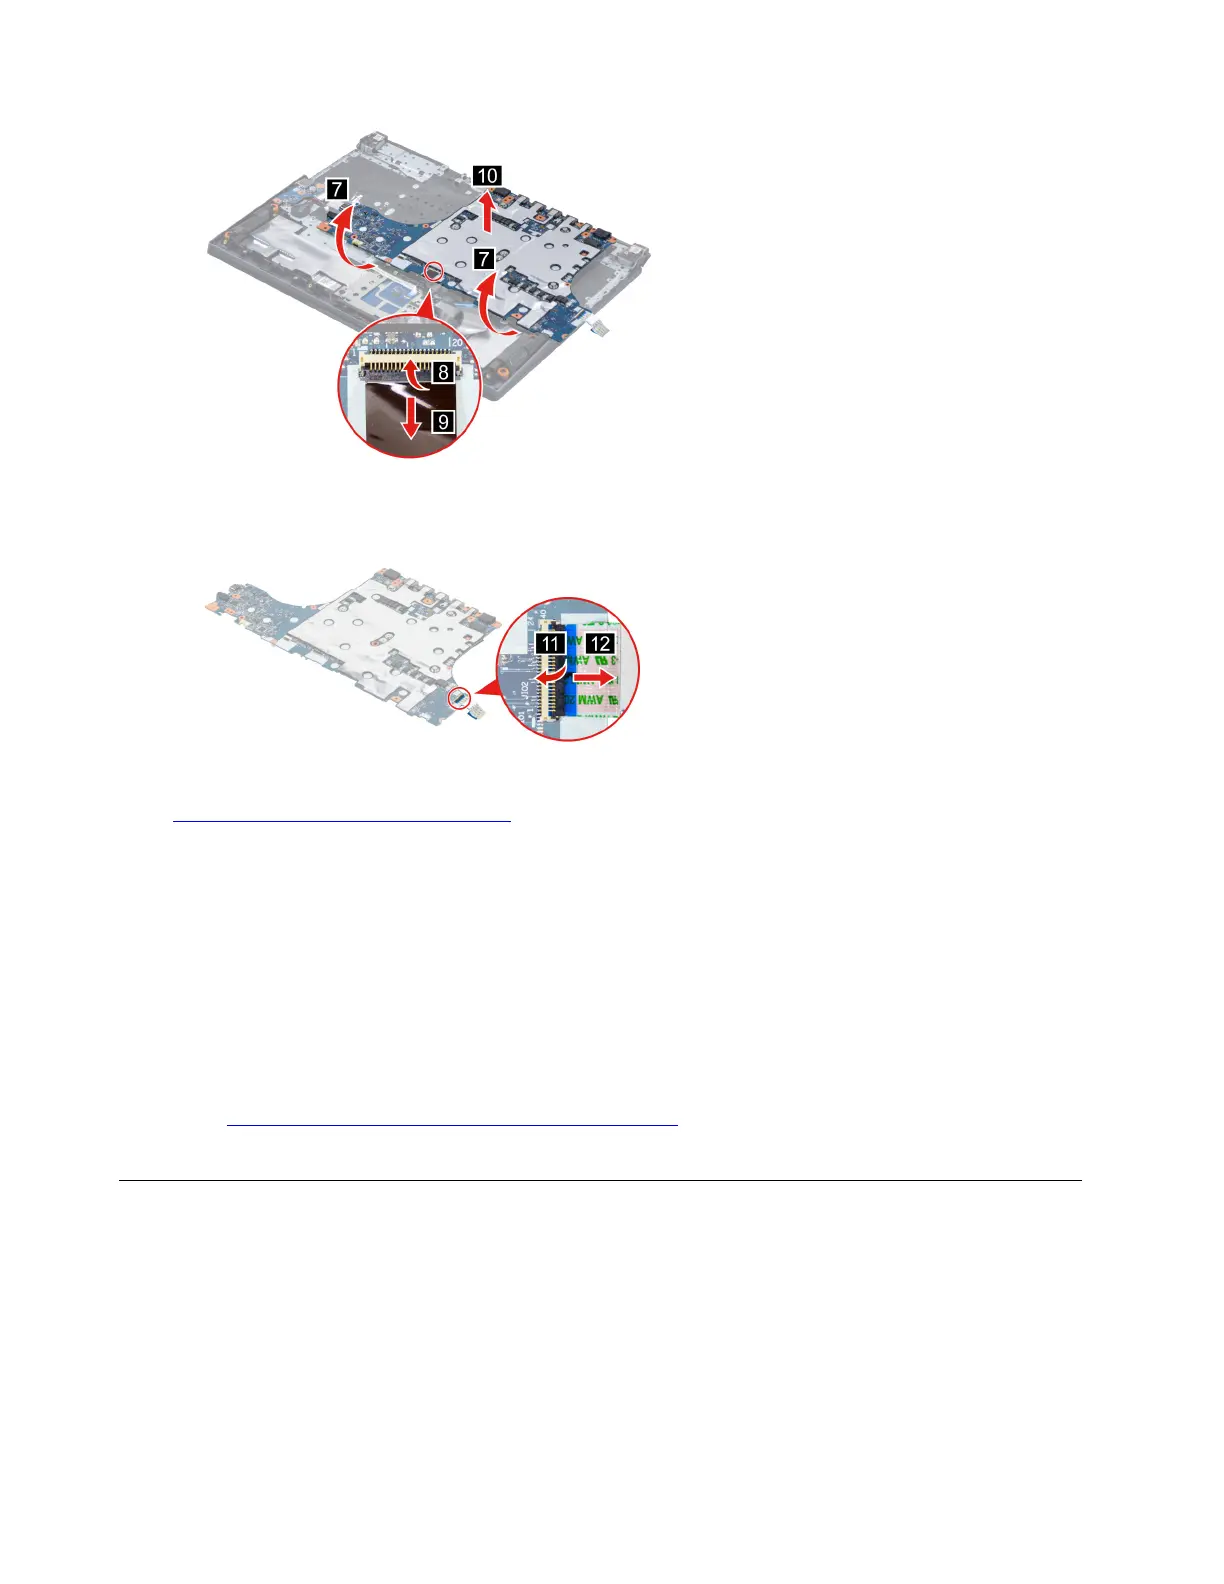
Figure 26. Remove the system board
Step 4. Disconnect the I/O board cable from the system board and then remove the I/O board cable.
Figure 27. Remove the I/O board cable
Go to https://support.lenovo.com/partslookup to look up the Lenovo part numbers of the following
replacement parts:
System board
I/O board cable
Use a Golden Key U1 tool to flash-write key id information
After replacing the system board and re-assembling the computer, use a pre-made Golden Key U1 tool to
start the computer and flash-write the serial number (SN), machine type (MT), product name (PN), and UUID
to the new system board.
The Golden Key U1 tool is prepared by running the U1 Update software on a FAT32-formatted USB thumb
drive. Go to
http://support.lenovo.com/us/en/solutions/HT506954 for detailed instructions on how to create
and use a Goldern Key U1 tool.
Remove the strip cover
Make sure the following FRU (or CRU) has been removed.
“Remove the lower case” on page 30
Step 1. Peel off the two pieces of tape then remove four screws.
44
Hardware Maintenance Manual
 Loading...