4. Operation DA2DVI-DL – User's Manual 11
Switching the EDID
Avoid the use of keys, coins, knives and other sharp objects be-
cause they might cause permanent damage to the rotary switches.
Step 1. Use a screwdriver to change the EDID ADDRESS by the rotary
switches on the front panel of the DA2DVI-DL.
Location #17 is selected by the rotary switches
Step 2. After either one of the rotary switches has been rotated, the
unit waits approximately two seconds before the selected
EDID becomes active.
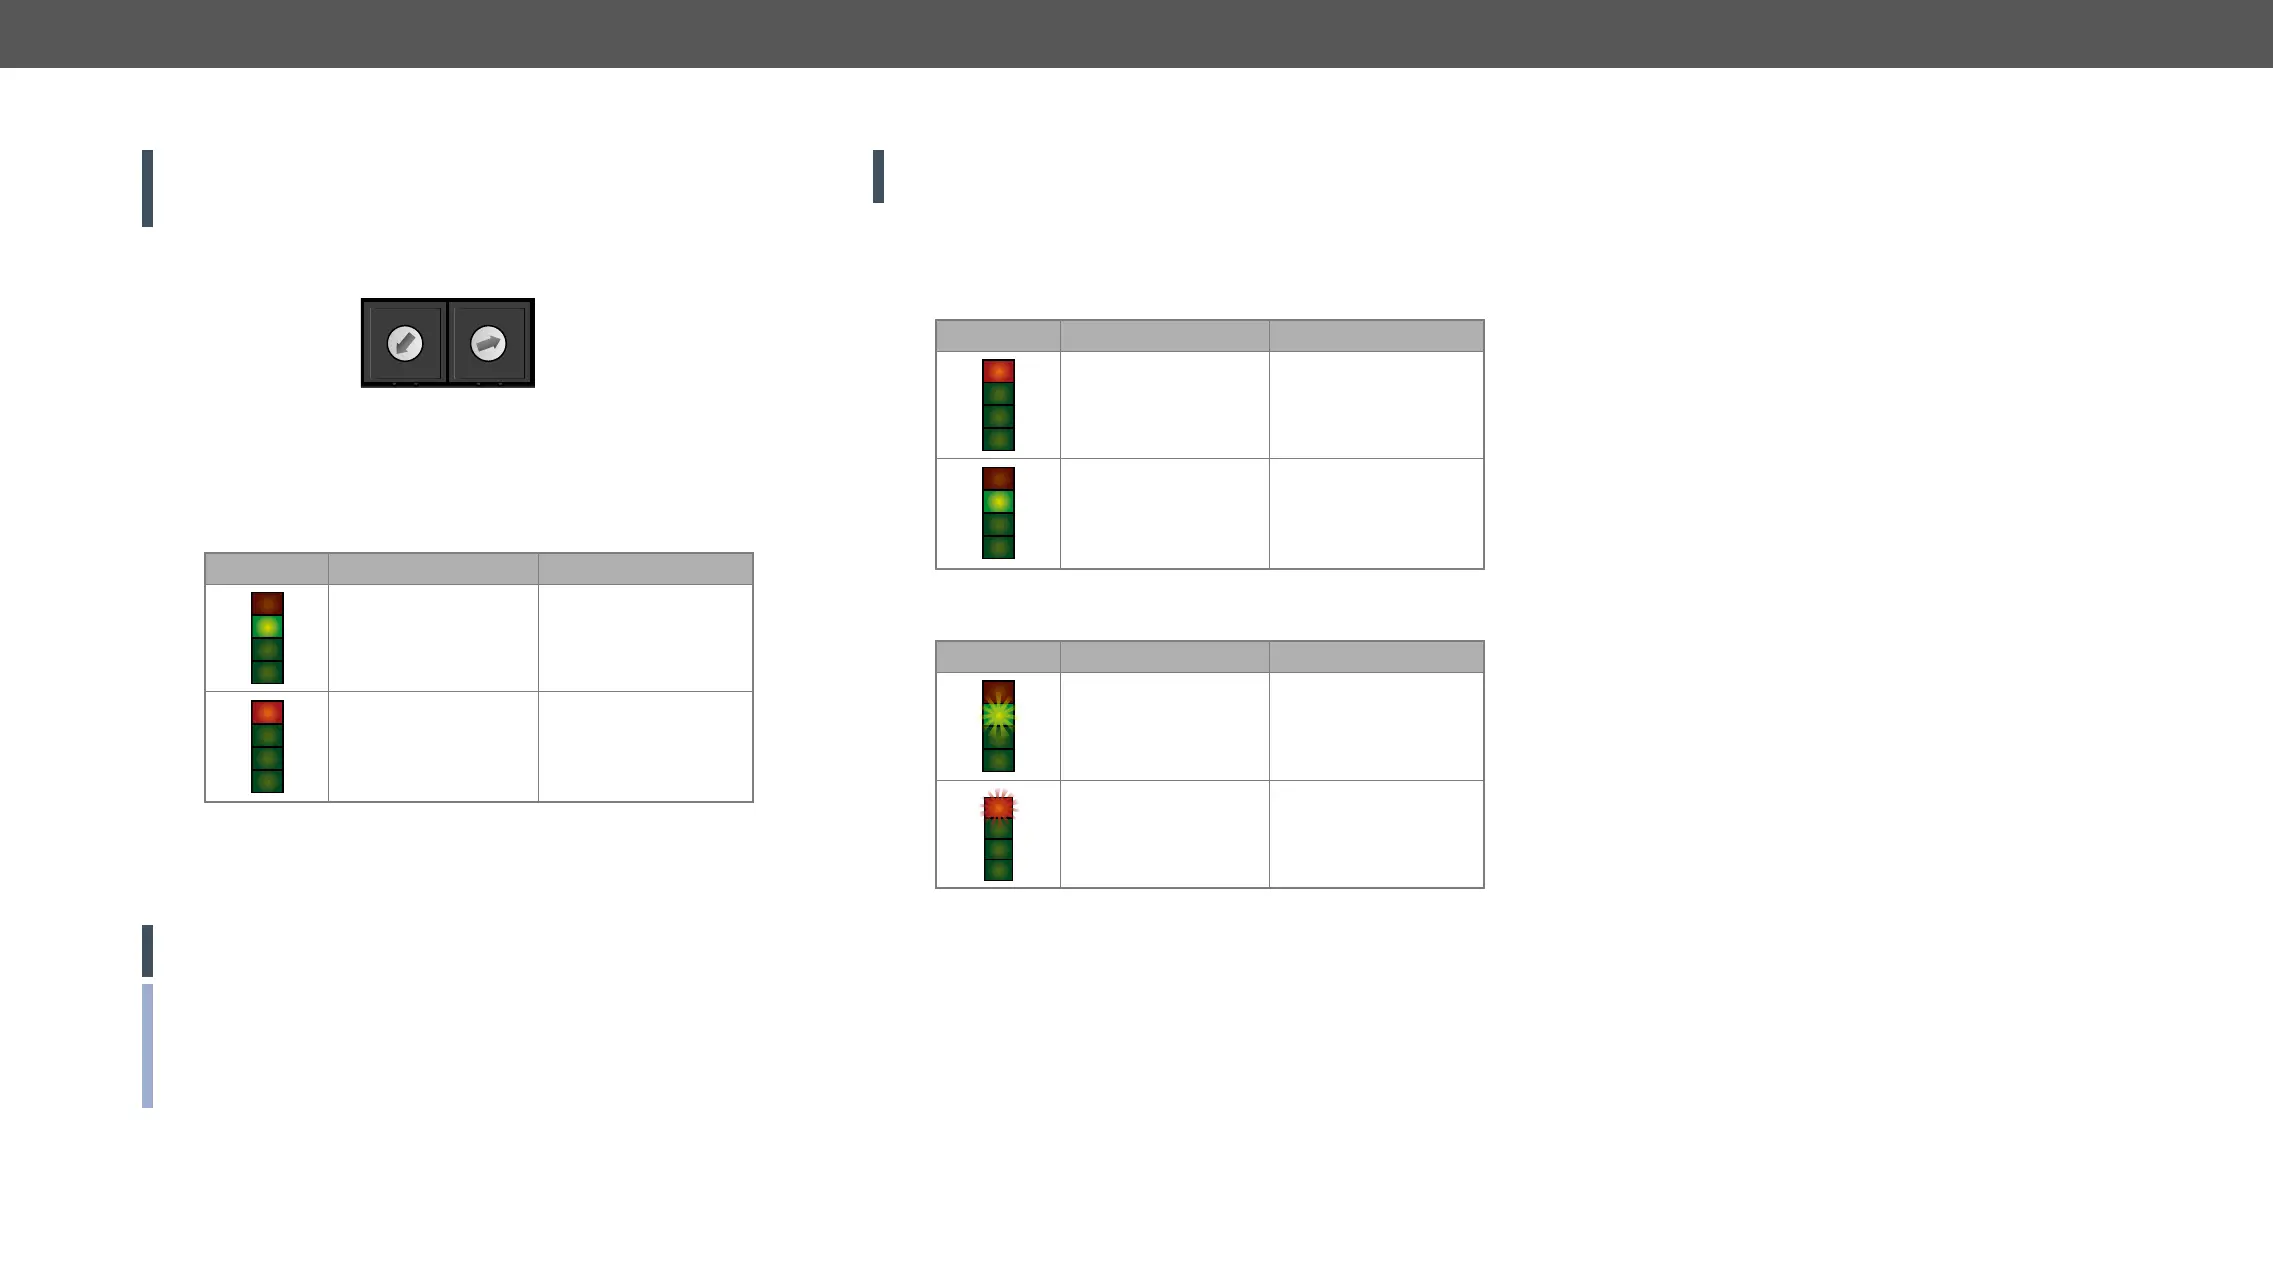
Step 3. Check the state of the device:
EDID LED
Description State
EDID status Y lights in
green.
The selected LED is
valid.
EDID status N lights in
red.
The selected EDID
memory is invalid
empty user memory).
The address #00 has a special function. If a monitor is connected to
OUTPUT 1, then its EDID is copied to the DVI-DL INPUT connector. If
no monitor is connected to the OUTPUT 1 then the EDID transmitted to
ATTENTION! If an invalid EDID is selected, DA2DVI-DL does NOT
give a HOT PLUG signal to the source connected to DVI-DL INPUT.
INFO: After every EDID change, DA2DVI-DL toggles the HOT PLUG
signal for approximately 2 seconds. Some graphics cards or DVD
players do not sense the HOT PLUG signal, and even if EDID has
been changed, the set resolution is not affected. In this case the
source device must be restarted, or powered OFF and ON again.
00
11
22
33
44
55
66
77
88
99
00
11
22
33
44
55
66
77
88
99
Learning the EDID
ATTENTION! The factory preset EDIDs cannot be changed by the
Step 1. After connecting the sink device to DVI-DL OUTPUT 1, use a
screwdriver to select a user programmable memory address.
EDIDs are stored in multiple programmable non-volatile
memories.
EDID LED
Description State
EDID status N lights in
red.
The memory slot is
empty and ready to be
programmed.
EDID status Y lights in
green.
The memory was
already used before,
but still available for
reprogramming.
Step 2. Push the LEARN EDID button on the front panel of the DA2DVI-DL
and hold it down for approximately 2 seconds.
EDID LED
Description State
EDID status Y blinks in
green four times.
The EDID has been
learnt successfully.
EDID status N blinks in
red four times.
The EDID learning was
unsuccessful.
Step 3. The normal function of the LEDs is in effect.
 Loading...