77
76
CHAPTER 9: PART REPLACEMENT GUIDE
9.11 CHAIN REPLACEMENT - CONTINUED
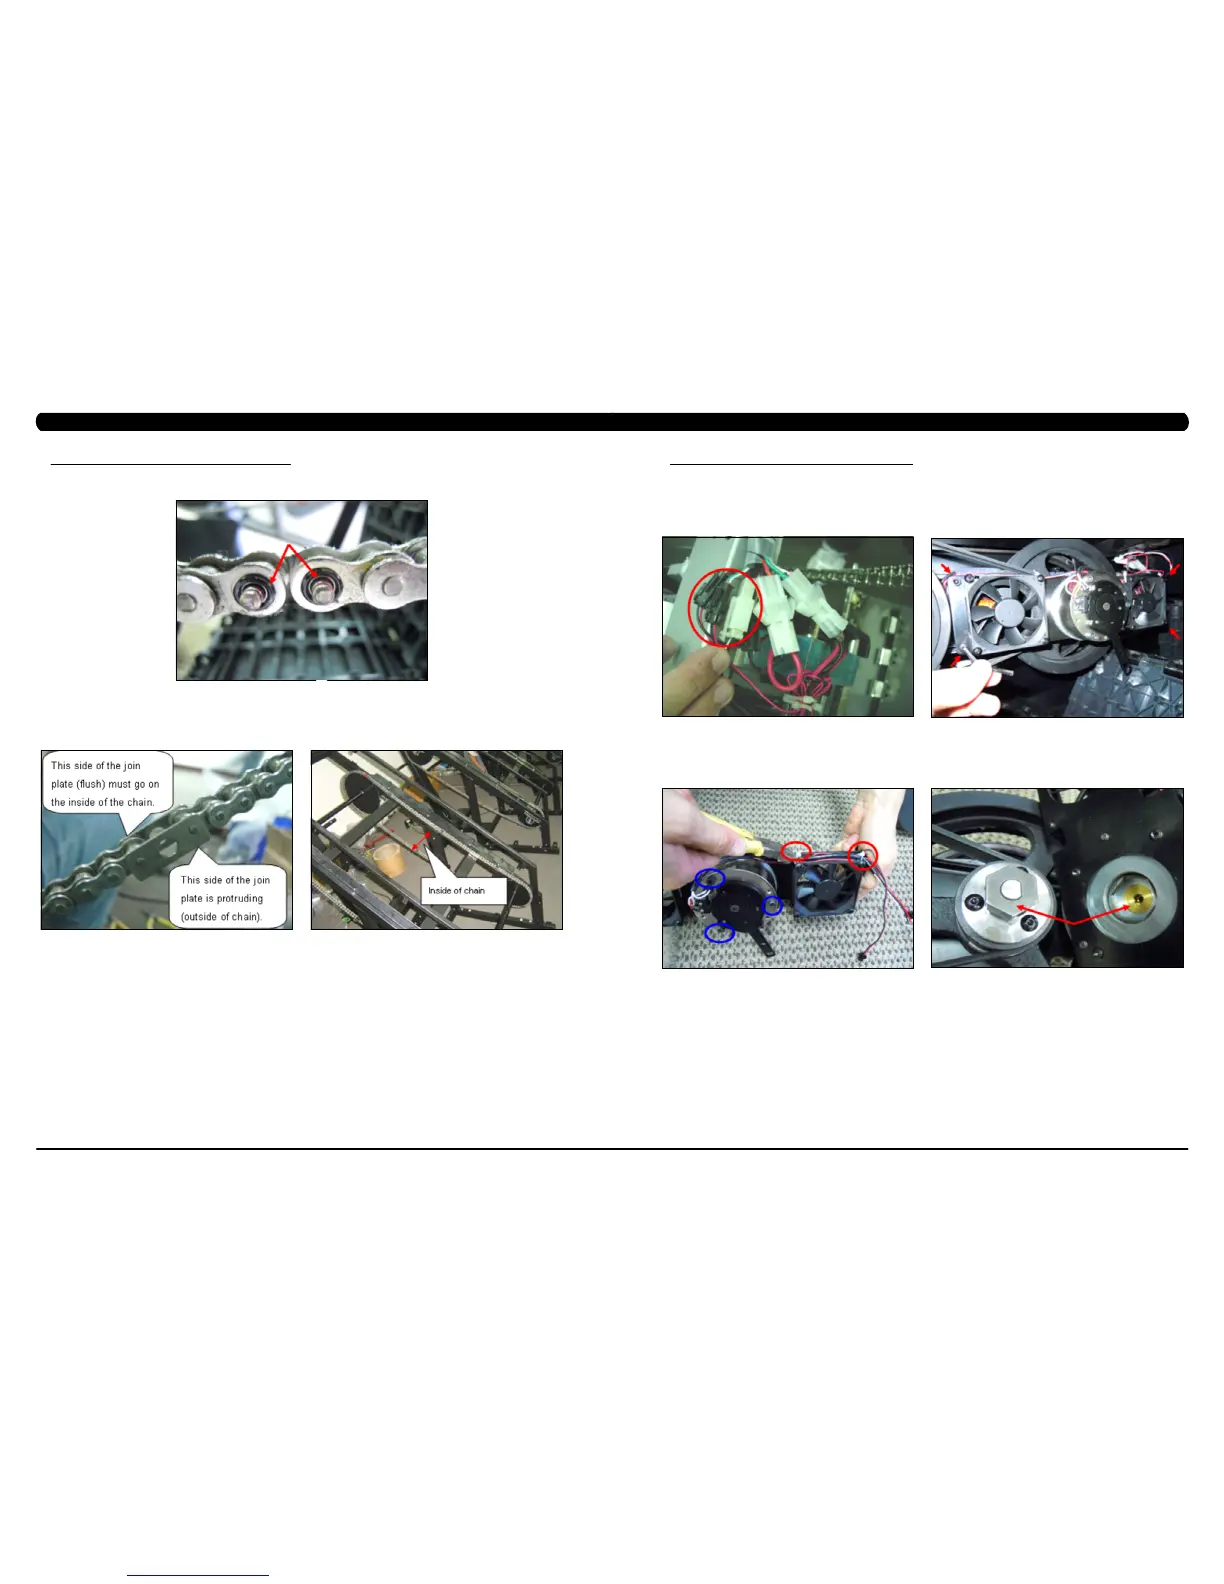
8) Remove the 2 seal rings from where the join link was just removed (Figure E).
9) The chain can now be removed.
10) Reverse Steps 1-9 to install a new chain. When installing a new chain, it is important to pay attention to the join plates. The join plates are
wider than the chain itself. It is important that the side of the join plates that are ush with the rest of the chain get installed to the inside of the
chain path (Figures F & G).
11) Test the Climb Mill for function as outlined in Section 9.21.
FIGURE E
FIGURE F
FIGURE G
9.12 BRAKE REPLACEMENT
CHAPTER 9: PART REPLACEMENT GUIDE
1) Turn off the power and disconnect the cord from the machine.
2) Remove the Matrix logo covers from each side of the machine.
3) Turn the brake lever to the right to lock the stairs and prevent movement that could cause injury.
4) Disconnect the brake and both fan wire connections (Figure A).
5) Remove the 4 screws holding the brake and fan plate to the drive set (Figure B) and remove the assembly. NOTE: BEFORE REMOVING
THE BRAKE AND FAN PLATE, BLOCK THE STAIRS FROM ROTATING (place a block under the bottom stair) TO PREVENT INJURY.
6) Remove the 3 screws and 2 cable ties holding the brake and brake wire to the plate (Figure C).
7) Reverse Steps 1-6 to install a new brake. note: When re-installing the plate assembly, make sure that the hexagon shaped plate on the
brake lines up with the slots in the shaft of the ywheel (Figure D).
8) Test the Climb Mill for function as outlined in Section 9.21.
FIGURE A
FIGURE C FIGURE D
FIGURE B
 Loading...