 Loading...
Do you have a question about the Miele H 2890 B and is the answer not in the manual?
| Fast heat | Yes |
|---|---|
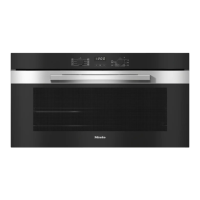
| Oven size | Large |
| Oven type | Electric |
| Self-cleaning | - |
| Number of ovens | 1 |
| Total oven power | - W |
| Oven thermostat range | 50 - 270 °C |
| Number of shelf positions | 3 |
| Total oven(s) interior capacity | 90 L |
| Current | 16 A |
| Connected load | 3700 W |
| AC input voltage | 220–240 V |
| AC input frequency | 50 Hz |
| Energy efficiency scale | A+++ to D |
| Energy consumption (conventional) | 1.45 kWh |
| Energy consumption (forced convection) | 0.89 kWh |
| Door hinge | down |
| Cord length | 1.7 m |
| Control type | Rotary |
| Product color | Black, Stainless steel |
| Control position | Front |
| Appliance placement | Built-in |
| Clock type | Electronic |
| Timer modes | Cooking time, End cooking time, Timer |
| Lamp type | Halogen |
| Lamps quantity | 2 lamp(s) |
| Depth | 568 mm |
|---|---|
| Width | 895 mm |
| Height | 478 mm |
| Weight | 64000 g |
| Installation compartment depth | 550 mm |
| Installation compartment height | 517 mm |
| Installation compartment width (min) | 860 mm |
Defines the intended domestic use and limitations of the oven.
Outlines essential safety measures and precautions for children around the appliance.
Covers safety aspects of installation, maintenance, and electrical connections.
Advises on safe operating procedures to prevent injury and damage during use.
How to use the main control dials for functions and temperature.
Operation of the display, clock/timer, and sensor controls.
Overview of oven functions, system lock, and cooling fan safety features.
Instructions for initial setup and setting the time of day on the oven display.
Procedure for the initial heating-up process to remove smells.
Basic steps for operating the oven, including heating and cooling.
Step-by-step guide to setting the time of day and cooking durations.
How to program cooking programmes for automatic start and stop.
Guide to setting a specific cooking duration and a desired finish time.
Lists cleaning agents and tools to avoid to prevent surface damage.
Step-by-step guide to removing and dismantling the oven door for cleaning.
Instructions for reassembling and fitting the oven door correctly.
Troubleshooting common problems with the display and oven heating.
Advice on rectifying uneven browning or baking results.
Information on how to contact Miele for assistance with faults.
Provides dimensions for installing the oven in tall or base units.
Shows connection points and minimum ventilation cut-out areas.
Steps for safely installing the oven into its designated housing.
Safety instructions and requirements for connecting the oven to the electrical supply.
Illustrates the wiring diagram and specifies the AC supply requirements.