- 9 -
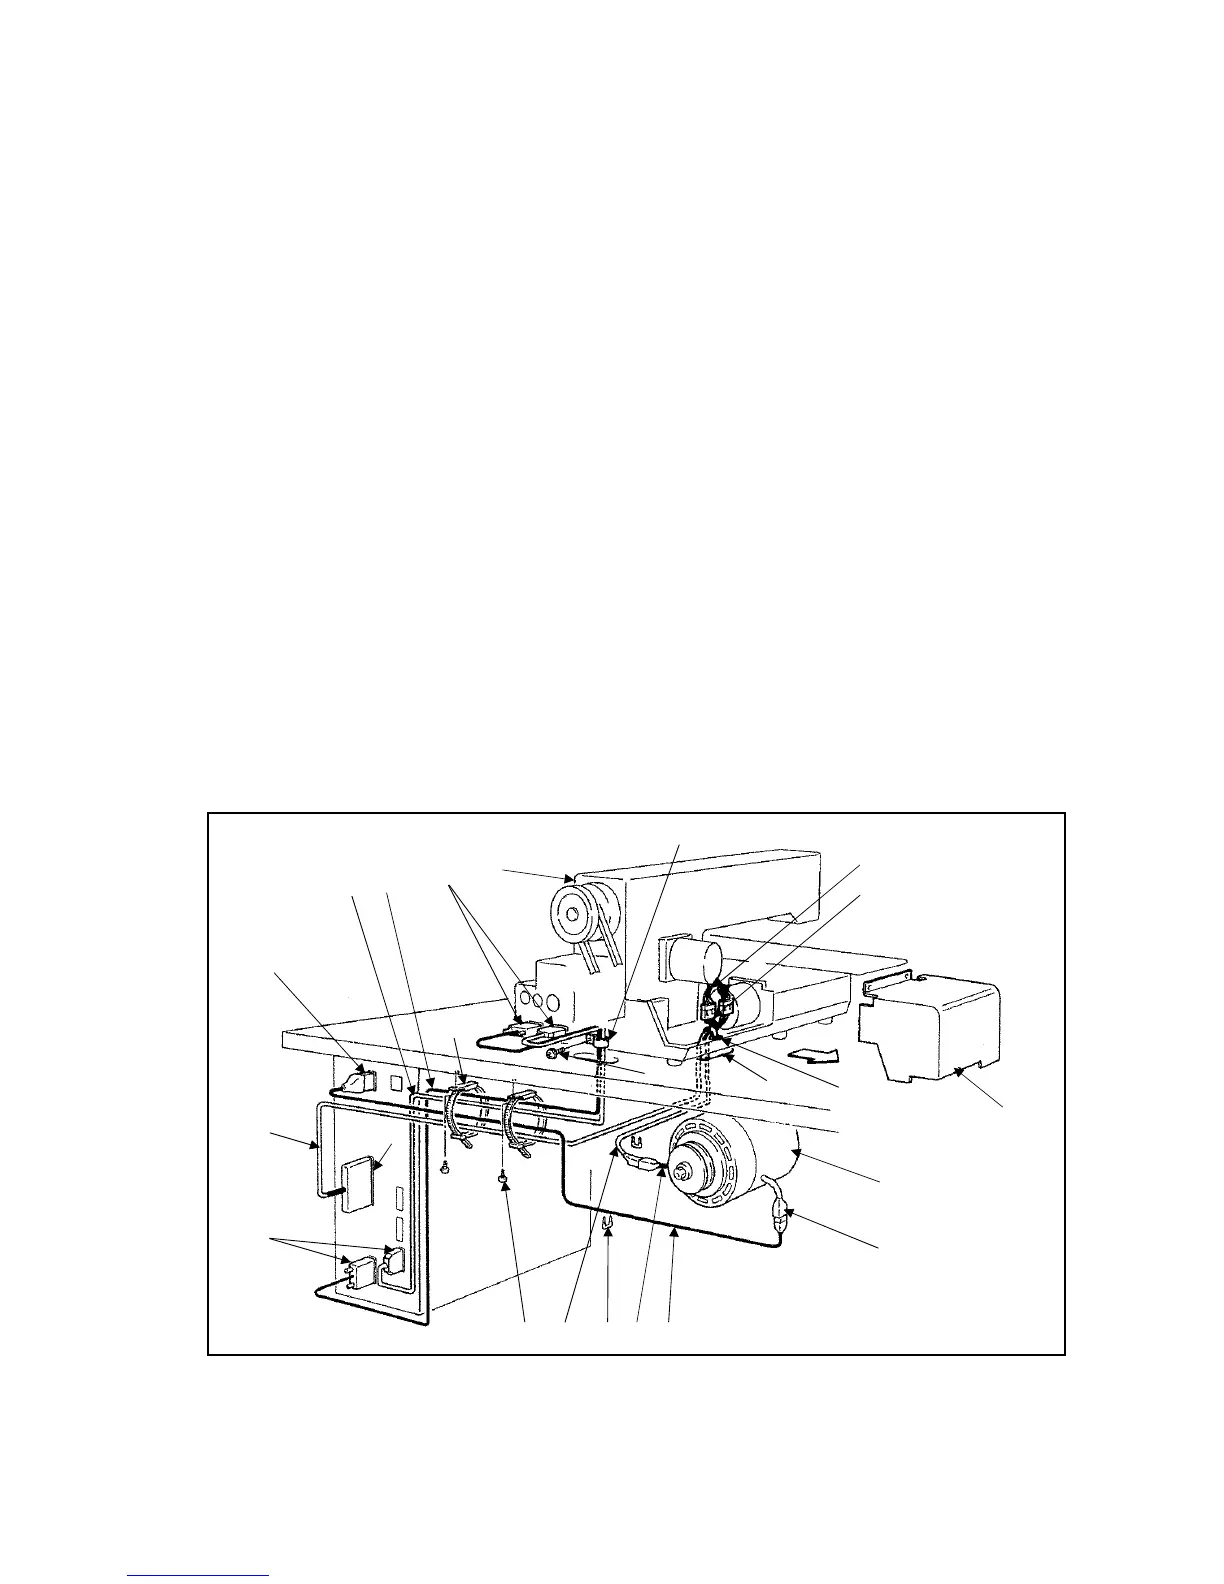
3-12 Connection of the electric cables
1) Connect the white color cable (No.1) and the black color cable (No.2) across the printed circuit board
unit connectors (No.4) on the sewing machine head (No.3) rear face and the connectors (No.5) on the
control box. At this time, bundle the white color cable (No.1) and the black color cable (No.2) with the
nylon clip (No.6) and fix them to the sewing machine head (No.3) rear face with the set screw (No.7).
All these parts are enclosed in the accessory box.
2) Remove the stepping motor cover (No.8) from the sewing machine head (No.3).
3) Pass upward the cable (No.9) which is attached the two connectors at the end through the cut-out
hole (No.16) on the table top then, connect it to the cable (no.10) and (No.11) extended from X and Y
stepping motor.
At this time, fix this cable with the nylon clip (No.13) provided on the sewing machine head.
And also, connect the other end of the cable (No.9) to the connector (No.12) on the control box.
The cable (No.9) is enclosed in the accessory box.
4) Pass downward the another cable (No.15) which is extended from the sewing machine head and
attached 4 pin connector through the cut-out (No.16) on the table top then, connect it to the cable
(No.18) extended from the motor (No.17).
5) Connect the last cable (No.19) to the another extended cable (No.20) from the motor then, book up
the other end of the cable (No.19) to the connector (No.21) on the control box.
The cable (No.19) is also enclosed in the accessory box.
6) Attach the two binder (No.22) underneath the table with the wood screws (No.23) then, bundle and fix
all the connected cables with the binders (No.22) and the staples (No.24).
The binders (No.22), the wood screws (No.23) and the staples (No.24) are enclosed in the accessory
box.
8)
13)
16)
7)
17)
20)
19)18)24)15)23)
5)
9)
21)
22)
1)
2)
4)
3)
6)
11)
10)
12)
 Loading...


