- 10 -
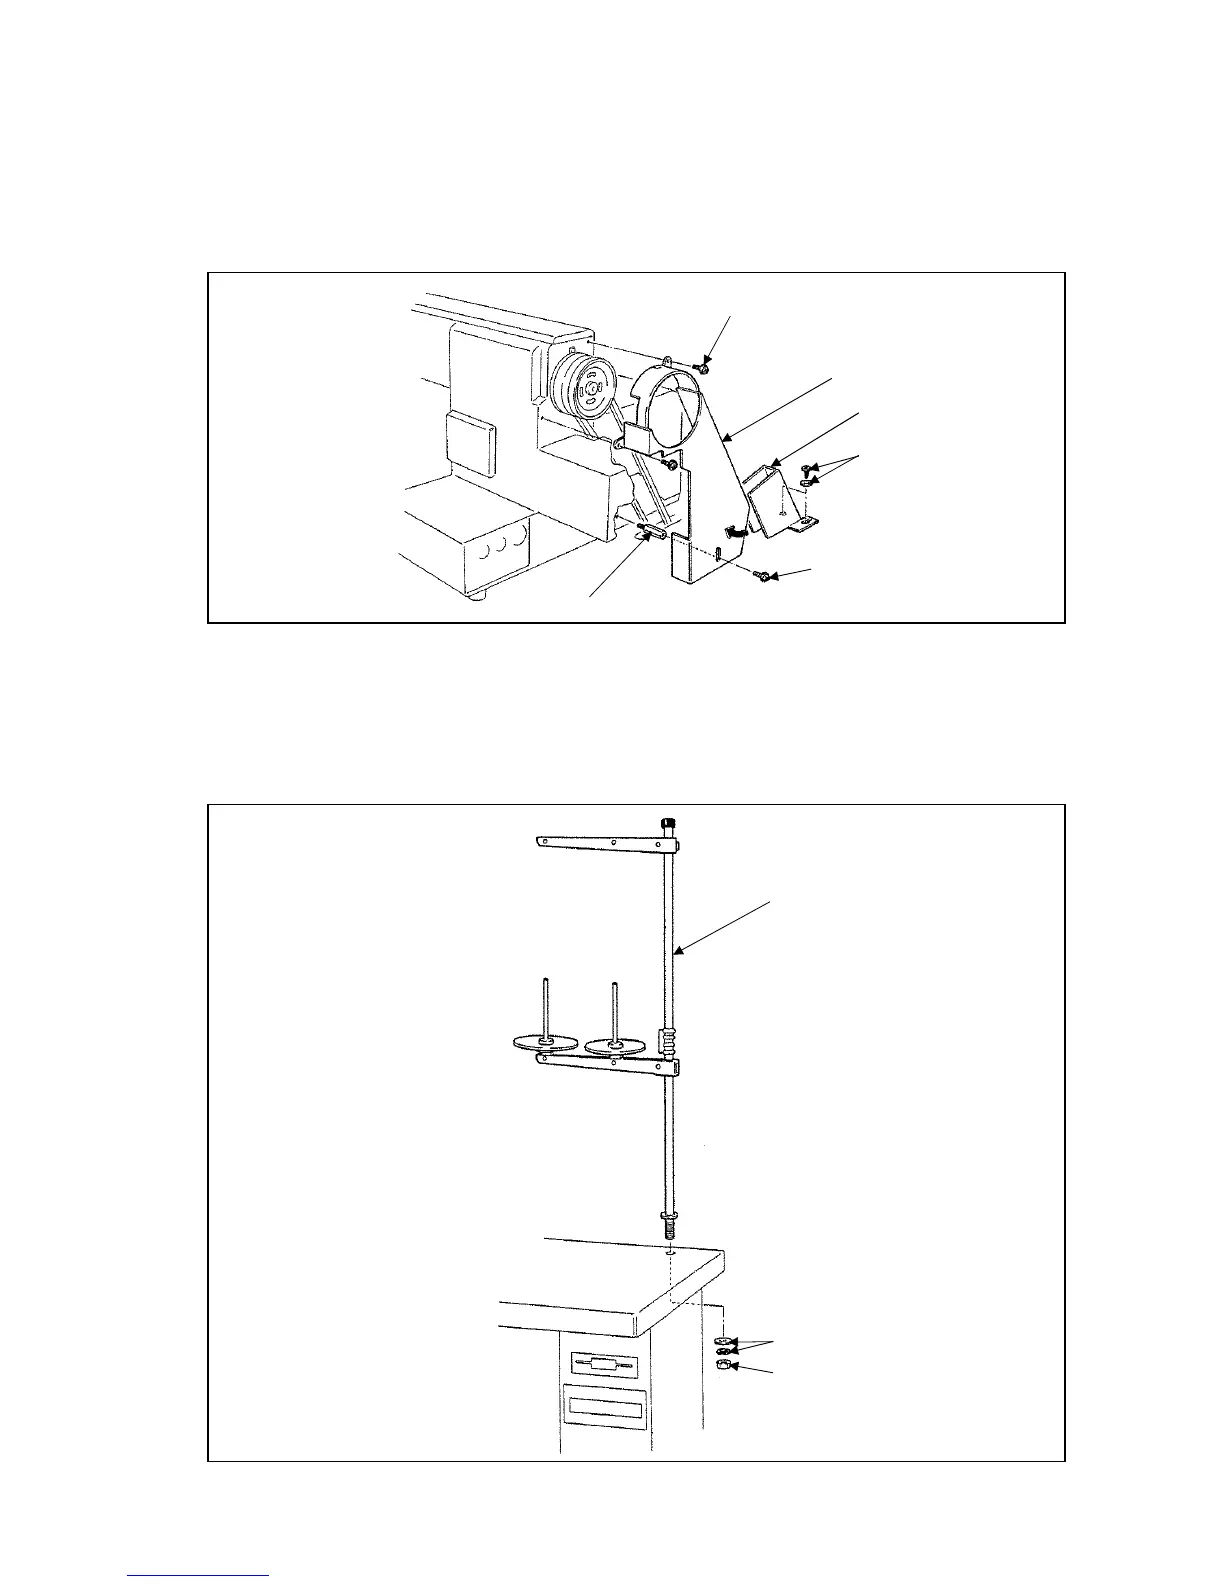
3-13 Installation of the belt cover
Attach the special bolt (No.1) enclosed in the accessories box to the side of the sewing machine bed.
Then, remove the large belt cover (No.2) and small belt cover (No.3) from the accessories box, and
mount them on the sewing machine head and table with the set screws (No.4 and 5), washers and wood
screws (No.6).
4)
3)
2)
6)
5)
1)
3-14 Installation of the thread stand
1) Assemble the thread stand with the instructions enclosed in the packing.
2) Fit the thread stand (No.1) in the thread stand hole on the table top.
3) Fix the thread stand (No.1) firmly from the rear side of the table with tightening the nut (No.3) and the
washers (No.2).
1)
2)
3)
 Loading...


